Understanding how and when late fees are triggered will help ensure your settings continue working exactly as you intend.
Late Fees Only Apply to Future Invoices
The key thing to remember is this: late fees only apply to invoices that are due after your settings are finalized. Once an invoice’s due date has passed, the system won’t go back and retroactively apply or re-run late fees for that invoice.
That means any manual edits to a late fee or its settings after the due date—even minor adjustments—will stop the system from automatically applying that fee to past or existing invoices.
What Triggers Late Fees to Stop Running
If you’ve noticed your late fees stopped calculating automatically, it could be because one of the following occurred:
-
You edited a late fee or its settings after the due date of an invoice.
-
Example: If rent was due on the 1st and you adjusted your late fee rules on the 2nd, that update won’t re-run for the invoice that was already due.
-
-
You clicked “Edit” on a late fee setting and saved it, even without changing anything.
-
Simply opening and saving the settings page counts as a modification, which tells the system to apply that version of the rule only to future invoices.
-
-
You added or removed a late fee manually on an existing invoice.
-
Once manual changes are made, the system won’t overwrite them automatically to prevent conflicting data.
-
How to Avoid Missed Late Fees
To make sure your late fees continue applying automatically:
-
Review and finalize your late fee settings before the invoice due date.
-
Avoid clicking “Edit” and saving your late fee configuration unless you actually need to change something.
-
If you must update the settings, remember that changes will only apply to future invoices.
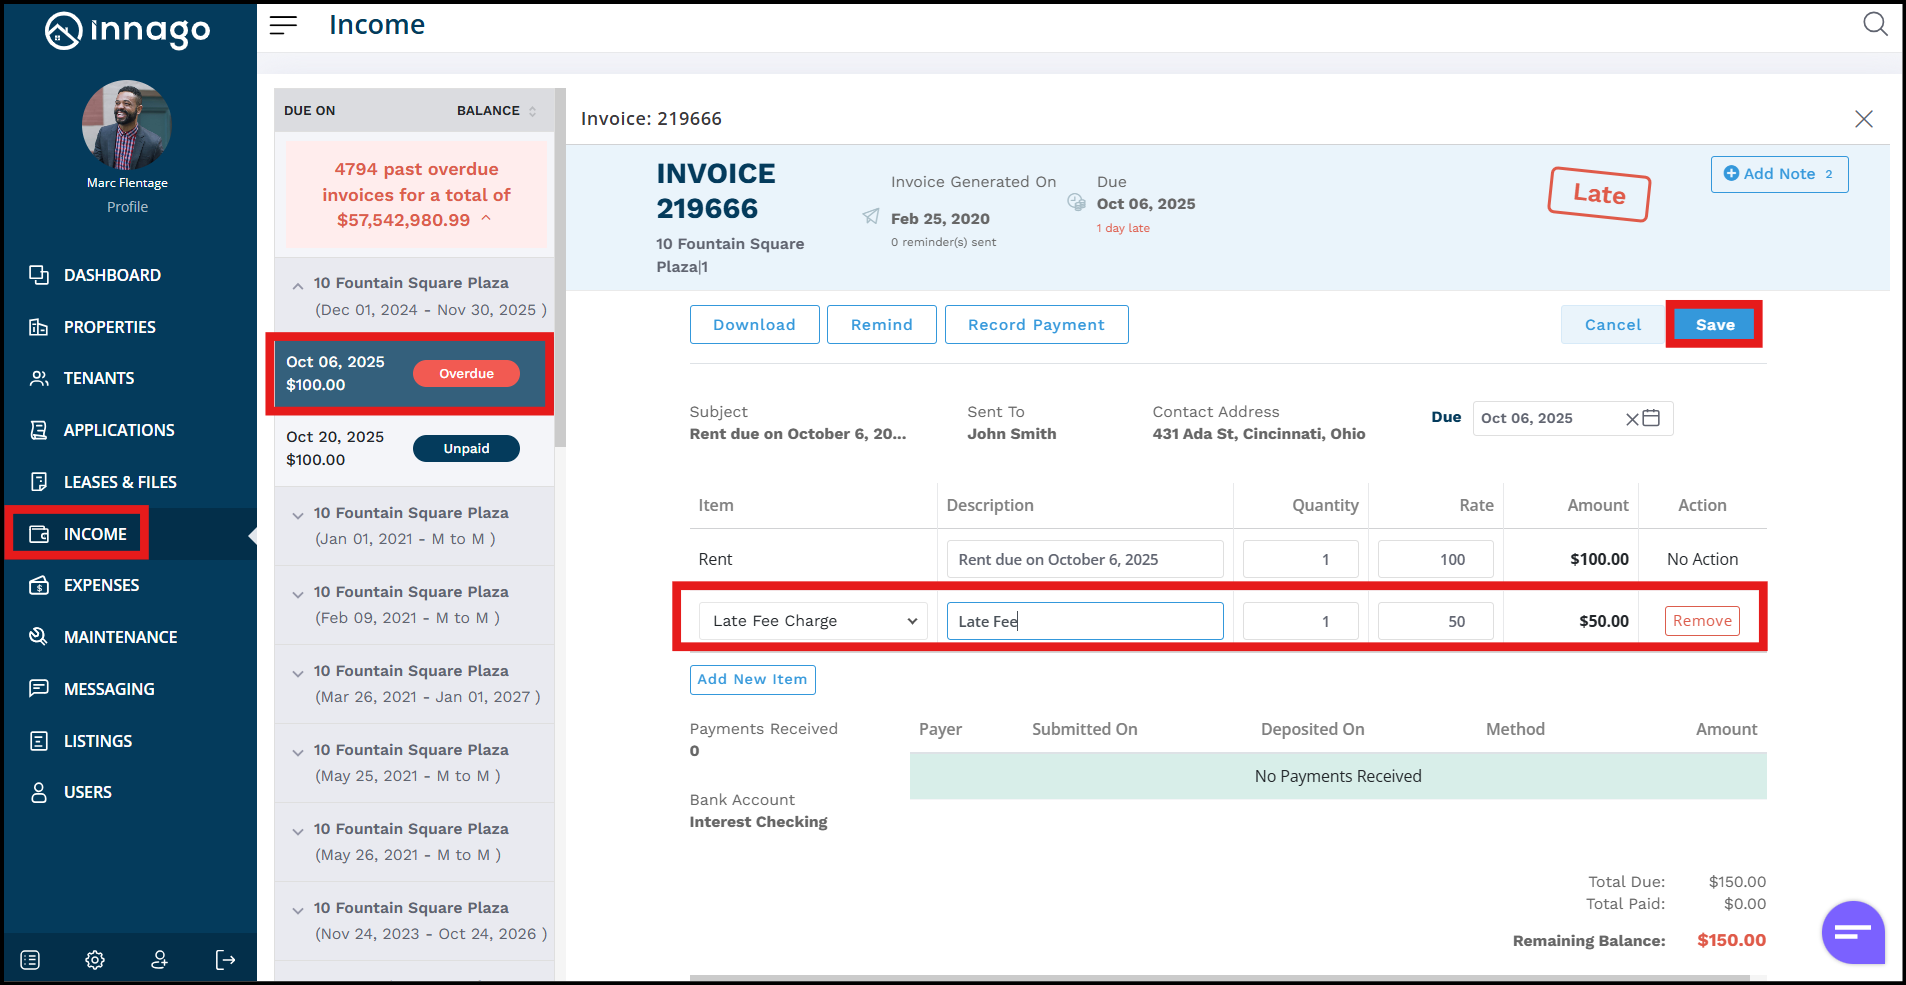
Adding a Late Fee Manually
If a late fee didn’t run automatically, landlords and property managers can still easily add it manually. Just follow these steps:
-
Go to the Income page.
-
Find and open the relevant invoice.
-
Click Edit Invoice to adjust the amount or add a new line item for the late fee.
-
Save your changes.
This ensures your accounting stays accurate and that tenants are still charged appropriately for late payments, even if the automatic rule didn’t trigger.