
As a Property Manager or Operator using PlacePay you could set up your employees/team members with their own PlacePay user accounts. This allowed your team members to receive the same email notifications that you did, and they could also have the ability to research transactions, initiate refunds, etc. You can do the same in Innago.
Using PlacePay, if you prefered that an employee only had limited access, you’d have to email help@placepay.com and provide the name and email address that you would like added as a “read-only user”. In Innago, you can immediately create users with “view” only access, without needing to contact Support.
In PlacePay, to add users you would have followed the steps below:
1) Click on your name in the top right corner of your dashboard and select “Edit Your Settings” to open your Settings Window. Then select the “User” tab.
In Innago, you’ll follow similar steps, but first you’ll need to enable multiple user set up by following the instructions below:
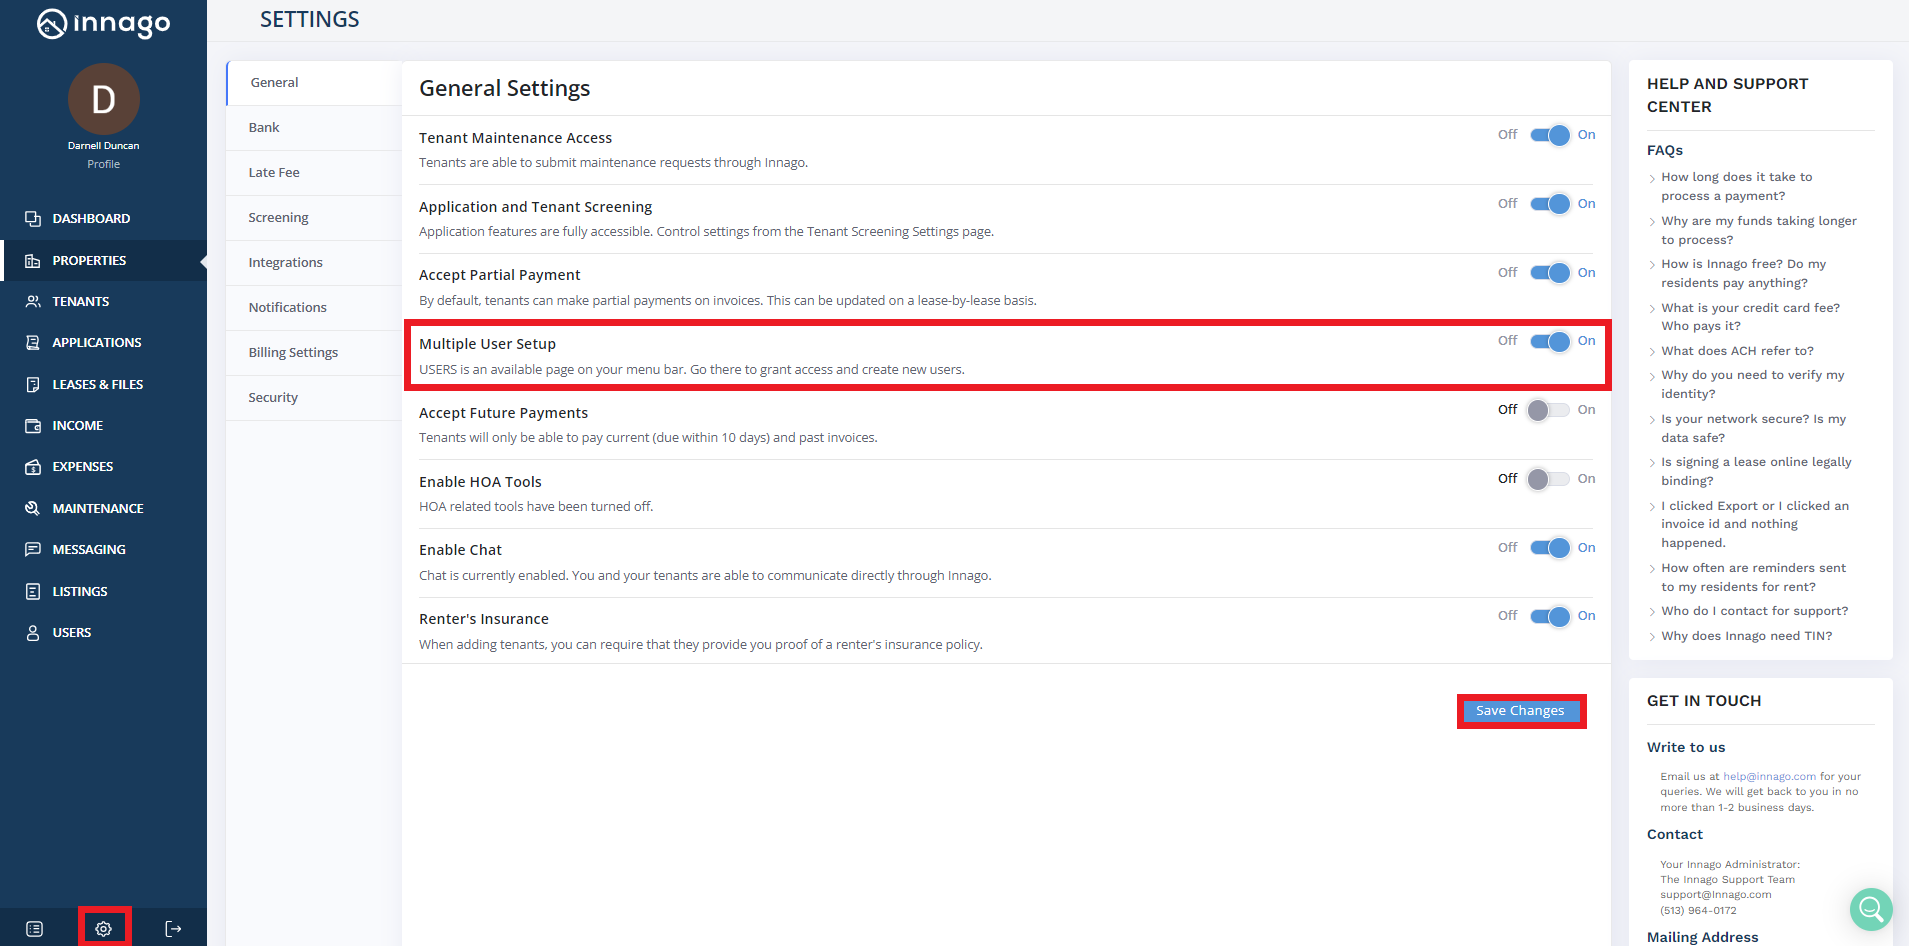
1. In the bottom left corner of your screen, click the gear icon to access your Settings.
2. Under the General tab, toggle on the option for “Multiple User Setup”.
3. Click “Save Changes” to enable this feature.
After enabling the feature, to add a new user:
1. Click “Users” from the main menu.
2. In the top right corner, click “Add New User”.
3. Enter the new user’s details and assign them a role, or choose “Custom” to customize their access.
4. Assign specific properties to this user if neccesary.
5. Click “Save” to add this user. They’ll be sent an e-mail to activate their account.
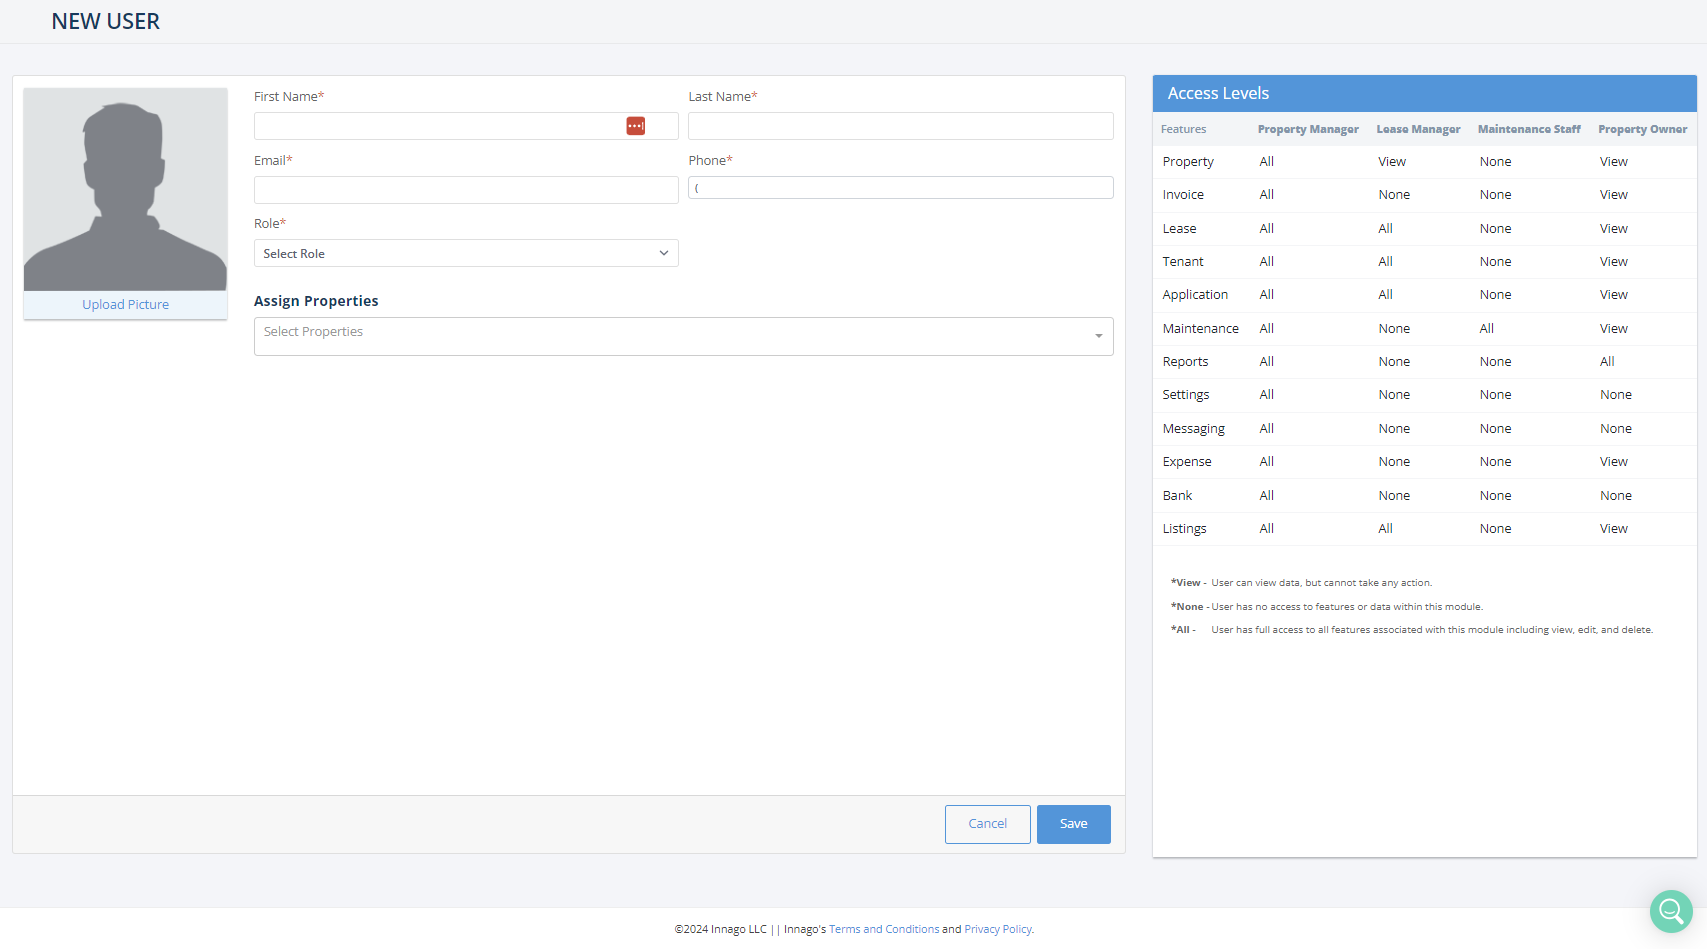
Note – When assigning properties to your users, you can select “All Properties” or select each property individually. If the “All Properties” option is selected, this would also give your user access to all new properties added to your Innago account. When you finish adding a user, similar to PlacePay, they will receive an email with a link to reset their password and log into their dashboard.
You can walk through this process of adding mutliple users with us in the tutorial below: