Innago Help Center

Advice and answers from the Innago Team

Generic selectors
Exact matches only
Search in title
Search in content
Post Type Selectors
post
Filter by Categories
01. Getting Started with Innago / Dashboard
02. Creating and Editing Properties
03. Adding Tenants and Lease Terms
04. Adding your Bank Accounts
05. Applications and Screening
06. Uploading / Signing Leases and Documents
07. Viewing and Creating Invoices
08. Tracking Expenses
09. Tenant Communication
10. Managing Maintenance
11. Marketing your Rentals
12. Team Management
13. Viewing Reports
14. Settings
15. Tenant Management
16. Referrals and Integrations
17. Help Articles for Tenants
A. Adding and Deleting Users
A. Adding, Deleting and Archiving Properties
A. Adding, Editing and Deleting Tenants
A. Creating New Invoices
A. Customizing Application Templates
A. Learning the Basics
A. Messaging your Tenants
A. Notifications
A. Setting up a Document Template
Accelerent
B. Adding / Editing Charges and Fees
B. Adding Lease Terms
B. Creating Messaging Templates
B. Editing Property Details
B. General Settings
B. Managing User Roles
B. Online Document Signing
B. Profile
B. Requesting Applications
C. Assigning Bank Accounts to Properties
C. Editing Lease Terms
C. Late Fees
C. Notes
C. Recording Payments and Managing Invoices
C. Tenant Screening and Reports
C. Uploading and Downloading Documents
D. Applications and Screening FAQs
D. Crediting, Deleting and Exporting Invoices
D. General FAQs
D. Property Settings
D. Renewing and Terminating Leases
D. Renters Insurance
E. HOAs
E. Income FAQs
E. Special Lease Scenarios / Cases
Integrations
PlacePay General FAQ's
PlacePay General FAQ’s
PlacePay Landlord
PlacePay Landlord
PlacePay Tenant
PlacePay Tenant
Uncategorized

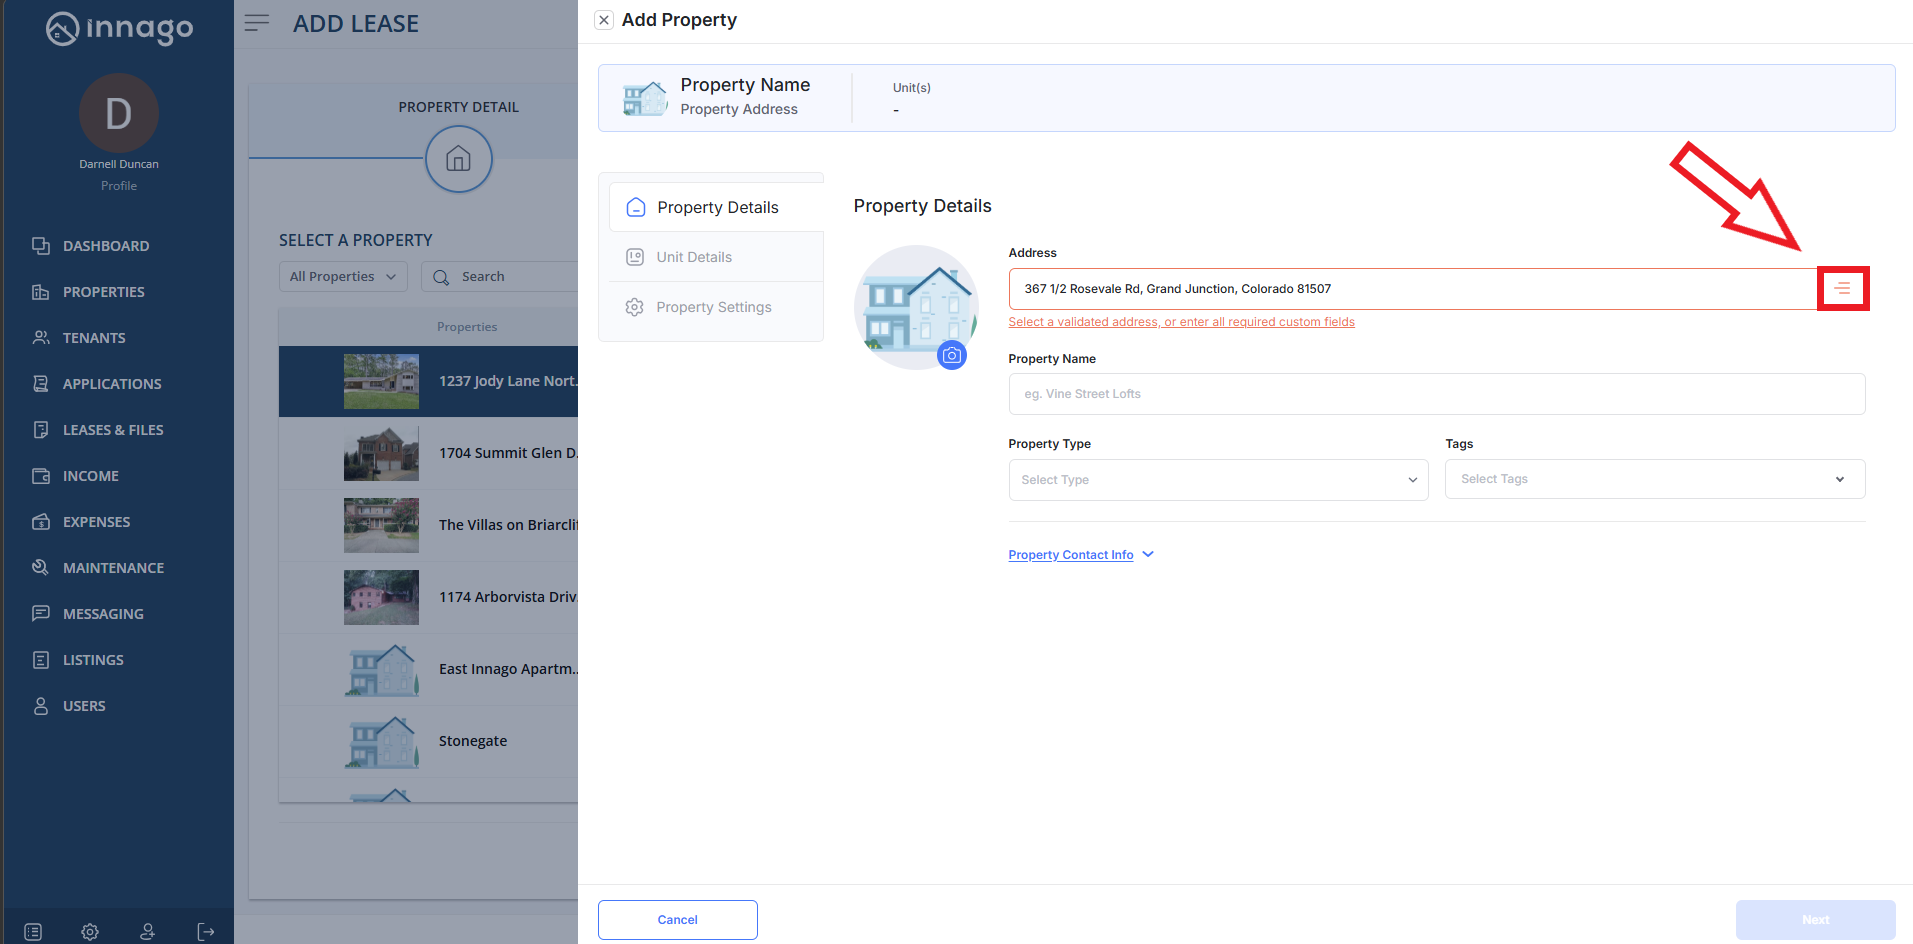
If you’re creating a property in Innago, or editing a property, you may have cases where your address doesn’t populate automatically via Google Maps. You may even have an address that does populate, but cannot be accepted in the form. No worries! You can simply click the hamburger icon (three horizontal lines) to the right of the “Address” field to manually enter custom address information.

After you’ve clicked the hamburger icon, you can simply update your address in the new fields that appear. Please note, you will want to update fields starting with Address Line 1. If you edit the main “Address” field, you will still encounter the same issue. Click “Next” once you’re done to proceed.

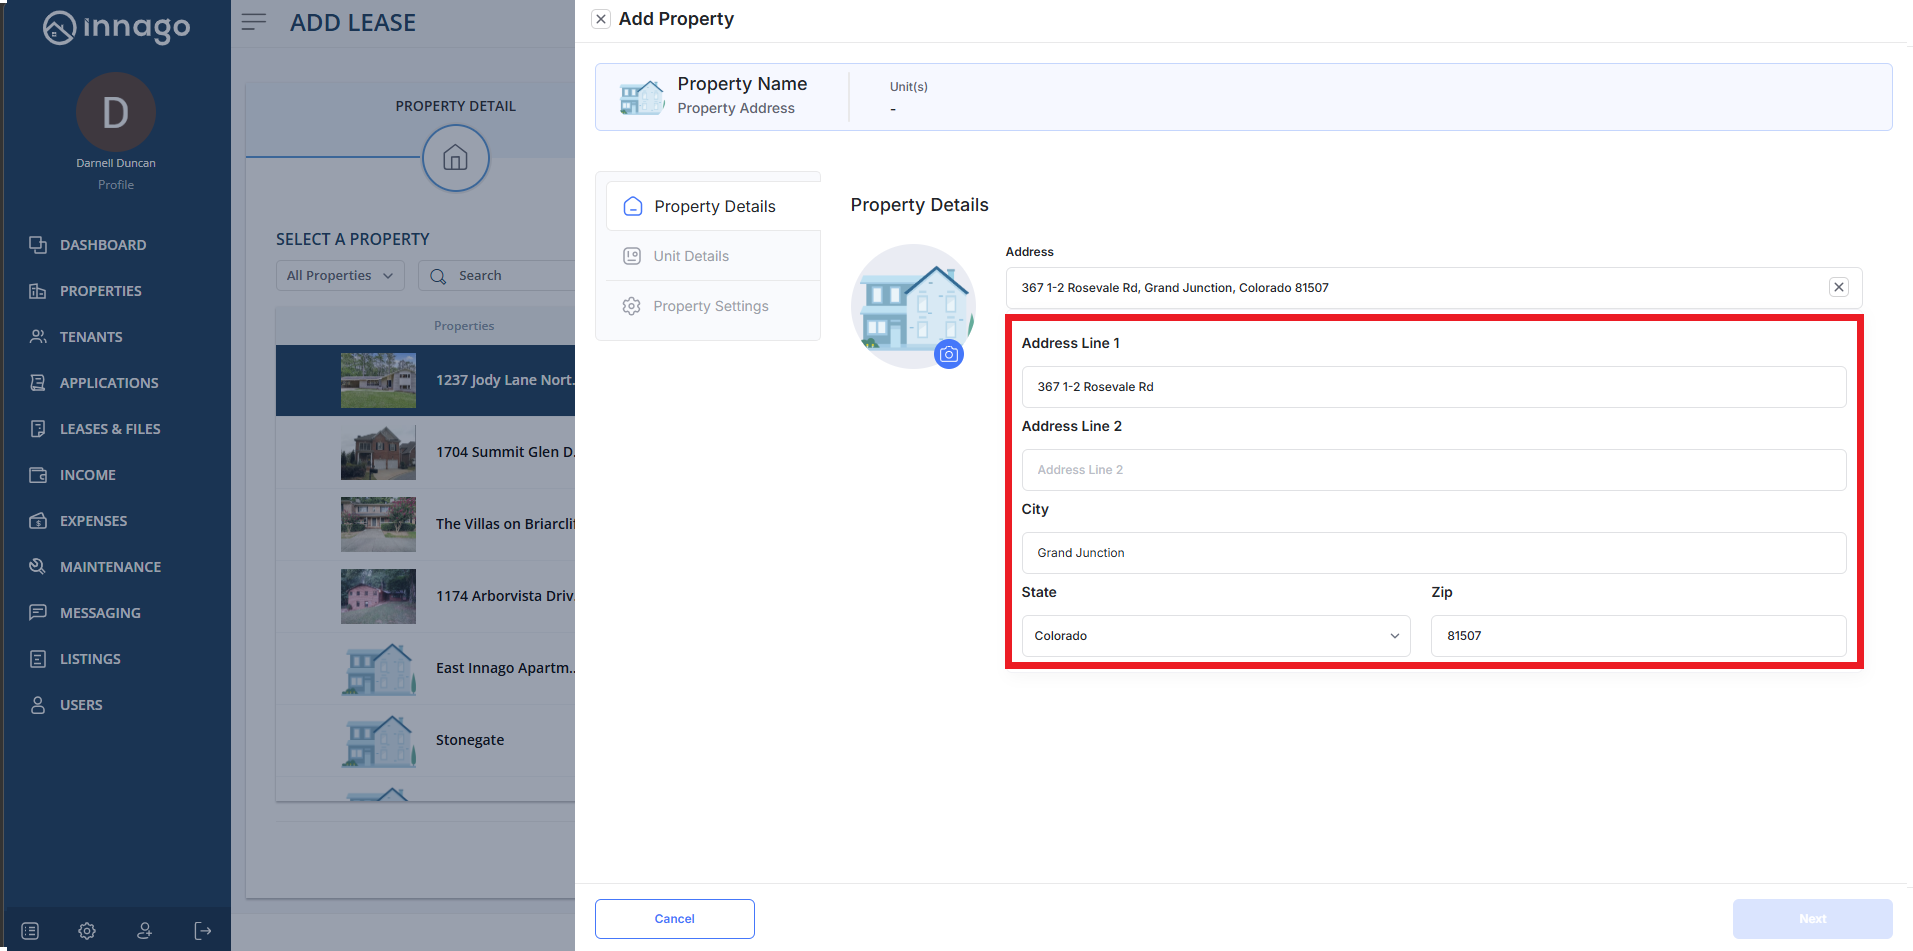
Please note, 1/2 addresses will not be accepted due to character limitations. As shown in the example above, you will have to input 1-2 to reflect a “1/2” address.