Innago Help Center

Advice and answers from the Innago Team

Generic selectors
Exact matches only
Search in title
Search in content
Post Type Selectors
post
Filter by Categories
01. Getting Started with Innago / Dashboard
02. Creating and Editing Properties
03. Adding Tenants and Lease Terms
04. Adding your Bank Accounts
05. Applications and Screening
06. Uploading / Signing Leases and Documents
07. Viewing and Creating Invoices
08. Tracking Expenses
09. Tenant Communication
10. Managing Maintenance
11. Marketing your Rentals
12. Team Management
13. Viewing Reports
14. Settings
15. Tenant Management
16. Referrals and Integrations
17. Help Articles for Tenants
A. Adding and Deleting Users
A. Adding, Deleting and Archiving Properties
A. Adding, Editing and Deleting Tenants
A. Creating New Invoices
A. Customizing Application Templates
A. Learning the Basics
A. Messaging your Tenants
A. Notifications
A. Setting up a Document Template
B. Adding / Editing Charges and Fees
B. Adding Lease Terms
B. Creating Messaging Templates
B. Editing Property Details
B. General Settings
B. Managing User Roles
B. Online Document Signing
B. Profile
B. Requesting Applications
C. Assigning Bank Accounts to Properties
C. Editing Lease Terms
C. Late Fees
C. Notes
C. Recording Payments and Managing Invoices
C. Tenant Screening and Reports
C. Uploading and Downloading Documents
D. Applications and Screening FAQs
D. Crediting, Deleting and Exporting Invoices
D. General FAQs
D. Property Settings
D. Renewing and Terminating Leases
D. Renters Insurance
E. HOAs
E. Income FAQs
E. Special Lease Scenarios / Cases
Integrations
Uncategorized

Rental invoices are automatically created by Innago. You can create additional invoices for various items such as pet fees, maintenance, electricity, etc.

1. From the Innago menu on the left, click ‘Income’.

2. In the top right corner, click ‘New Invoice’.

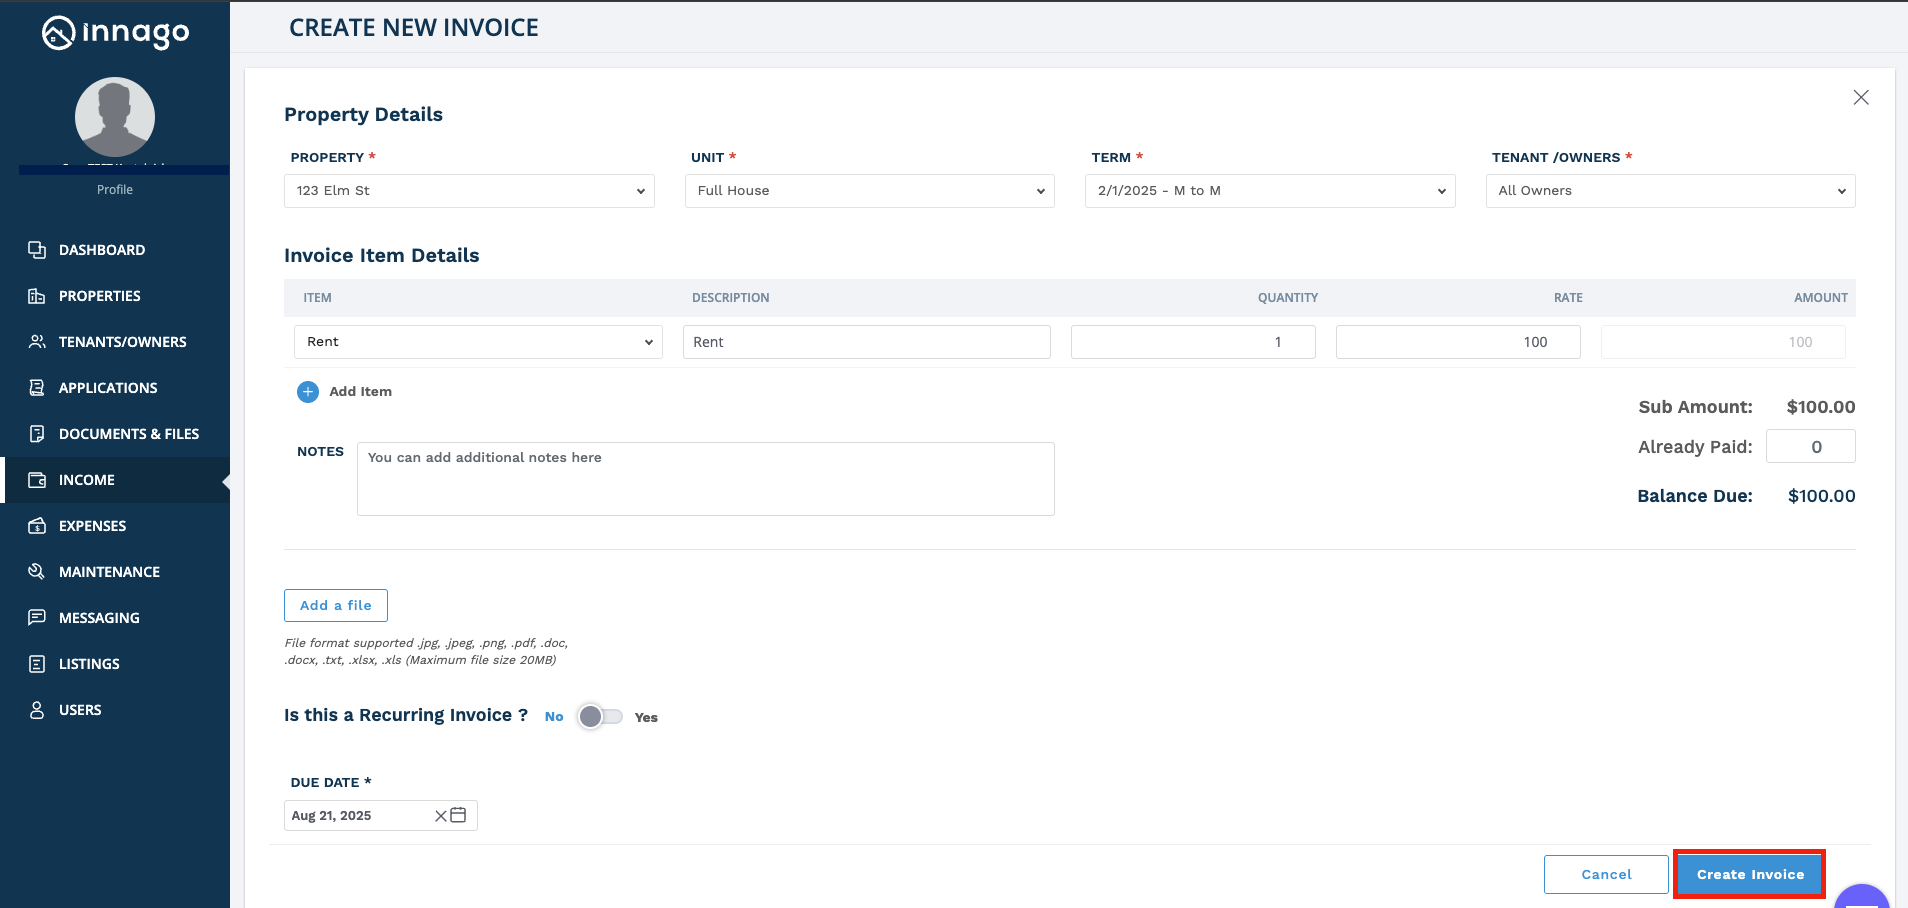
3. You must first choose a property, unit, lease, and the tenant(s) for whom you’d like to generate your invoice.

4. You’ll then need to add the details of your invoice, including the Invoice Type, Property and Unit, Amount due, and Description.

5. Once you fill out these details, hit ‘Create Invoice’.

If you are using the mobile app, you can create recurring invoices by following a similar process.

1. From the Income Tab, you are going to select the “+” button in the bottom right hand corner


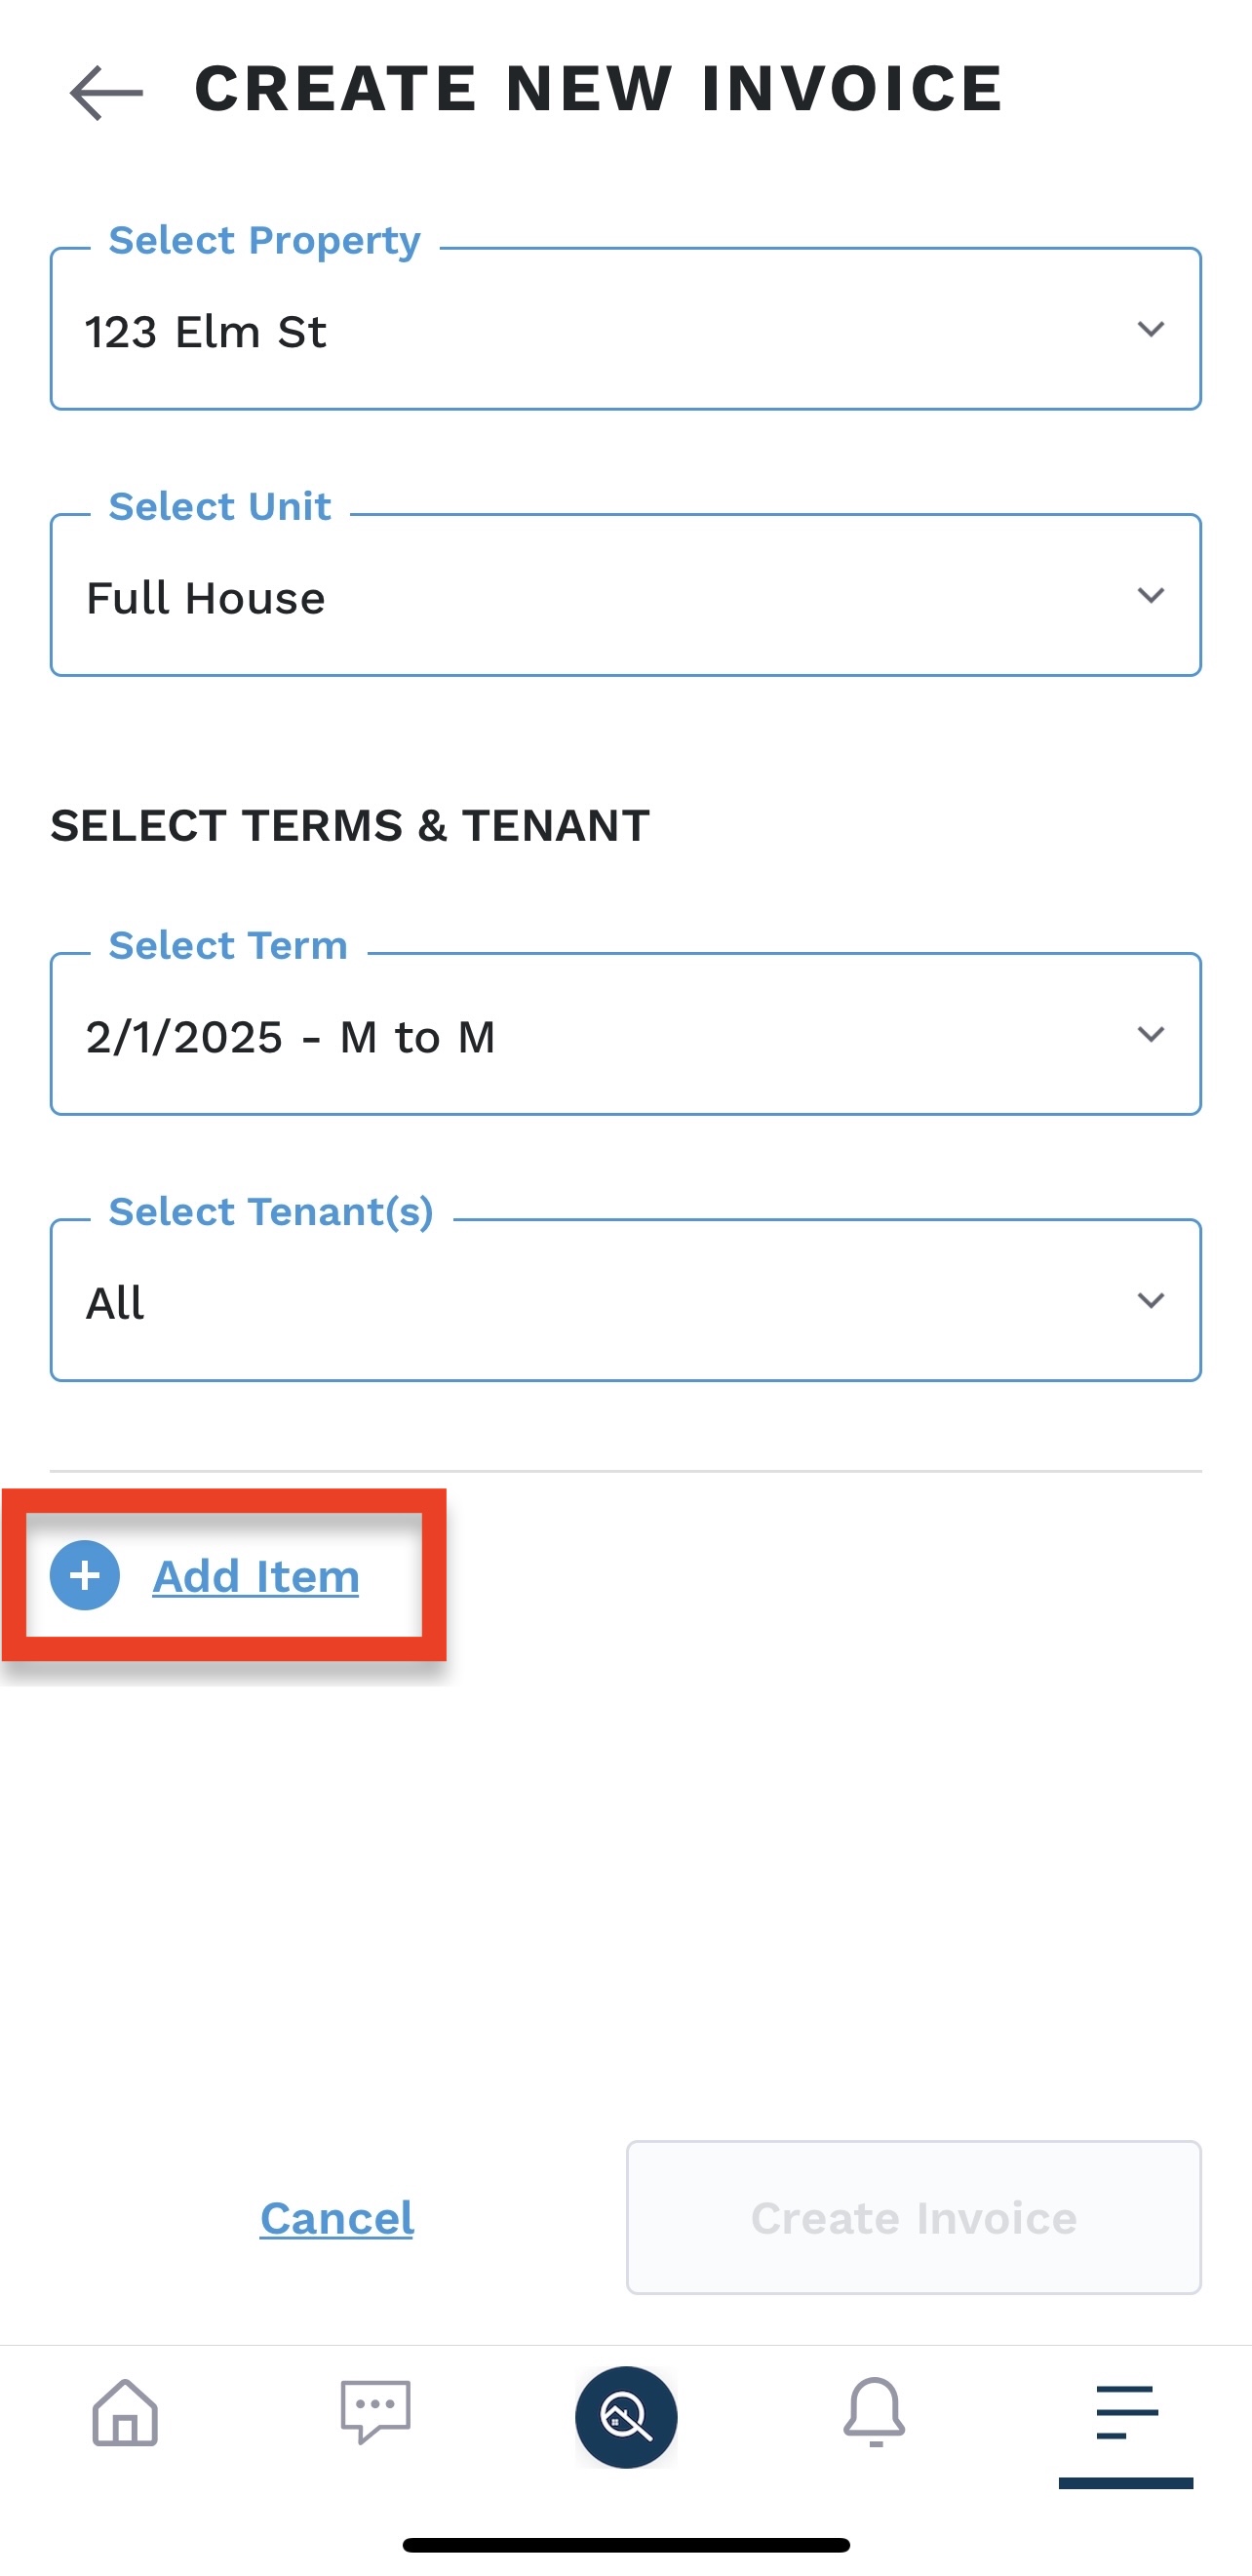
2. This will prompt you to the select the property, unit, term, and tenant. After selecting those options from the dropdown you will then click “add item.”


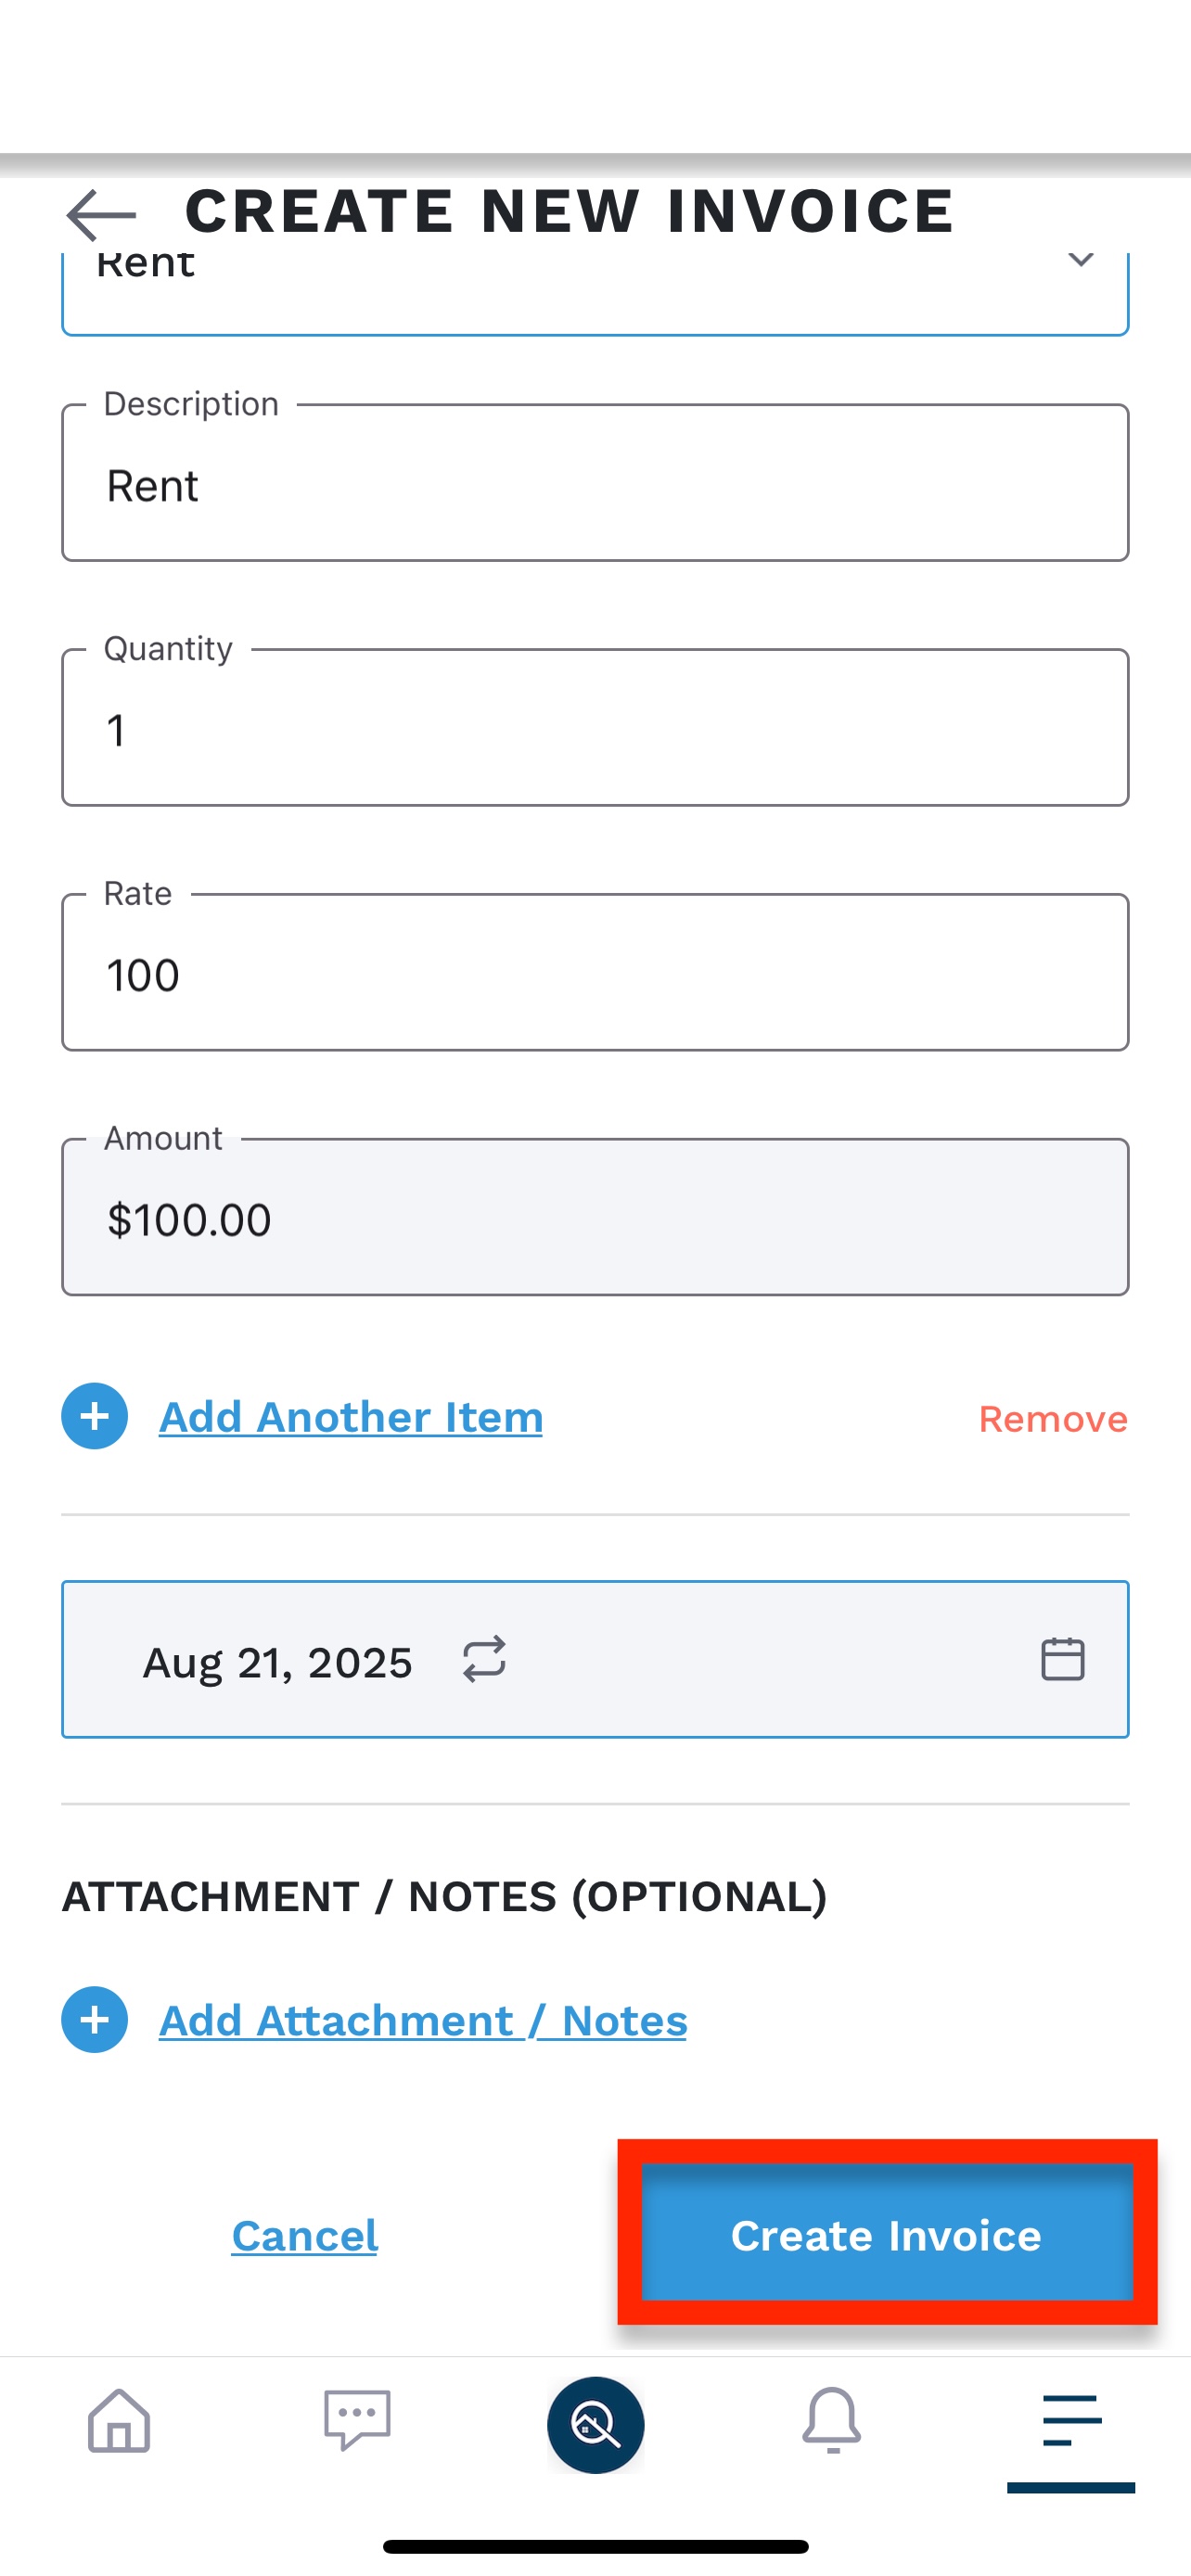
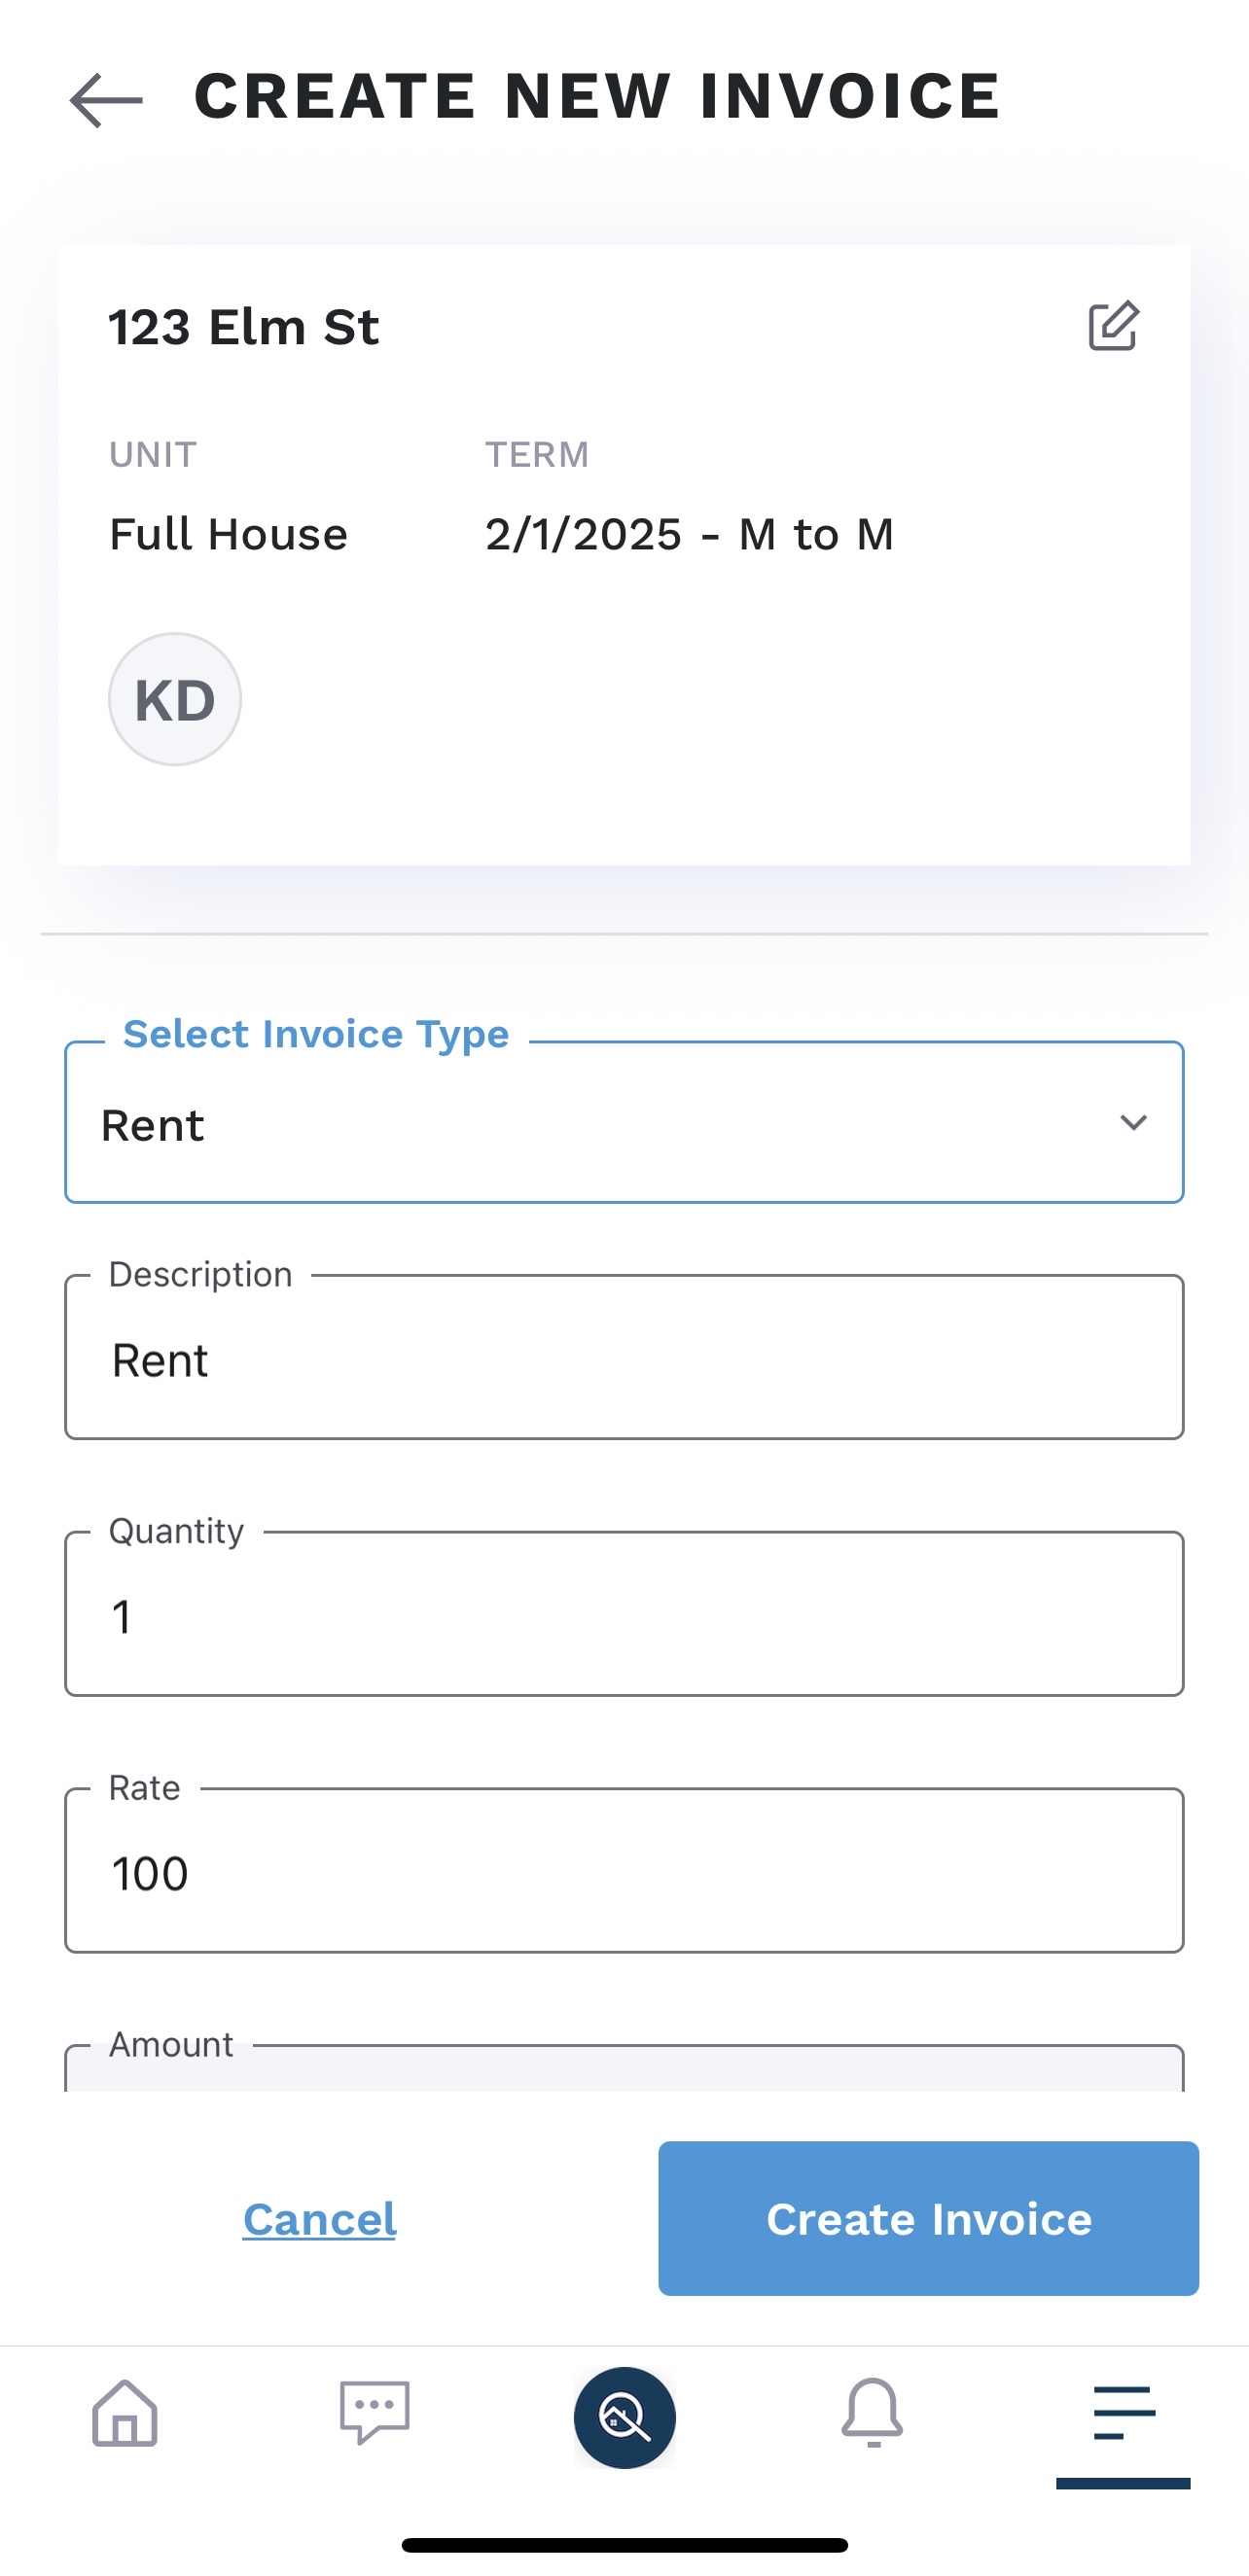
3. You will then select your invoice type and description, as well as typing in the quantity and rate.


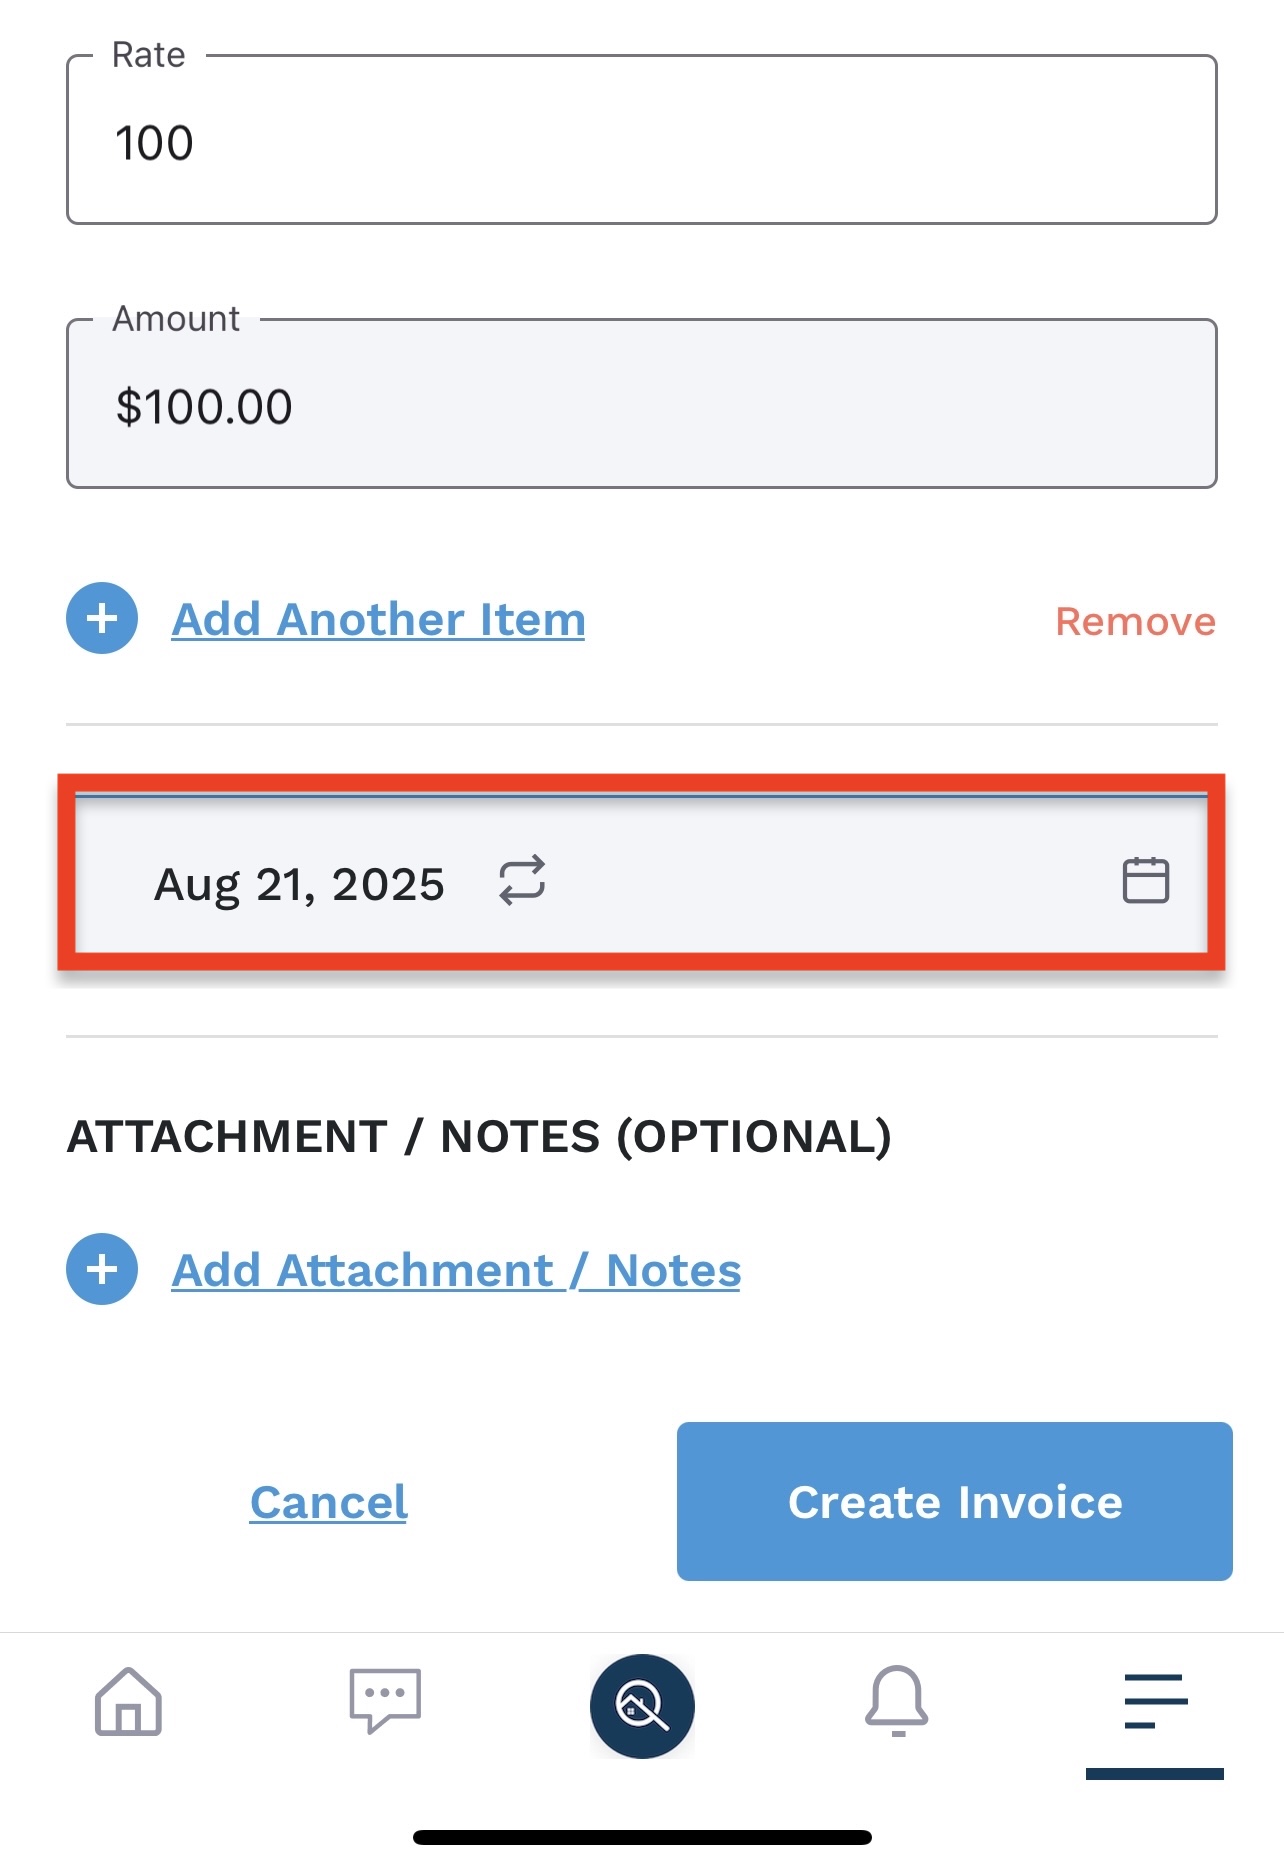
4. Select the date in which you want the invoice to be due by clicking the calendar option. That will then open up if you would like to make the invoice recurring or one time.


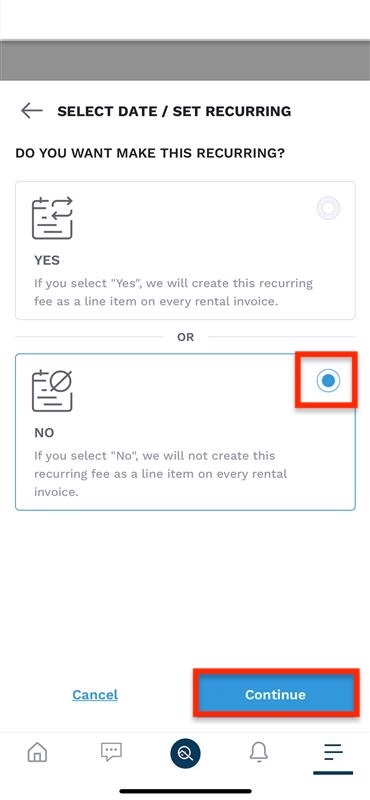
5. Select “no” so that the invoice is only generated once and then continue.


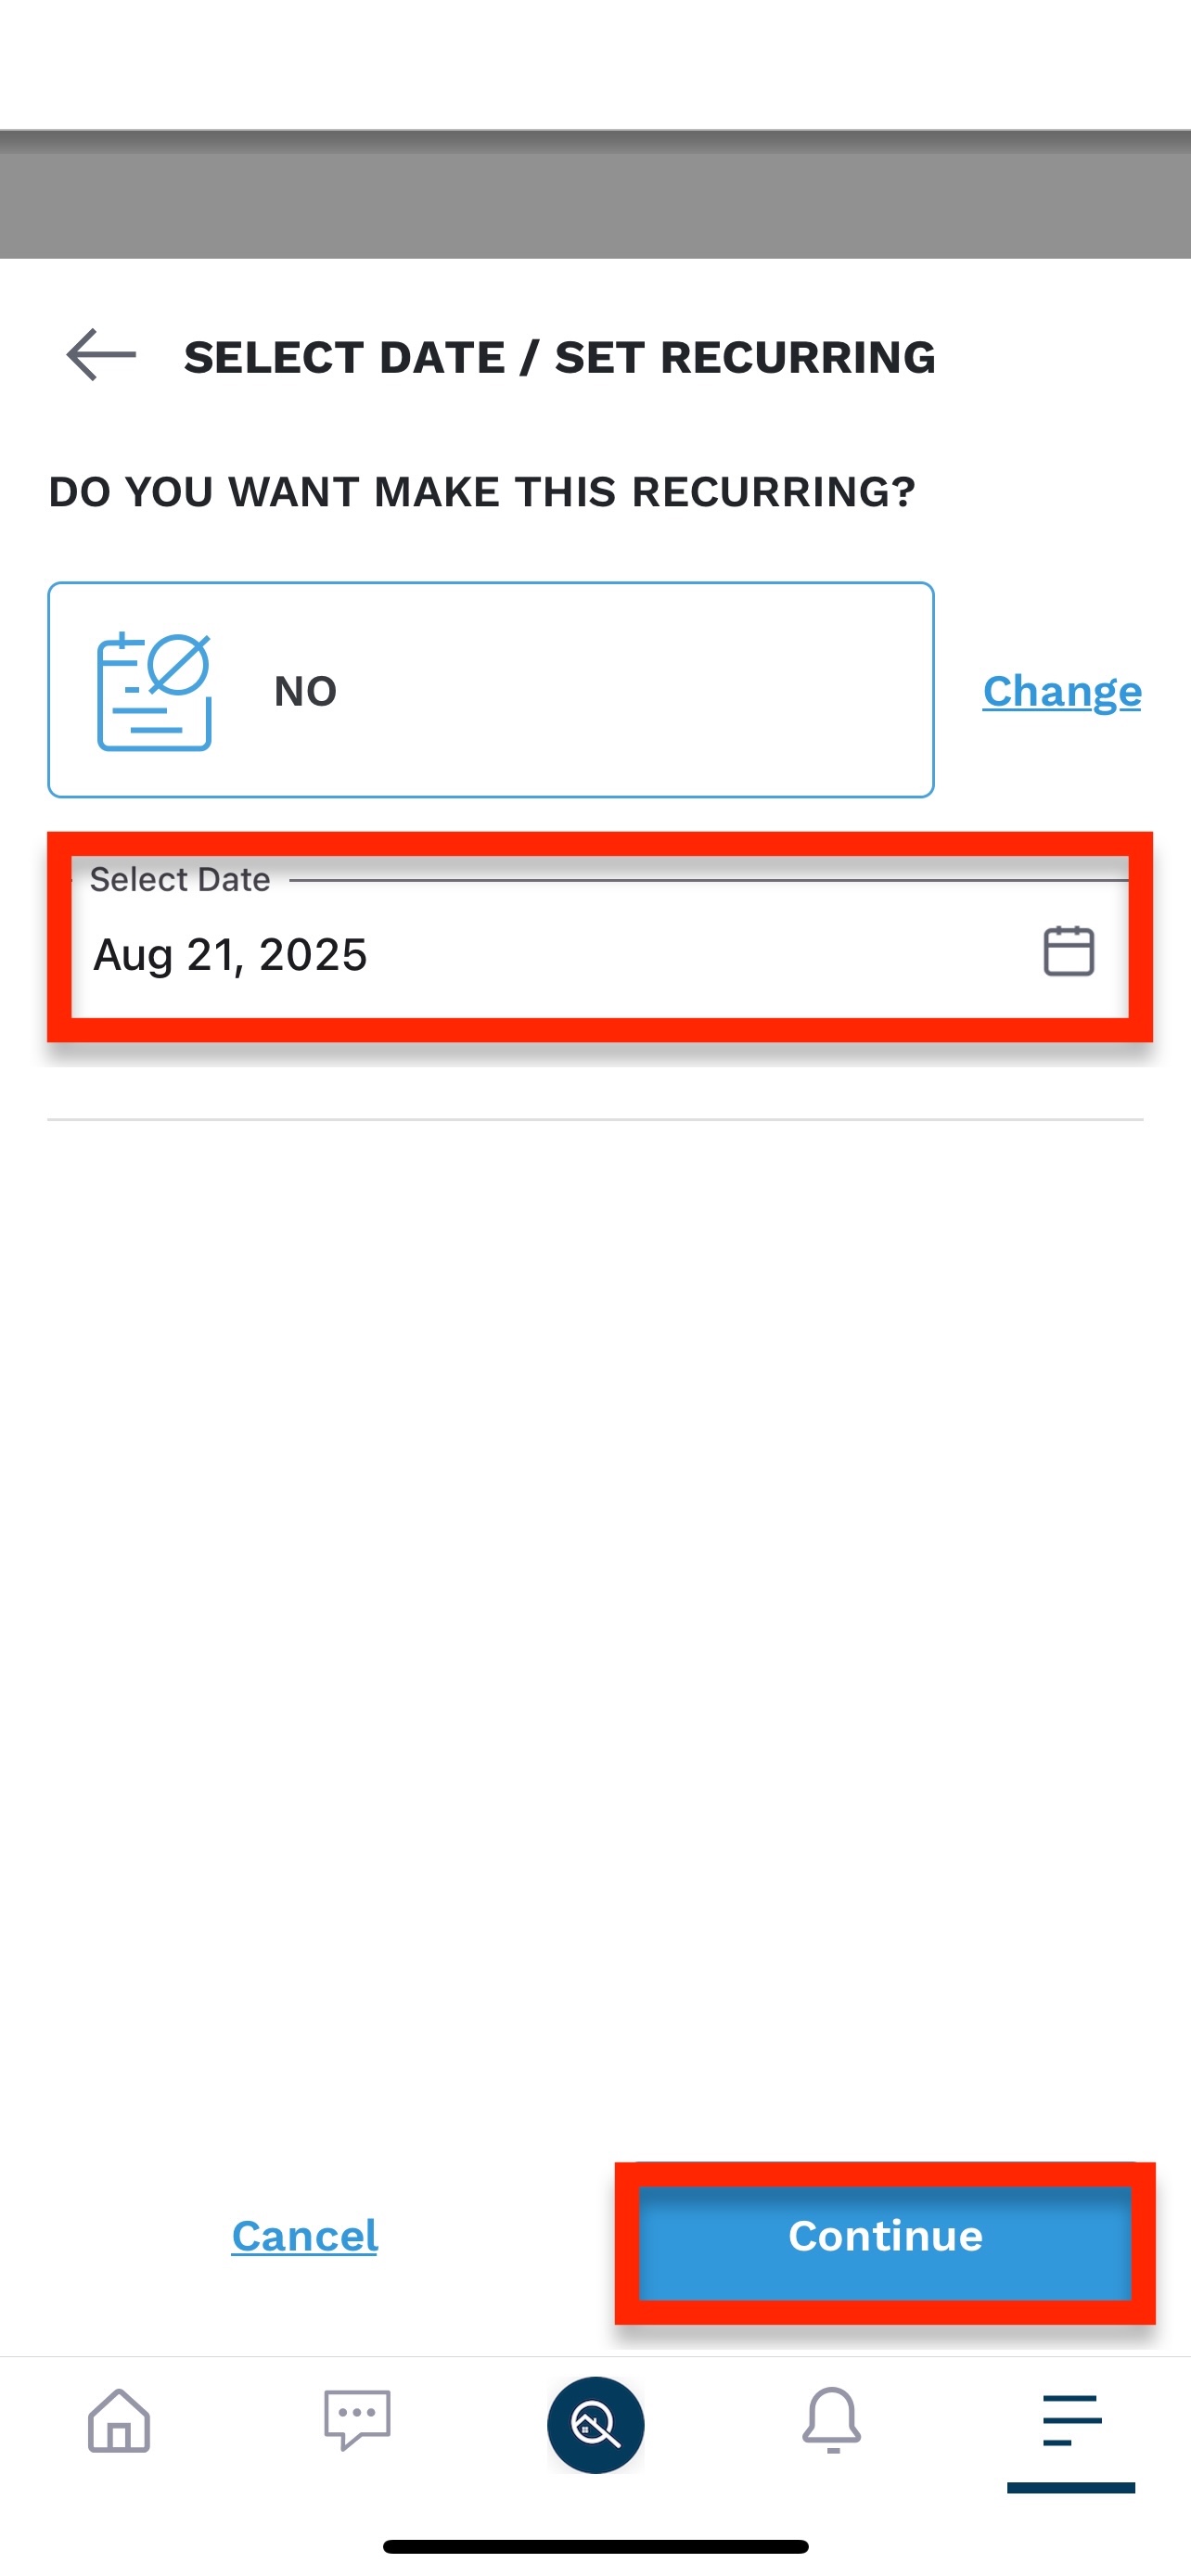
6. Here you can select the date in which you want the one time invoice to be due. After selecting the due date, click continue.


7.  After all fields have been selected, click “create invoice.”