
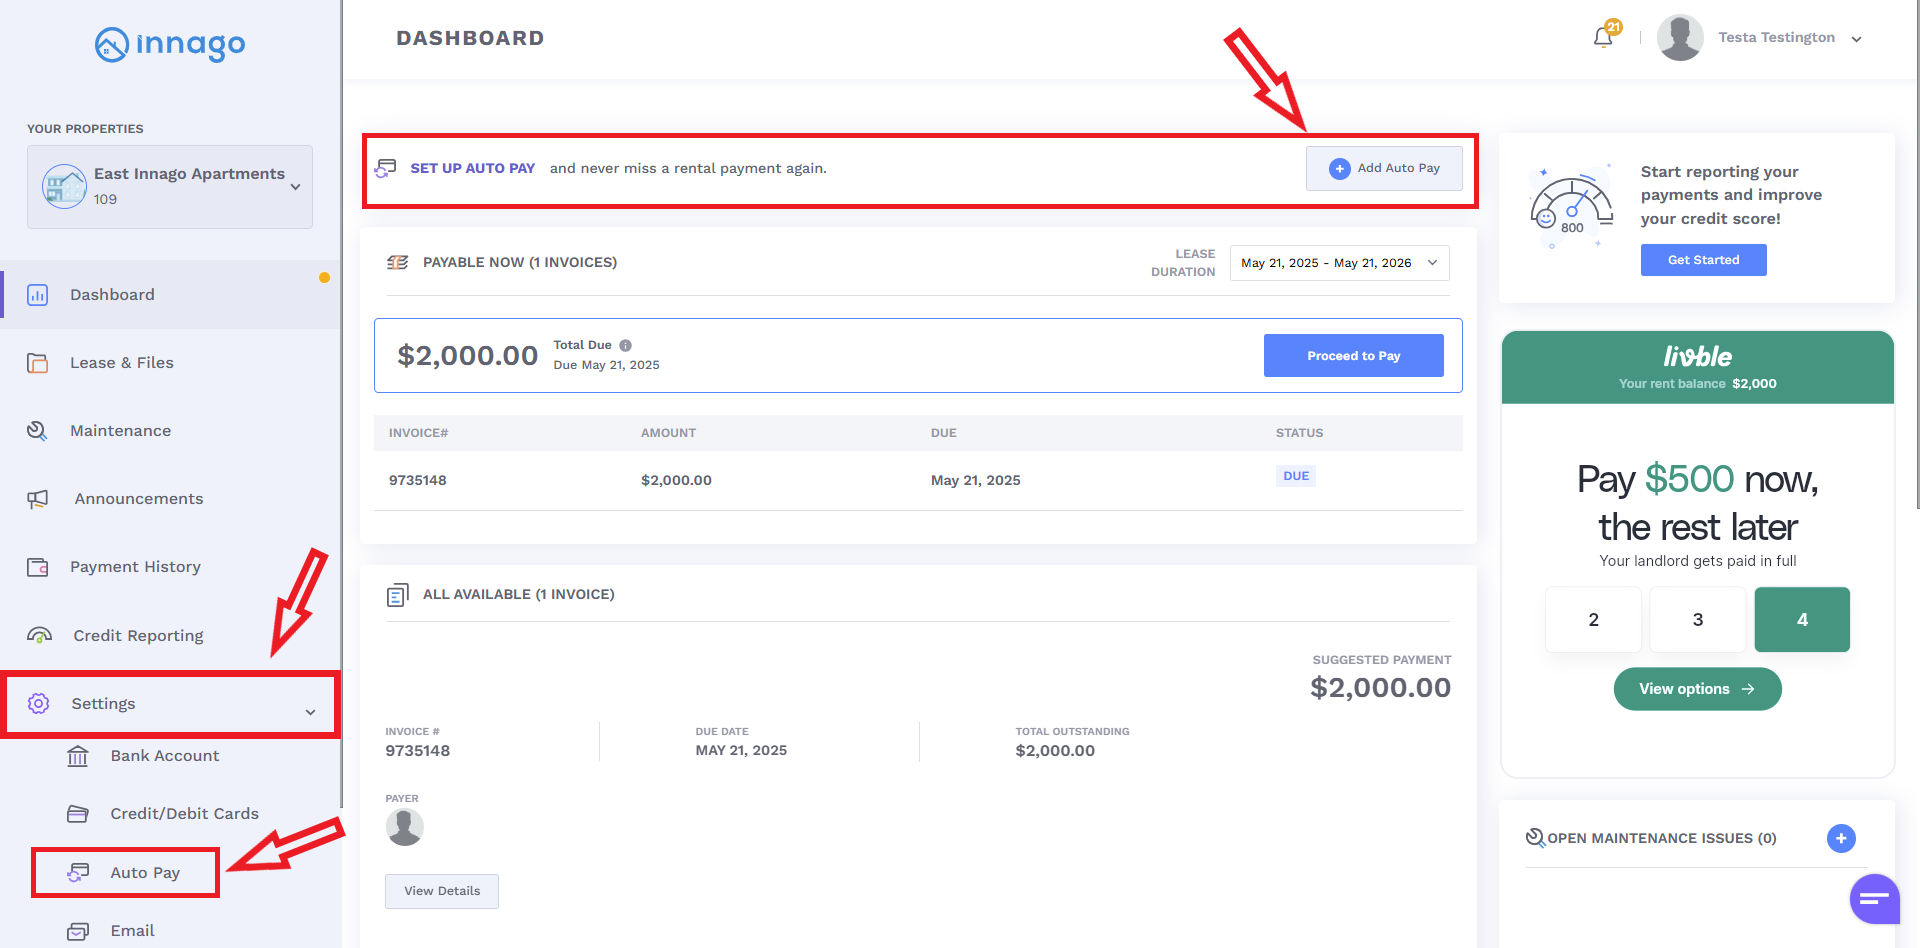
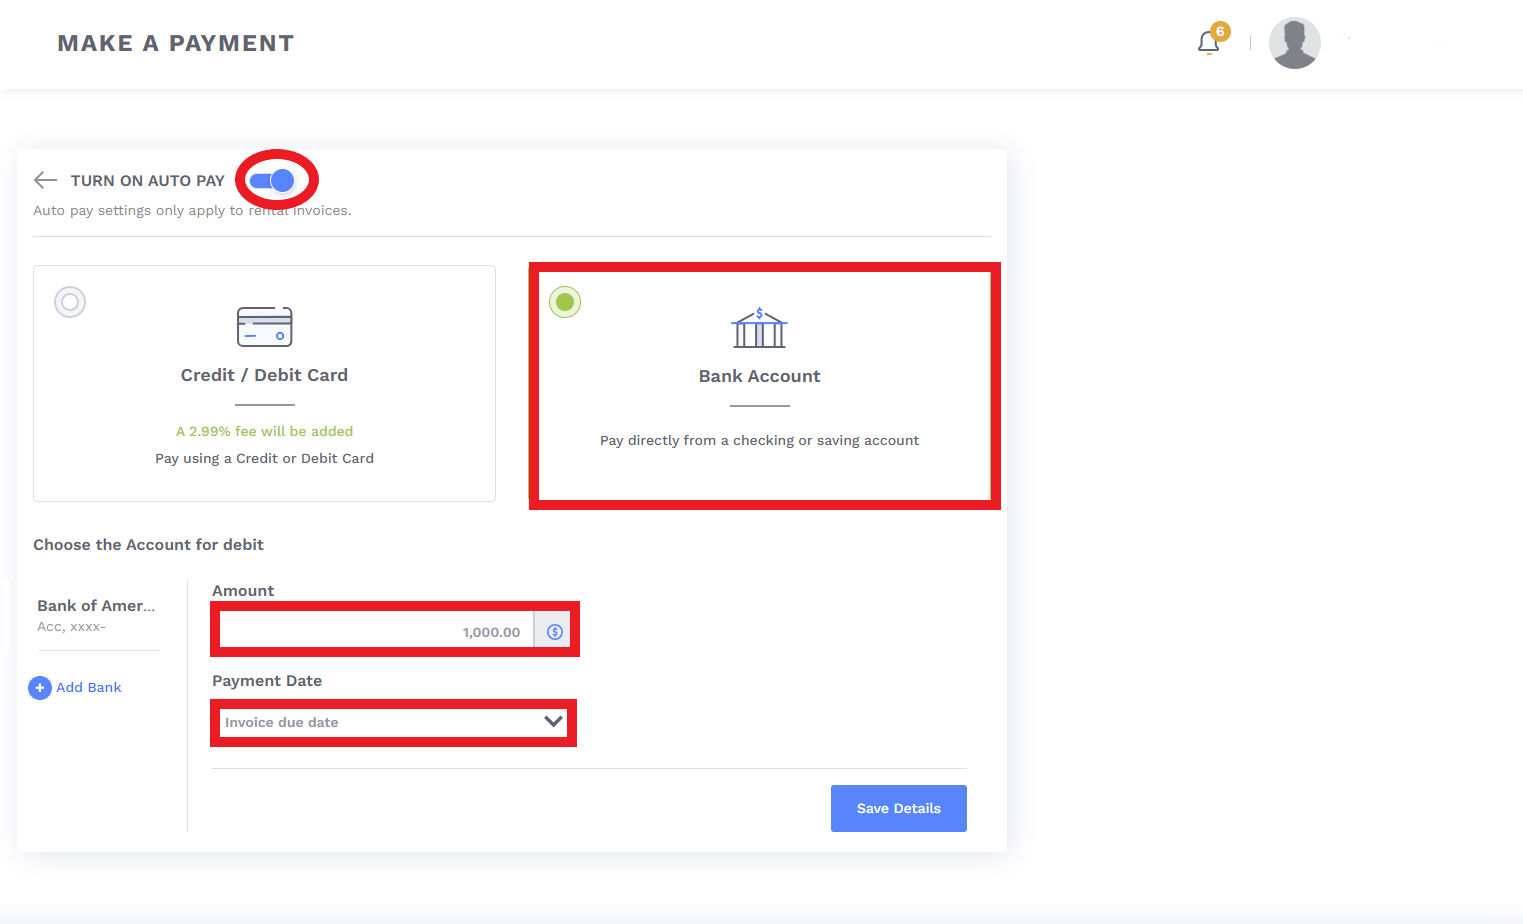
From here, you’ll use the toggle button to turn on Auto Pay. Once you’ve turned it on, you’ll select your payment method, enter in the amount you’d like to authorize for automatic withdrawals, and then finally you’ll select the date you’d like the withdrawal to occur.
Please note, you can only select the invoice due date or days prior to the invoice due date. You cannot select any dates past an invoice due date. For example, if your payment is due on the 1st, you cannot select the 2nd or any dates later as the withdrawal date.
Once you click “Save Details”, Auto Pay will be enabled, and you’ll now see when your next automatic payment is scheduled from your Dashboard. You can always make updates to your Auto Pay settings by following the same instructions.
*Important Notes:
Auto Pay incurs the same fees as a manual payment. You will not be exempted from payment processing fees by enrolling in Auto Pay.
You will not be able to enroll in Auto Pay if you have any past due invoices on your account. You must first manually submit payment for any past due invoices before you can enroll in Auto Pay.
Auto Pay will only run on invoices labeled “Rent”. Any additional charges would have to be included on a rental invoice for Auto Pay to run on them. For example, if you have a separate invoice for a $25 parking fee, Autopay will not run on that invoice. However, if your rent invoice includes an additional line item of a $25 parking fee, Auto Pay will run successfully towards that invoice.
If your landlord has not allowed Partial Payments, you’ll only be able to set Auto Pay to the full amount of rent due, based on their lease terms set within Innago.
If your landlord increases your rent, you’ll need to login and update your Auto Pay amount to reflect the new amount. The amount authorized for Auto Pay will never automatically increase without a tenant’s consent.
Auto Pay is a global setting, and a maximum withdrawal authorization. This means that if you have multiple leases on your account, you’ll want to set your automatic payment amount to whatever lease has the highest amount due. For example, for Lease A there is $1000 due every month, while for Lease B, there is $2000 every month. You’d want to set your Auto Pay amount to $2000. Only $1000 will be withdrawn on Lease A, since only $1000 is due, while $2000 will be withdrawn for Lease B. Auto Pay will never withdraw more than what is due on an invoice.
If you share invoices with other tenants, you’ll want to ensure you do not submit any manual payments prior to Auto Pay running. Auto Pay could still potentially run if there is a balance due, so you could have a situation where you’ve already paid manually, but Auto Pay still runs. You’ll want to make sure you disable automatic payments if you share invoices and submit an early manual payment.