You can open a new bank account with Innago directly from your Dashboard, or from your Settings. Please note, before adding any bank account to Innago, you will be prompted and required to verify your identity. For more information on verifying your identity, please see the following article here.
Once verified, you will have to provide business entity information for tax reporting purposes. For more information regarding business entities and tax reporting, please click here. In order to start the process, following these instructions below:
From Dashboard:
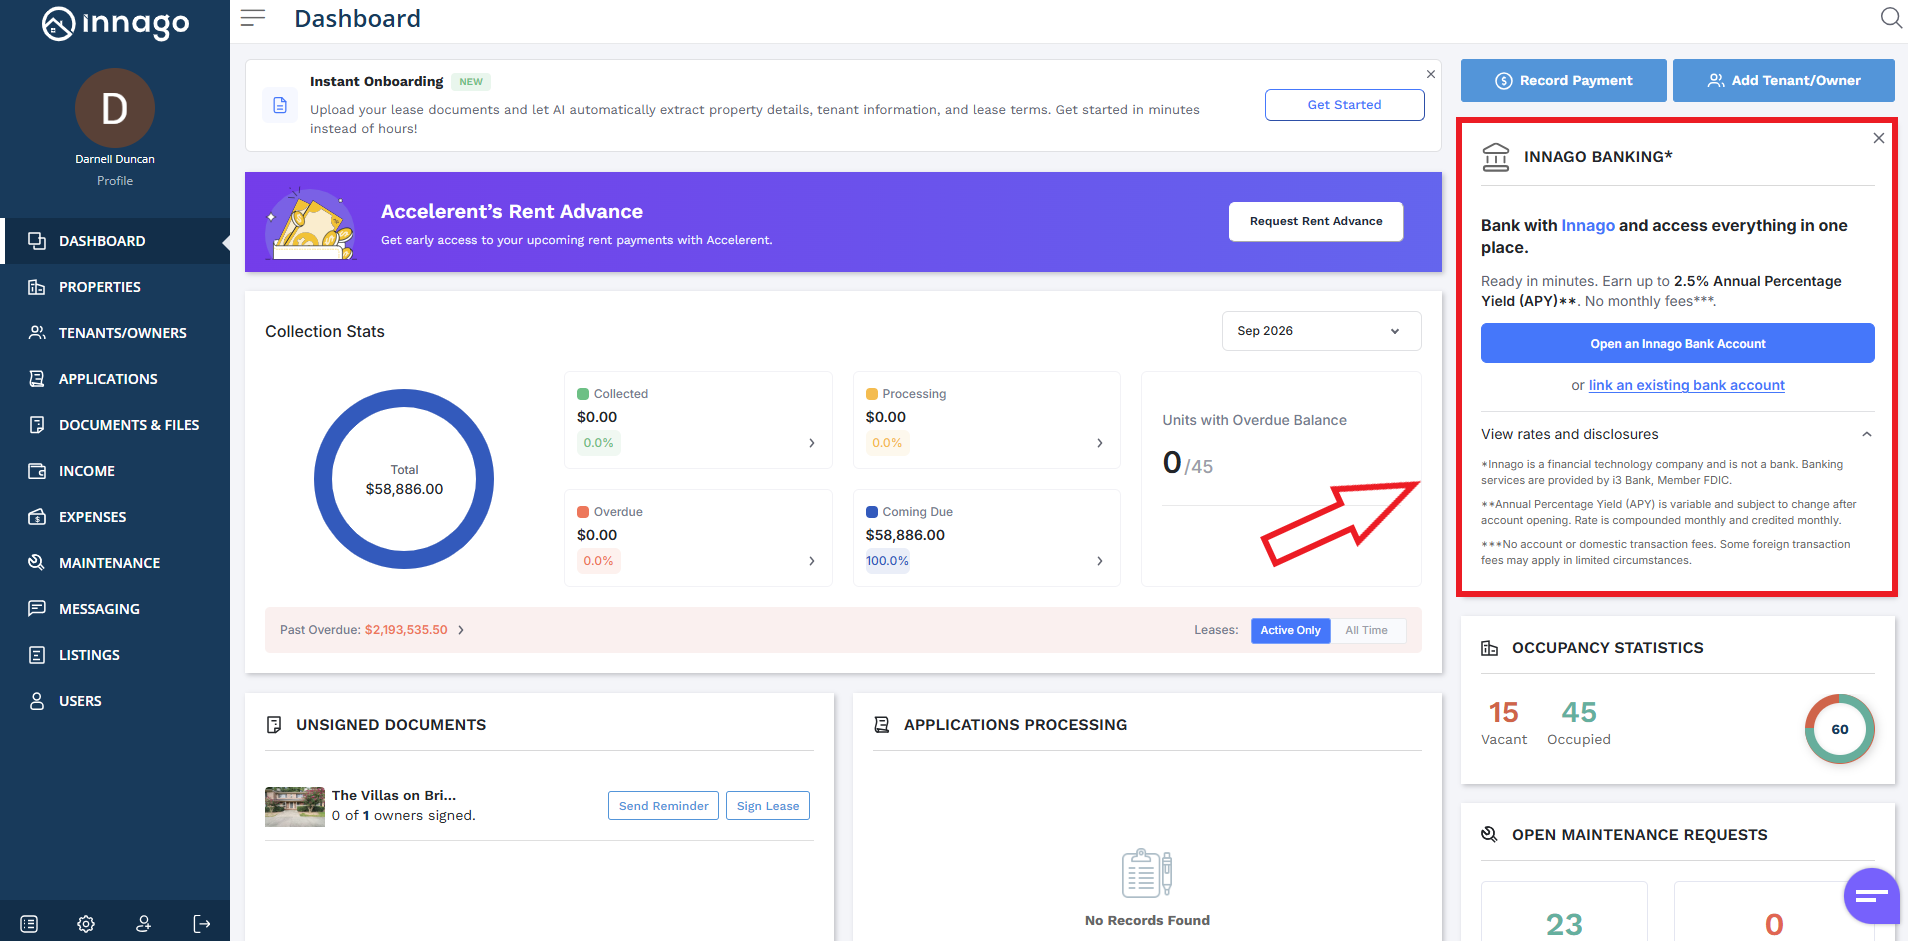
Click “Open an Innago Bank Account” from the Innago Banking section of your Dashboard.
From Settings > Bank:
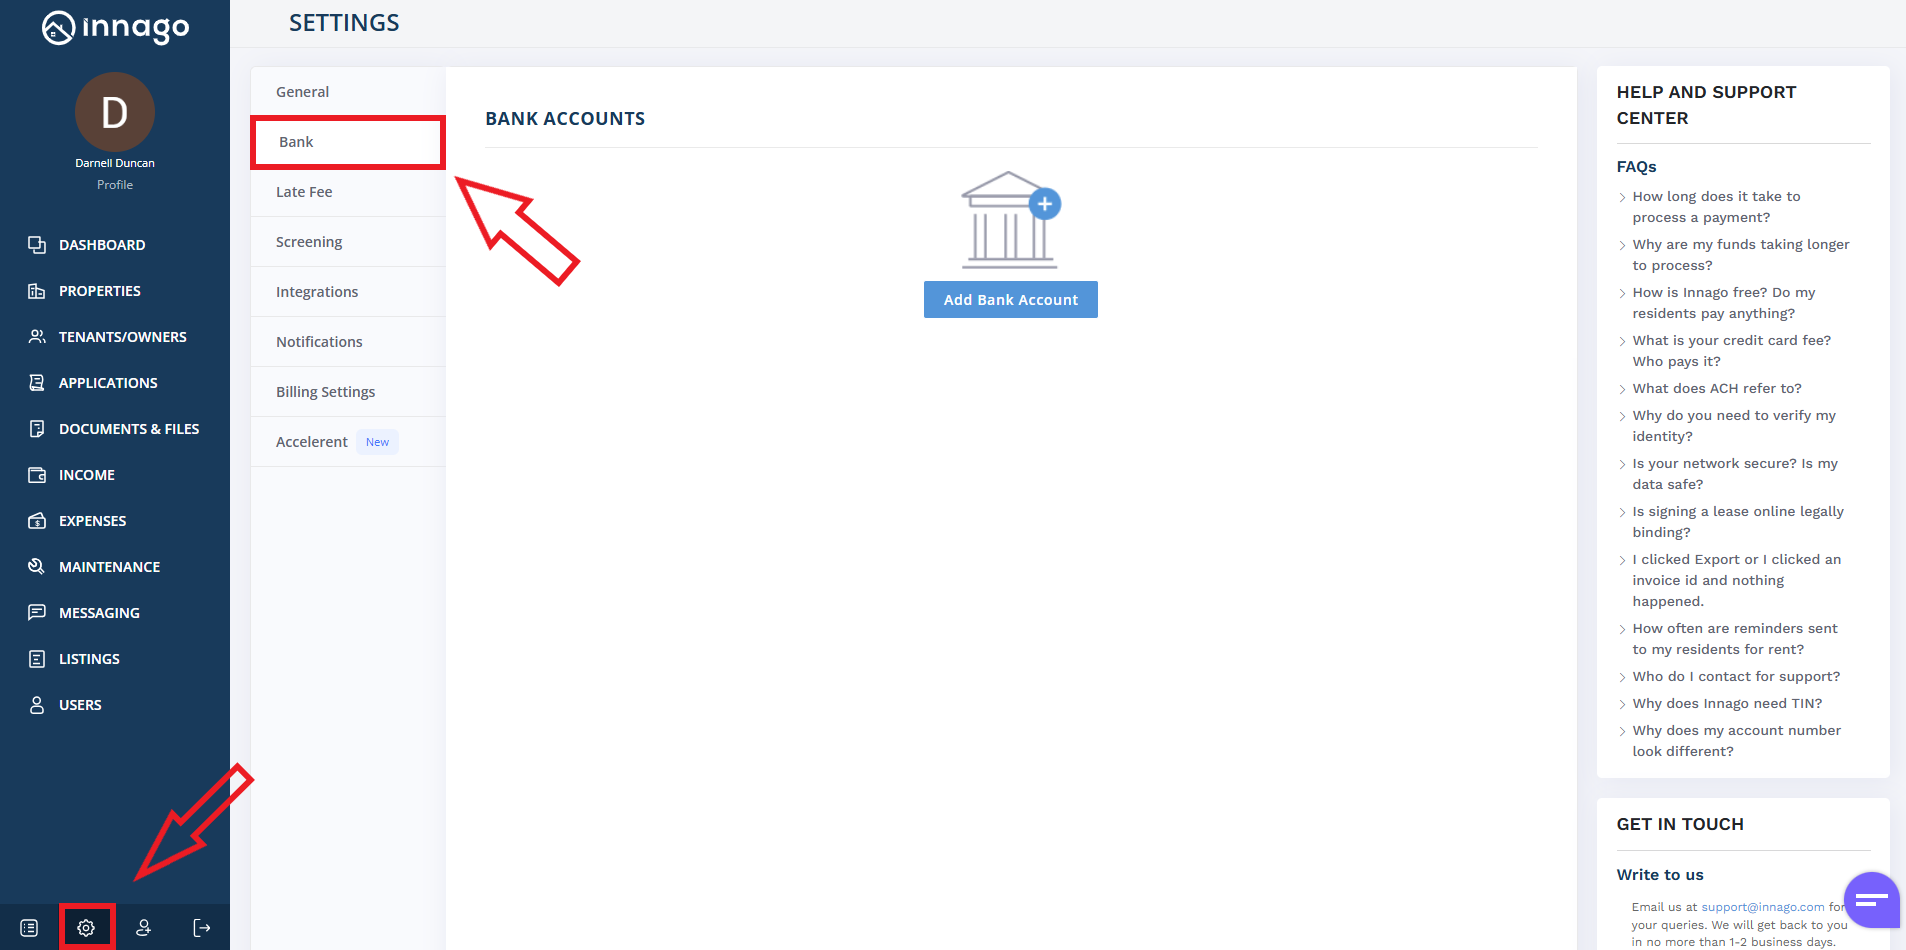
1. From the Innago menu on the left, click “Settings” (the gear icon).
2. From the Settings menu, select “Bank”.
3. Click the blue bar that reads “Add Bank Account”.
4. You’ll see the option to either open a new account, or add an existing account.
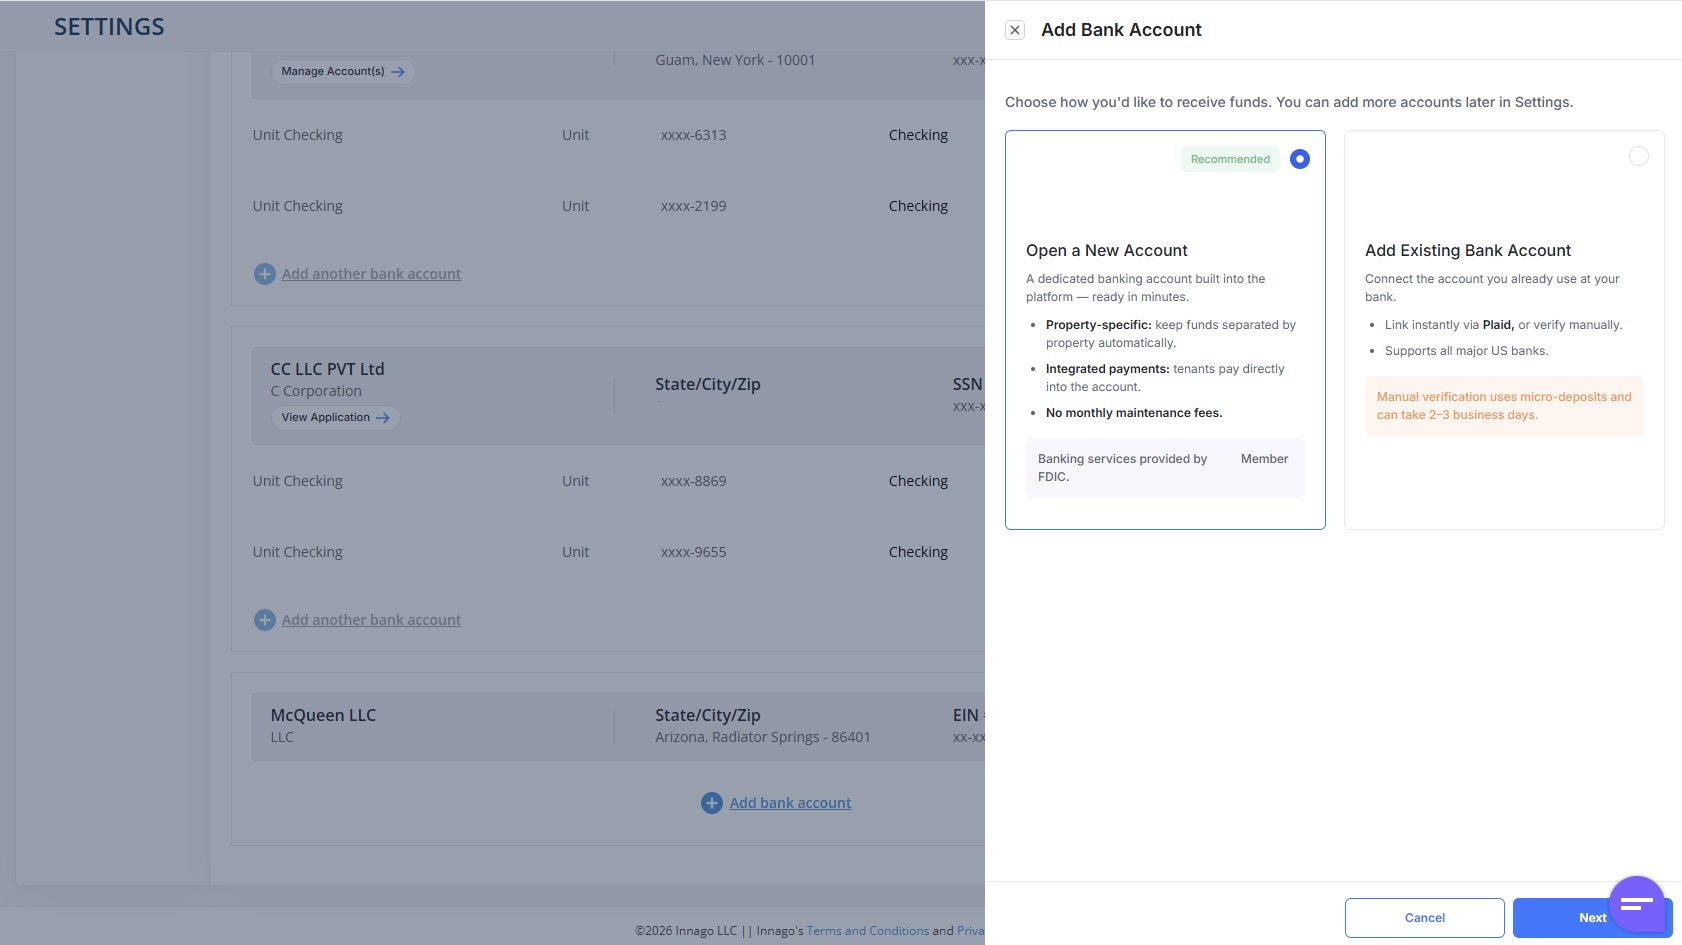
Open a New Account (recommended) — entity-specific dedicated account, tenants pay directly into it. Banking services provided by Unit.
Add Existing Bank Account — links a bank that you’re already using, either instantly via Plaid, or verified manually via micro-deposits (takes 2–3 business days). Please click here for more information on adding an existing bank account.
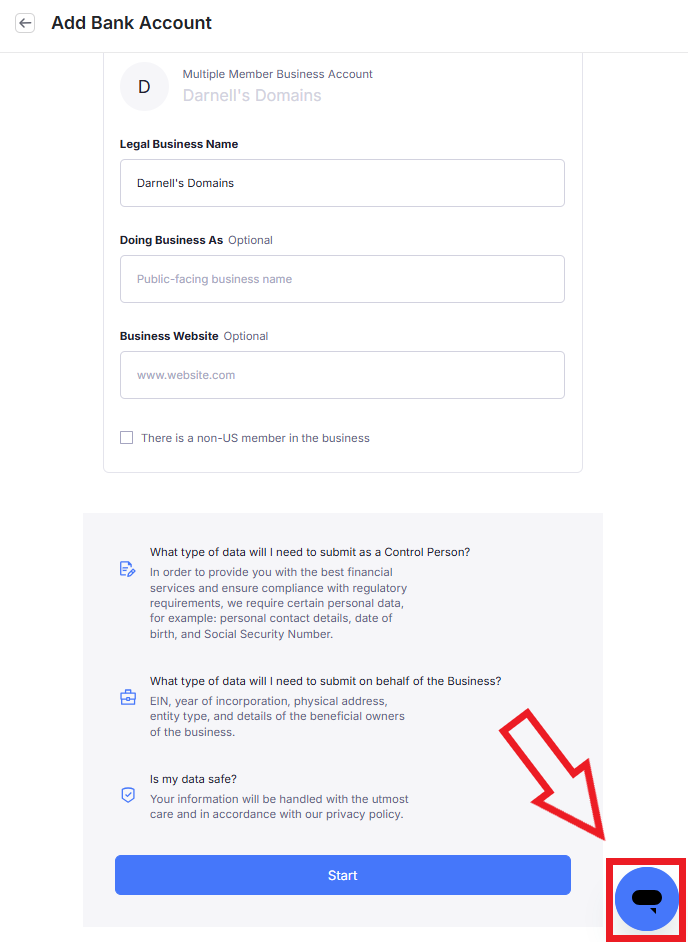
After selecting “Open a New Account”, click “Next”. You’ll be prompted to fill in various business details. Click “Start” to get started. Click “Continue” once you’re ready to proceed.
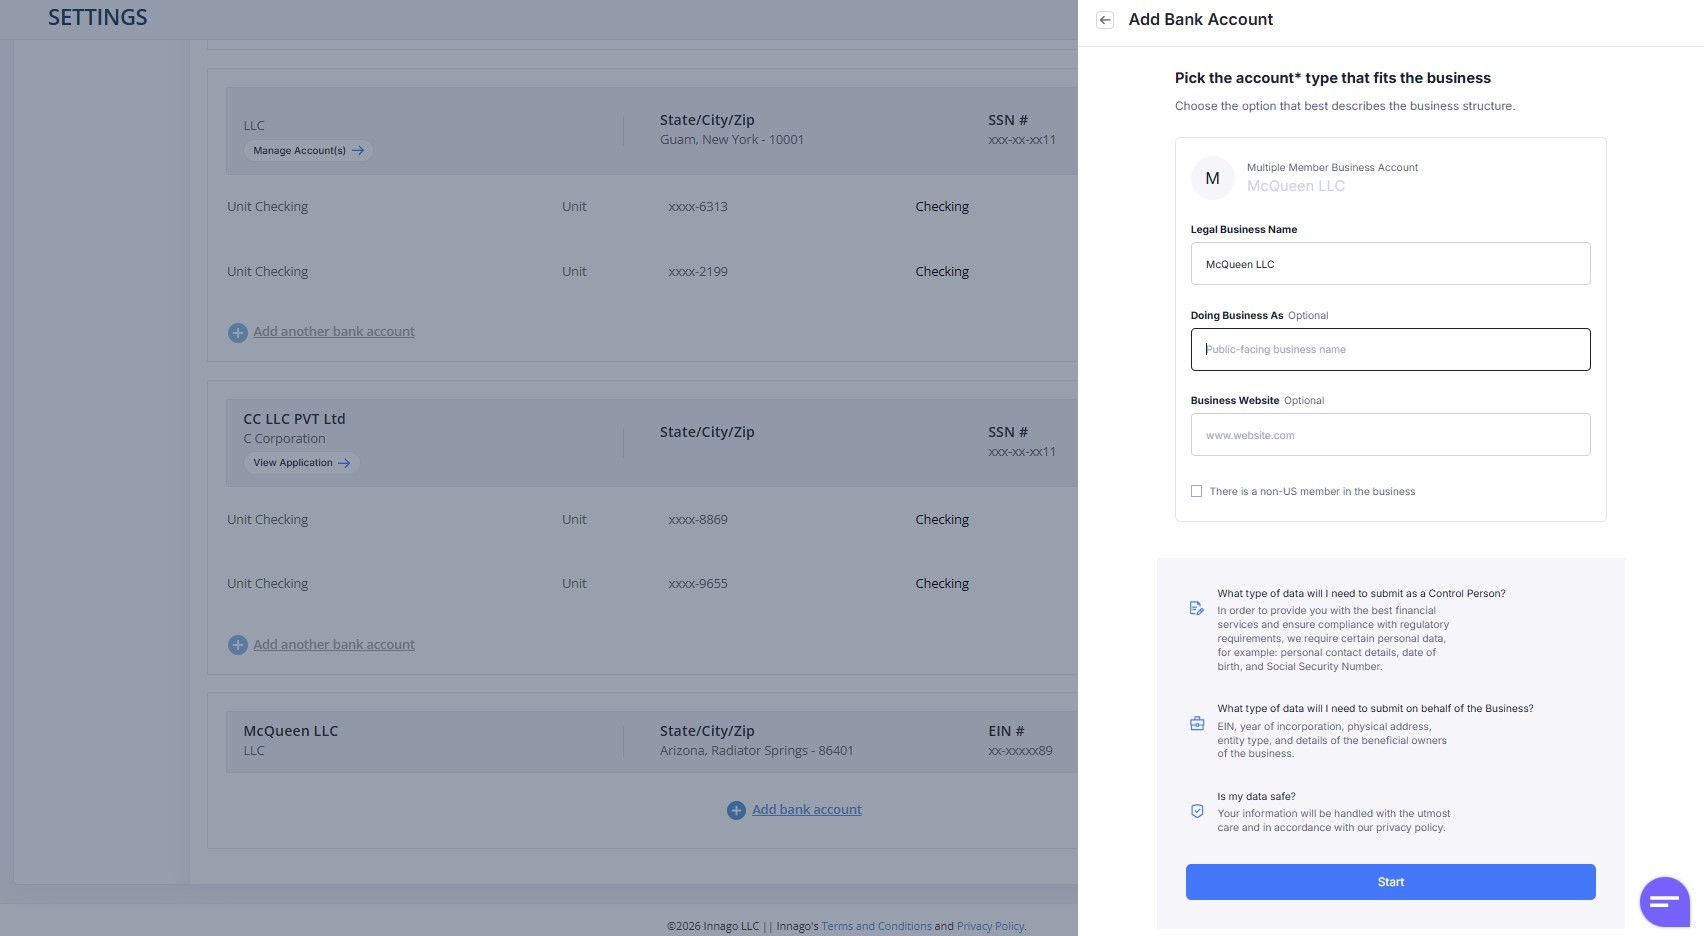
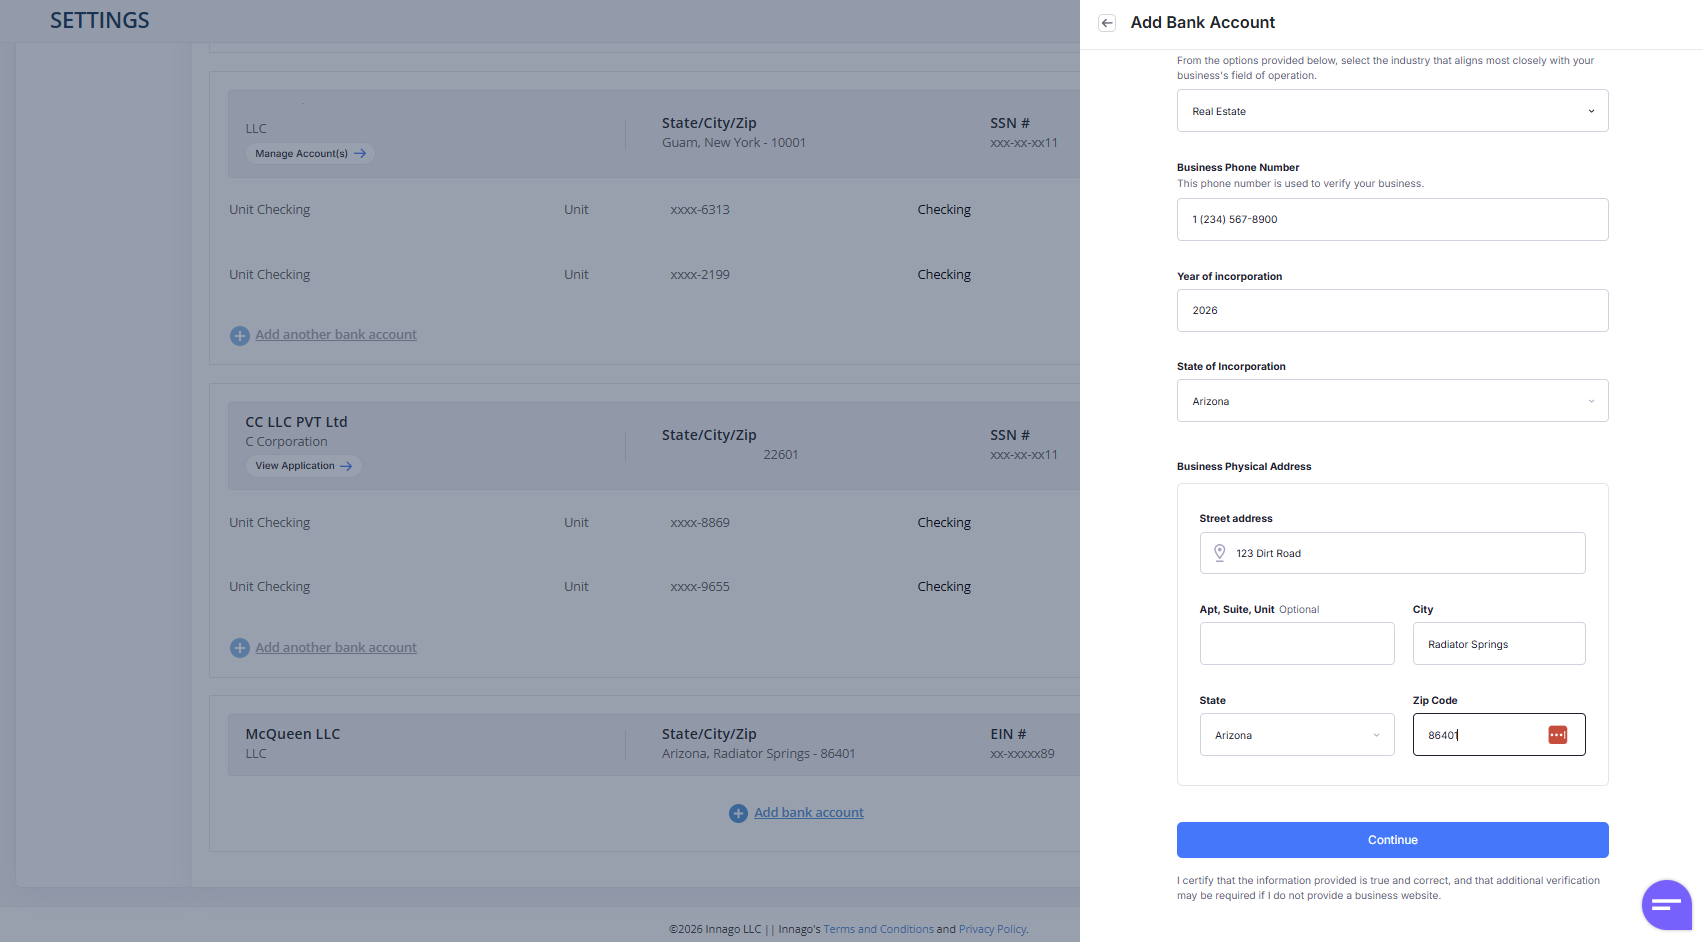
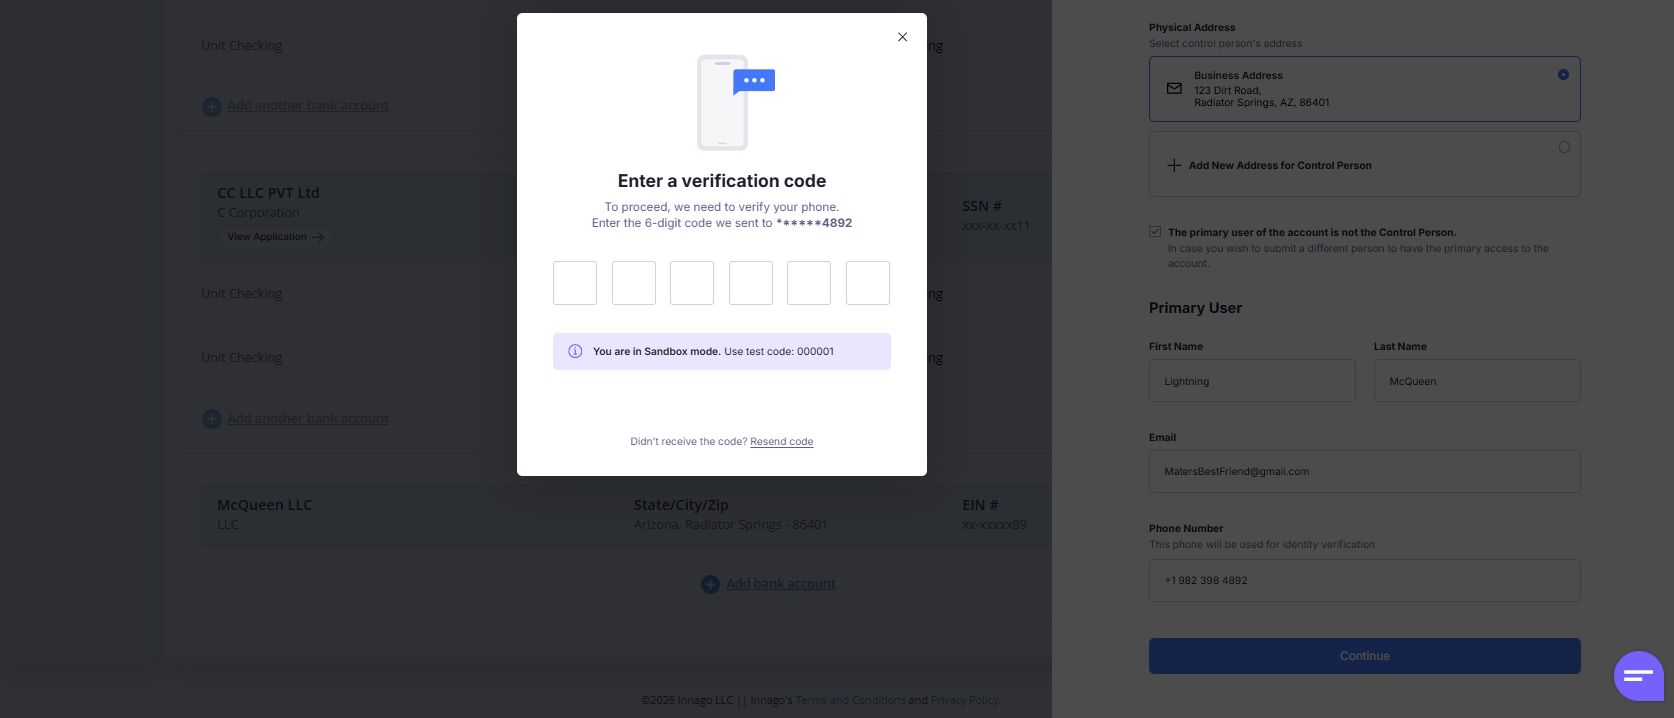
Verify the phone number — after completing all of the business details. An OTP (one-time code) is texted to the mobile number entered on the form. Enter the 6-digit code to continue.
After submitting your information and entering in the OTP code, Unit will begin evaluating the application in the background. No further action is needed from you at this point.
The “View Application Status” button will be displayed next to your entity on your Settings > Bank Account page until your application is approved. Please note, some applications may require additional documents. If so, you’ll need to upload them to proceed with your application. Once your application is approved, you’ll see a “Manage Accounts” button instead.
After approval, the account appears in two places:
- In the Unit account dashboard — under the Accounts tab, showing the account name, balance, and account/routing details (e.g. “Onboard – Checking • 4028”).
- Underneath the entity on your Settings > Bank Account page — listed alongside any existing bank accounts as e.g. “Unit Checking • xxxx-4028,” with a green check mark showing it’s verified/active.
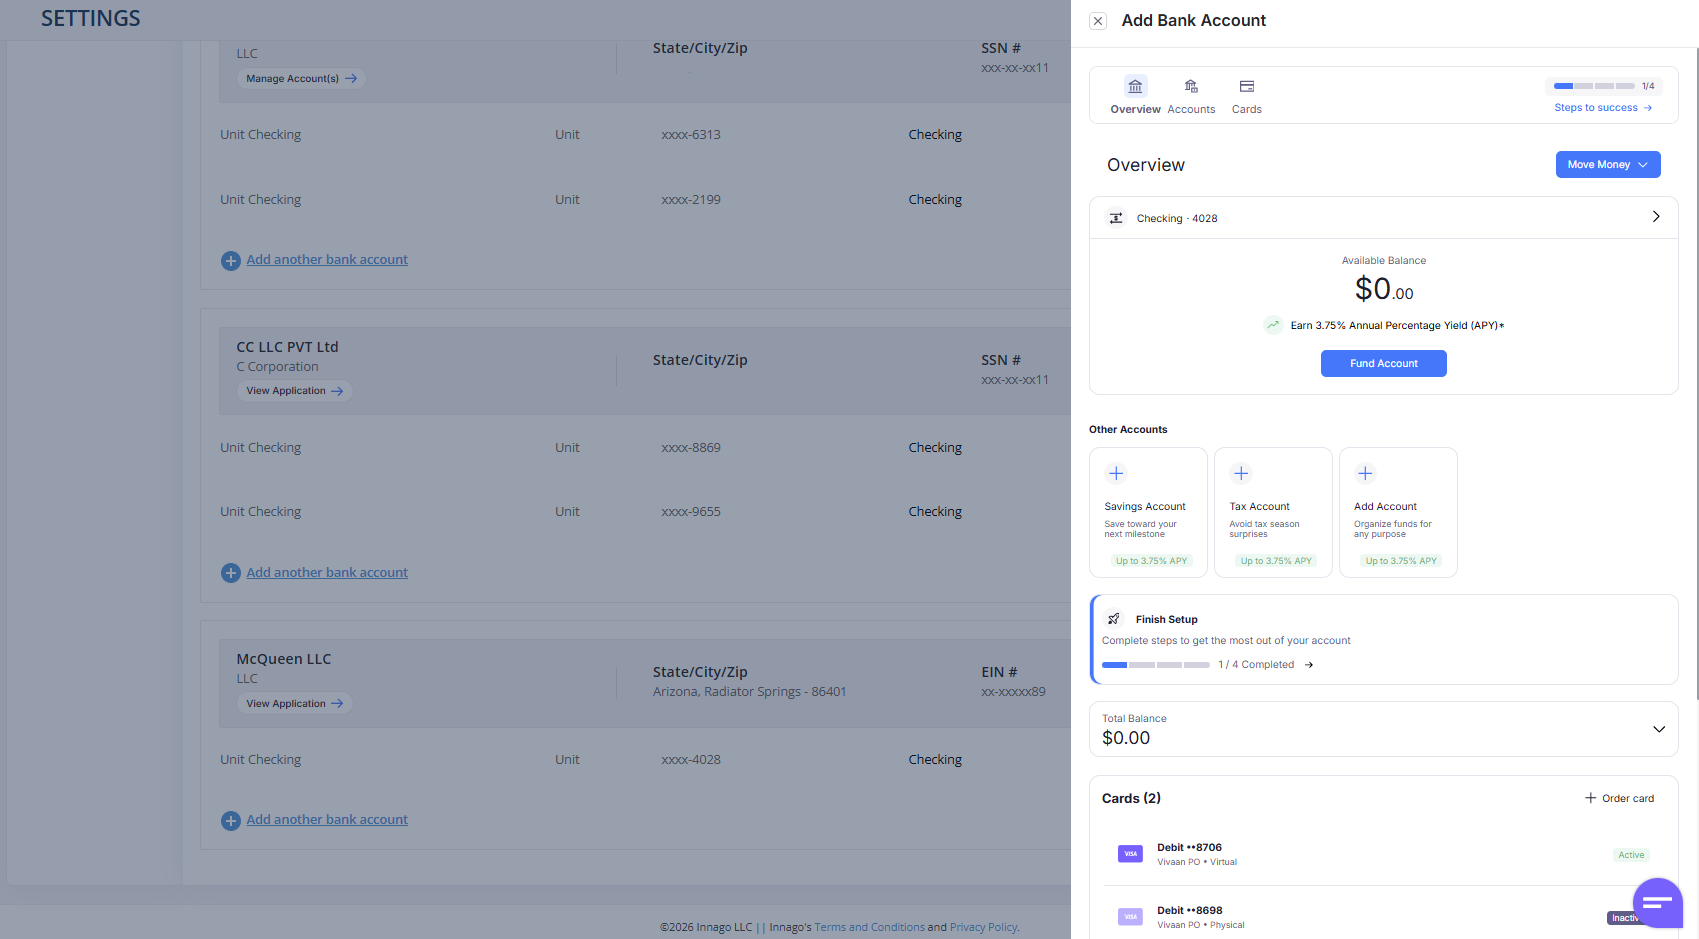
You can have more than one bank account per entity. Just click “Add another bank account” to open additional accounts or to add existing accounts. Once the Add Bank Account pane opens, click the “Accounts” tab. Please note, each account can only be linked to one entity at a time.
Once your new Innago bank account is active, it behaves exactly like any existing linked bank account. Every operation you can already do with a regular bank account — receiving rent payments, payouts, etc. — works the same way with the newly created Innago account.
Support:
If you need support with navigating the Unit widget, Unit account issues, transactions, identity verification and/or card inquiries, you can access the in-app Banking Support widget chat Mon–Fri, 9am–5pm EST, or email support.innago@bankingsupport.co
If you’re experiencing technical issues such as the bank account widget not loading, contact the general Innago Support Team at support@Innago.com.