
An expense is any cost you may have incurred while managing your rental business. Although you can’t pay these expenses through Innago, you can still record them for accounting purposes. You can either input expenses manually, or you can import them by uploading expense files/documents.
Adding Expenses Manually:
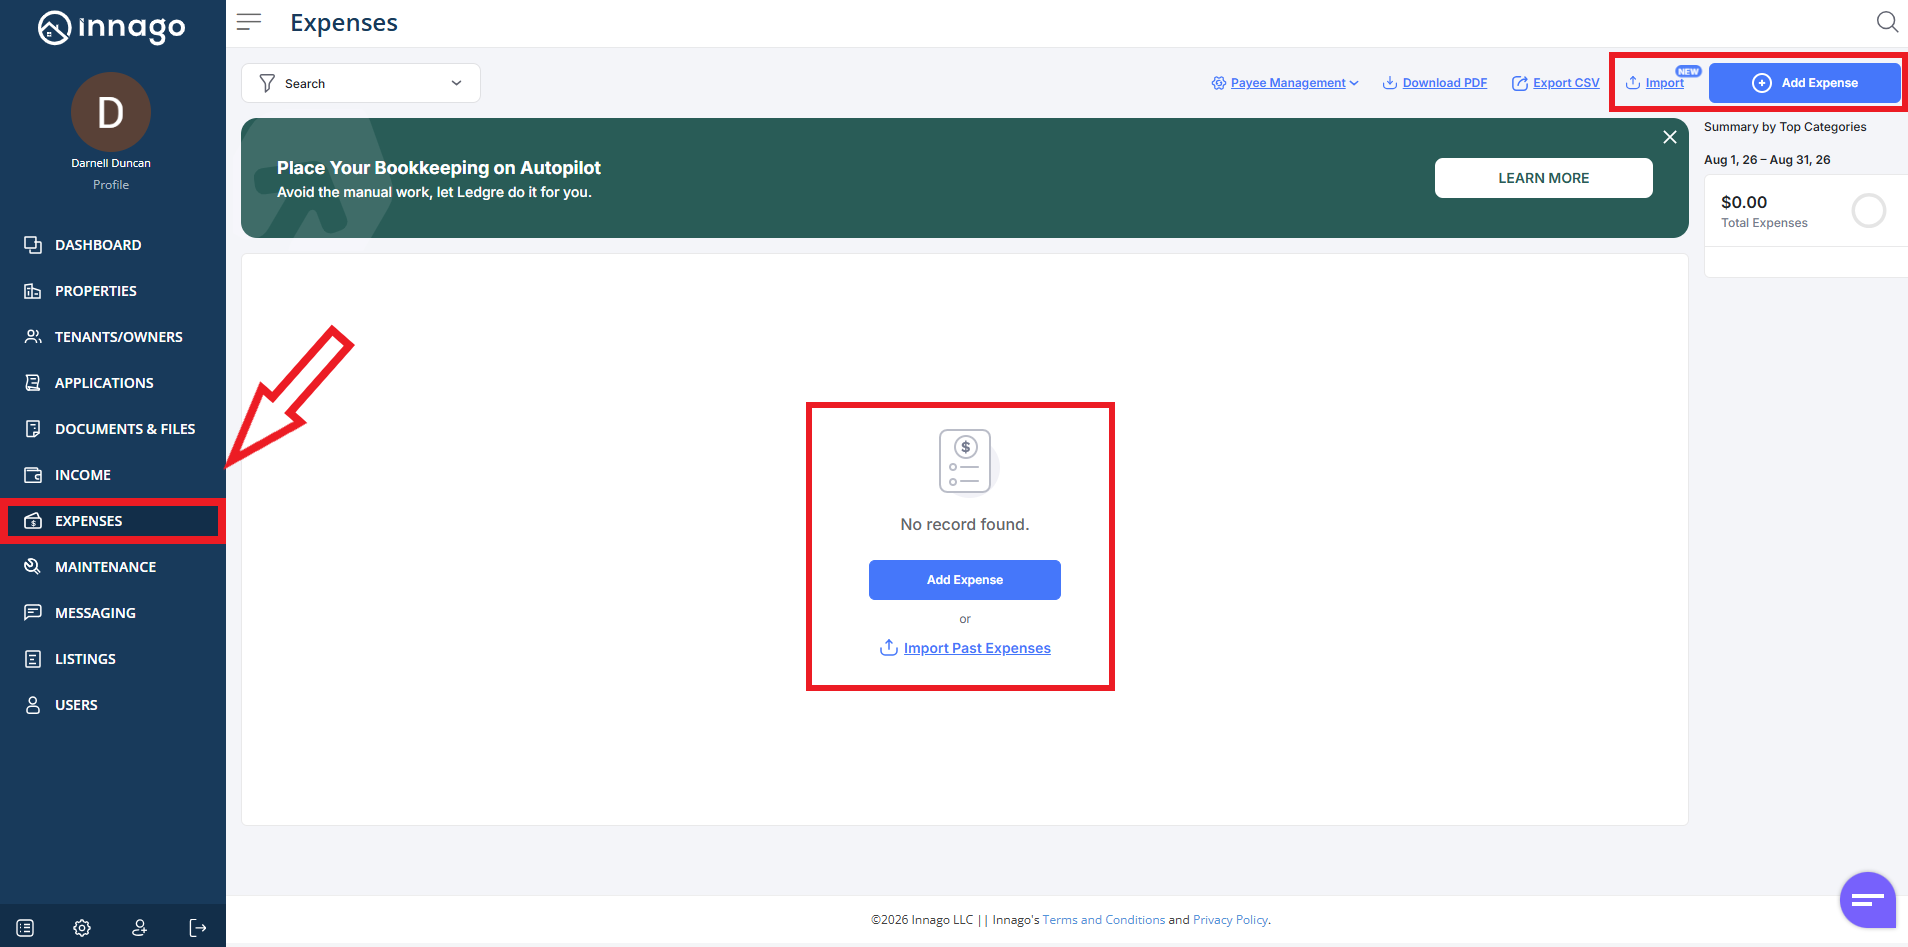
1. From the Innago menu on the left, click on “Expenses”.
2. In the top right corner, click “Add Expense” (if you’ve never added an expense, this button will also appear in the middle of the screen as shown below).
3. If you need to record a single expense, use the first form that appears. If you need to record multiple expenses, click the “Multiple Expenses” tab instead. Simply click “Add another expense” to continue adding multiple expenses on that tab.
If you’re recording a single expense and you have a receipt, you can also utilize the Auto-Fill Data from Receipt toggle located towards the top right of the page. Just upload your receipt, then hit the toggle. Any transferrable data will be auto-populated into the appropriate expense fields.
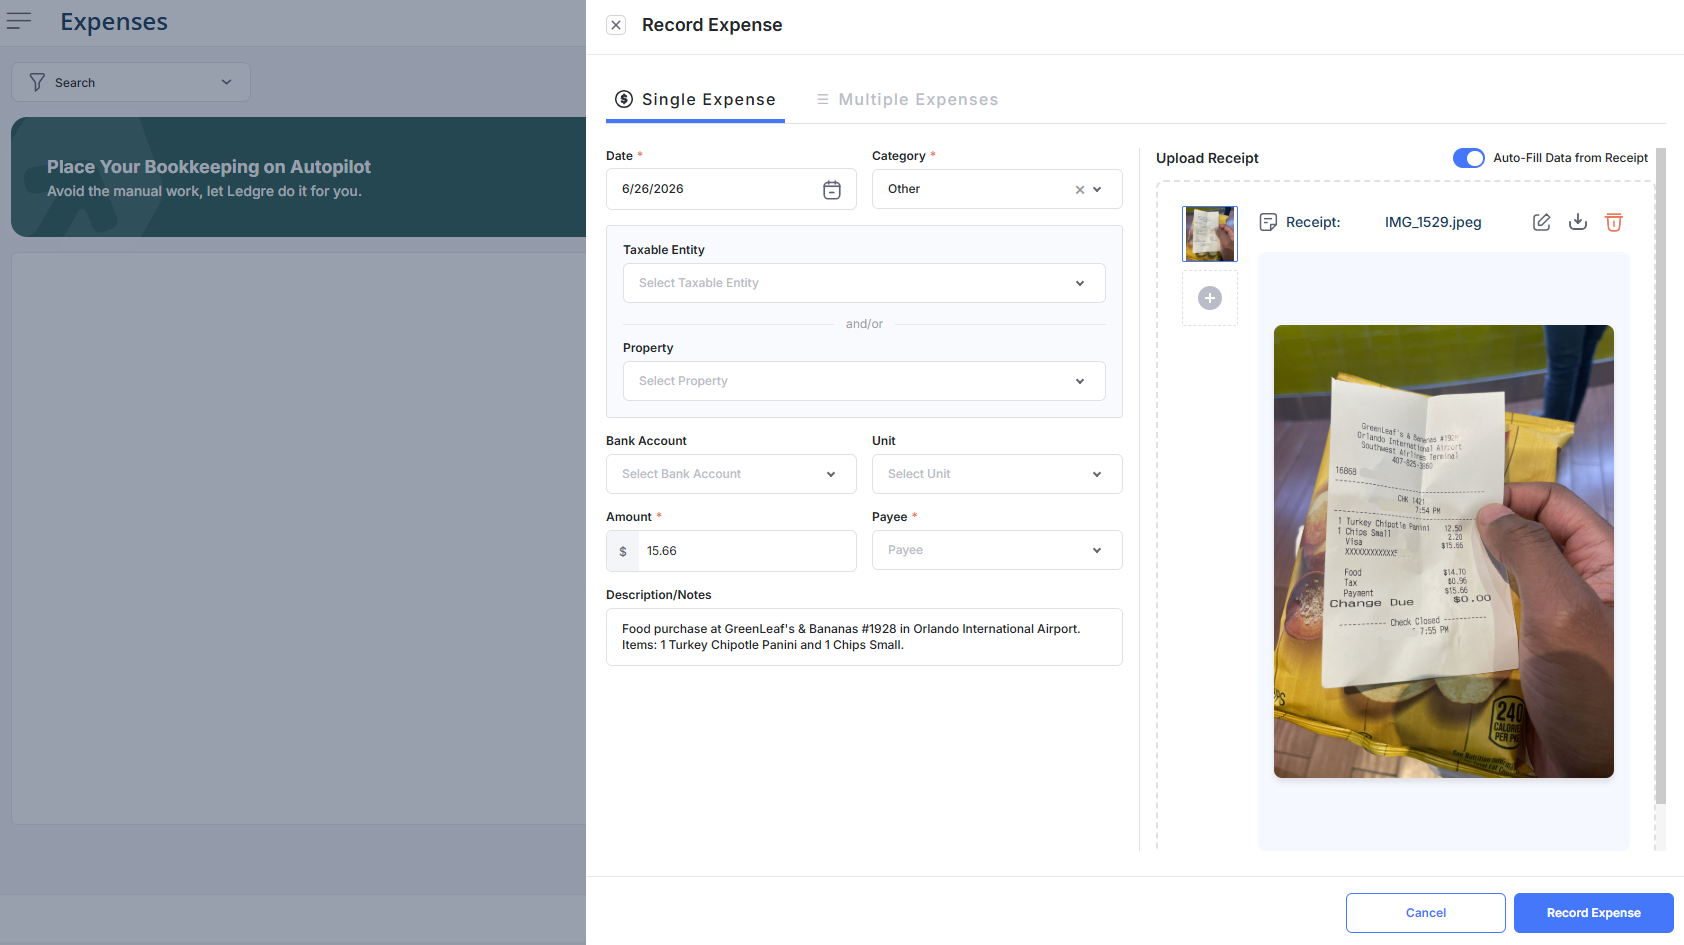
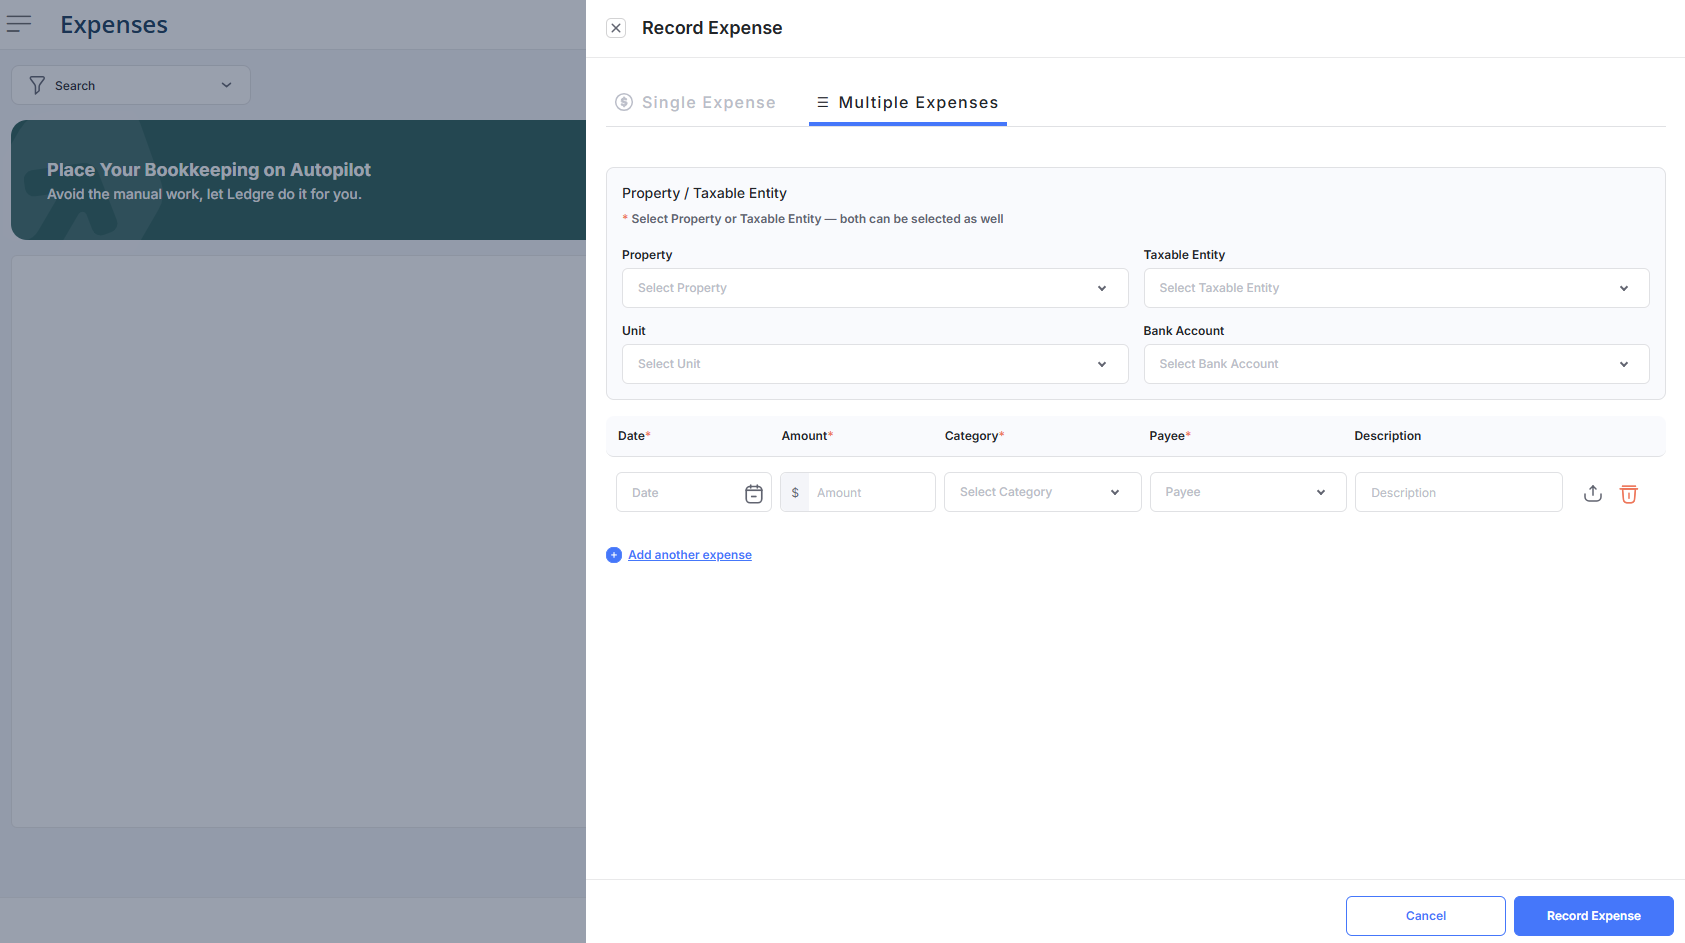
4. Once you’ve filled out all the relevant details, click “Record Expense”. You can always edit these expenses later from the main Expenses page. You can also edit/manage any payees from the main Expenses page as well by clicking “Payee Management”.
Importing Expenses Automatically:
1. From the Innago menu on the left, click on “Expenses”.
2. Click “Import” in the top right corner (or “Import Past Expenses” in the center of the screen if you’ve never previously added an expense).
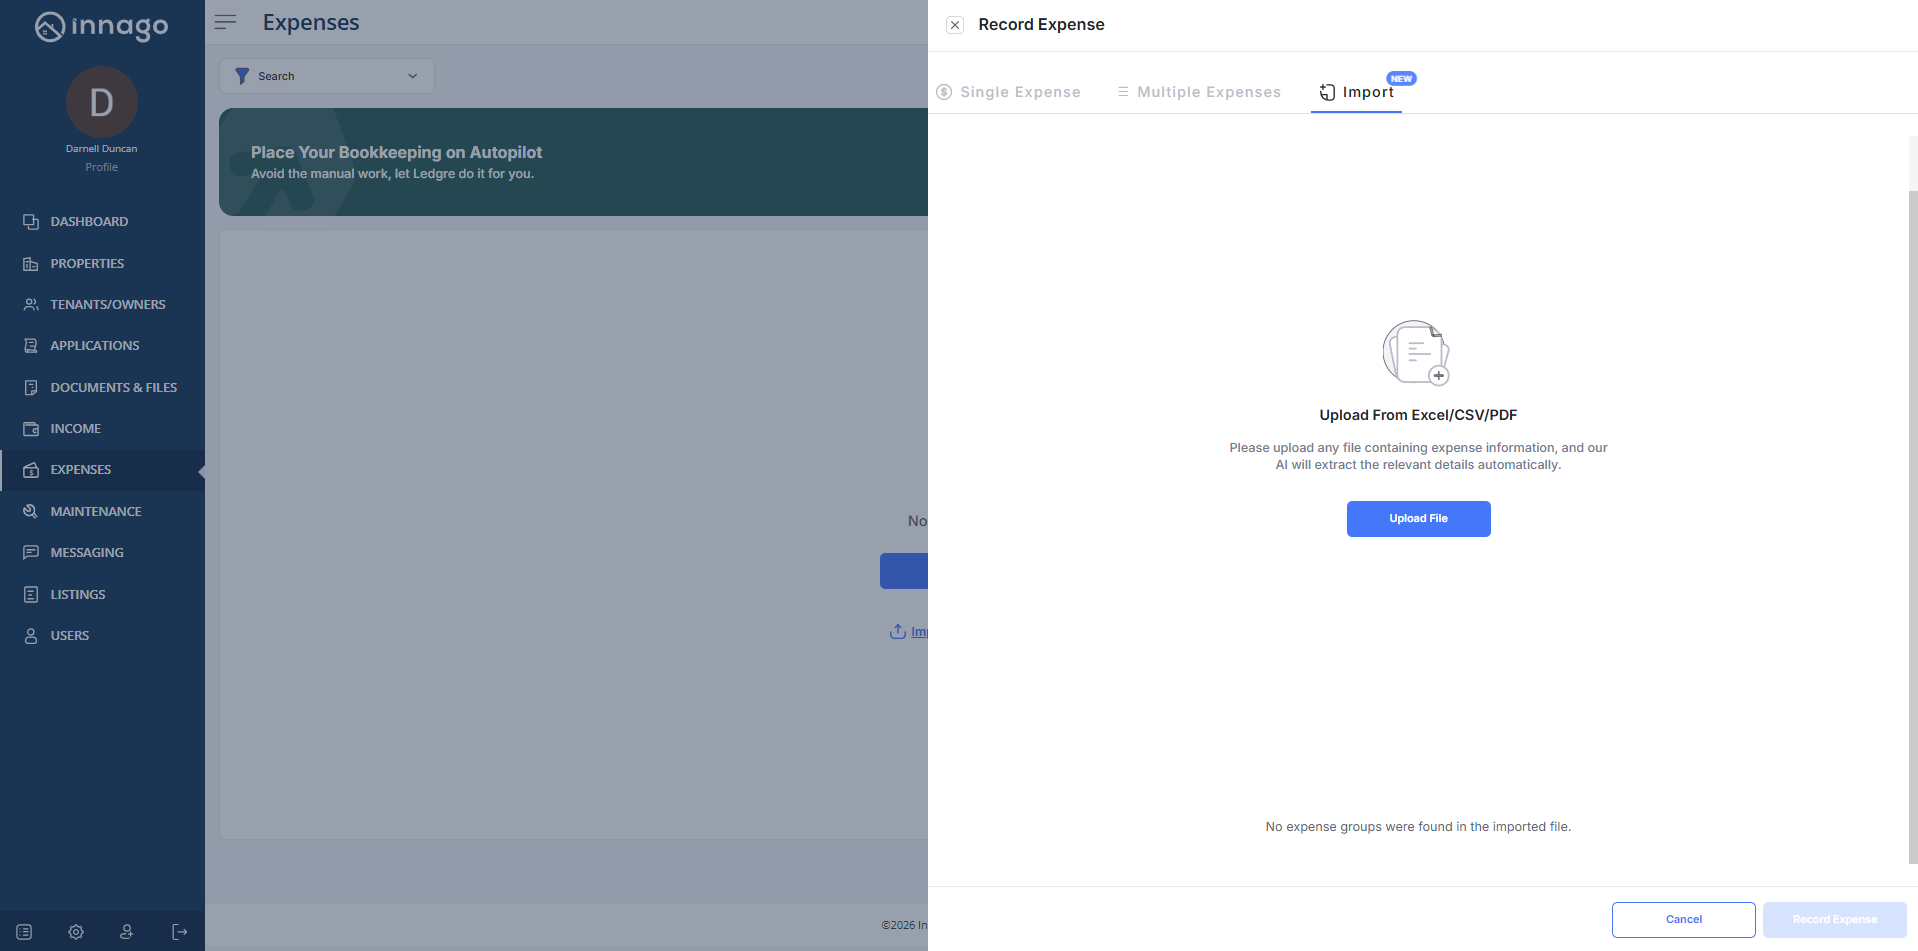
3. Click “Upload File” to broswe your device for Excel, CSV, and PDF files. These are the only file types you’ll be able to upload currently.
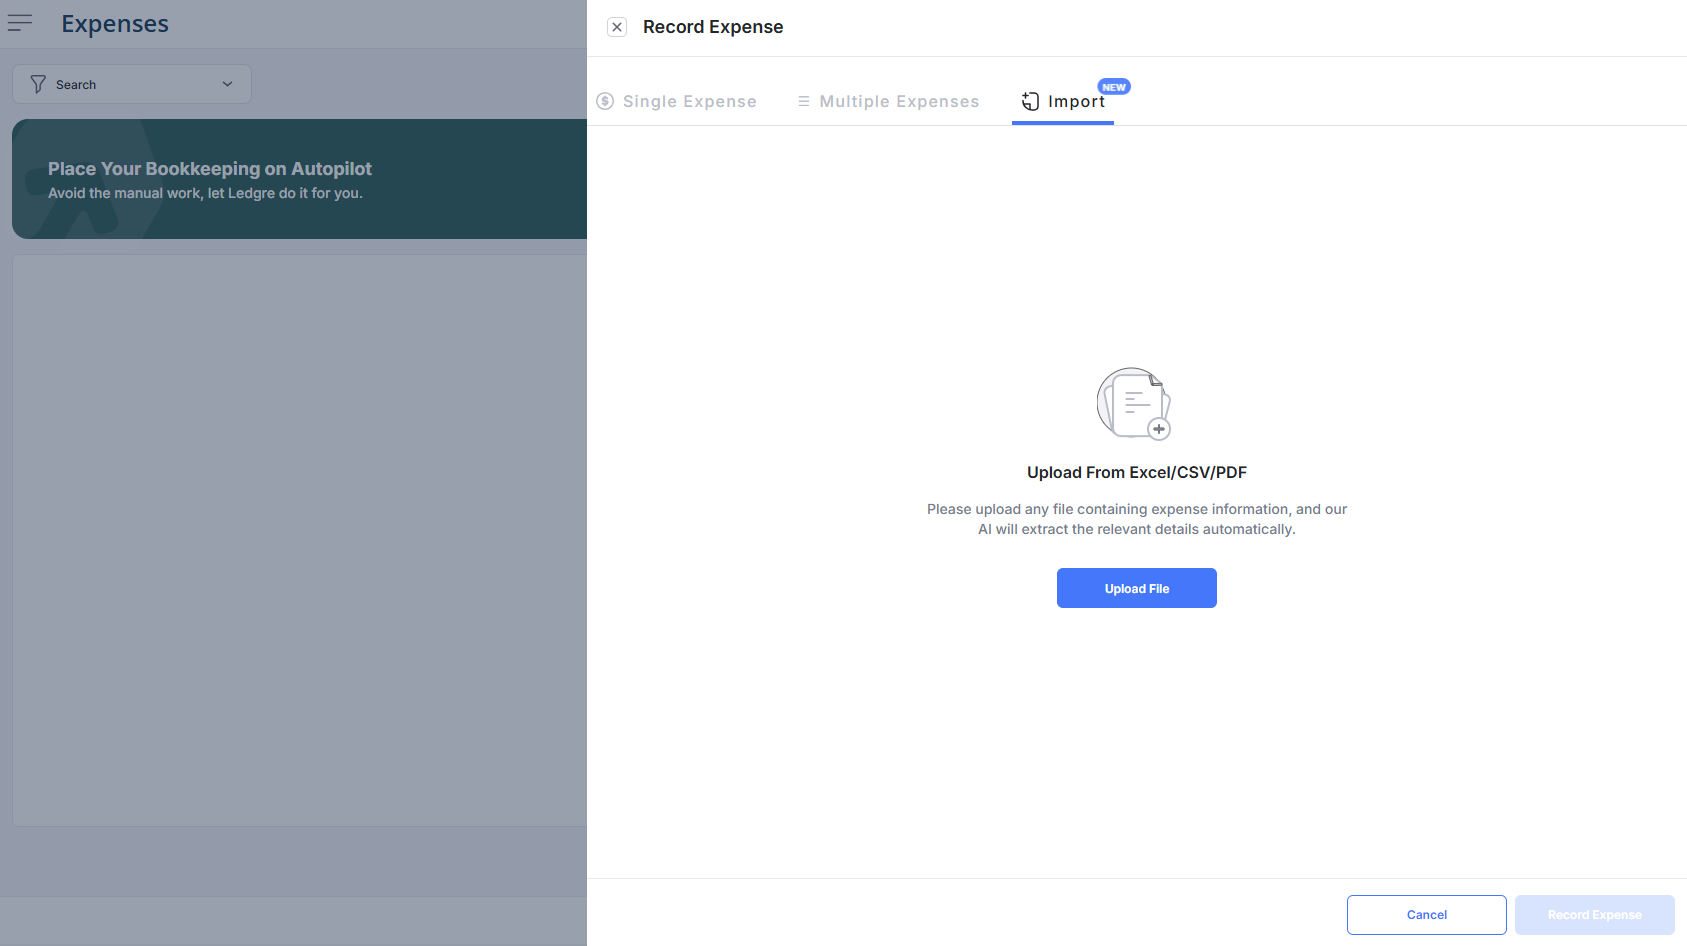
4. It may take a couple of minutes to extract and load expense details. If your file doesn’t have clear expense data, you’ll see a message saying “No expense groups were found in the imported file”. You’ll need to edit your file if possible, then re-upload.
Once your document has been analyzed, you may have to complete some information prior to saving. All required information will be highlighted in red. If you need to make changes to the file and re-upload, click “Re-upload File”.
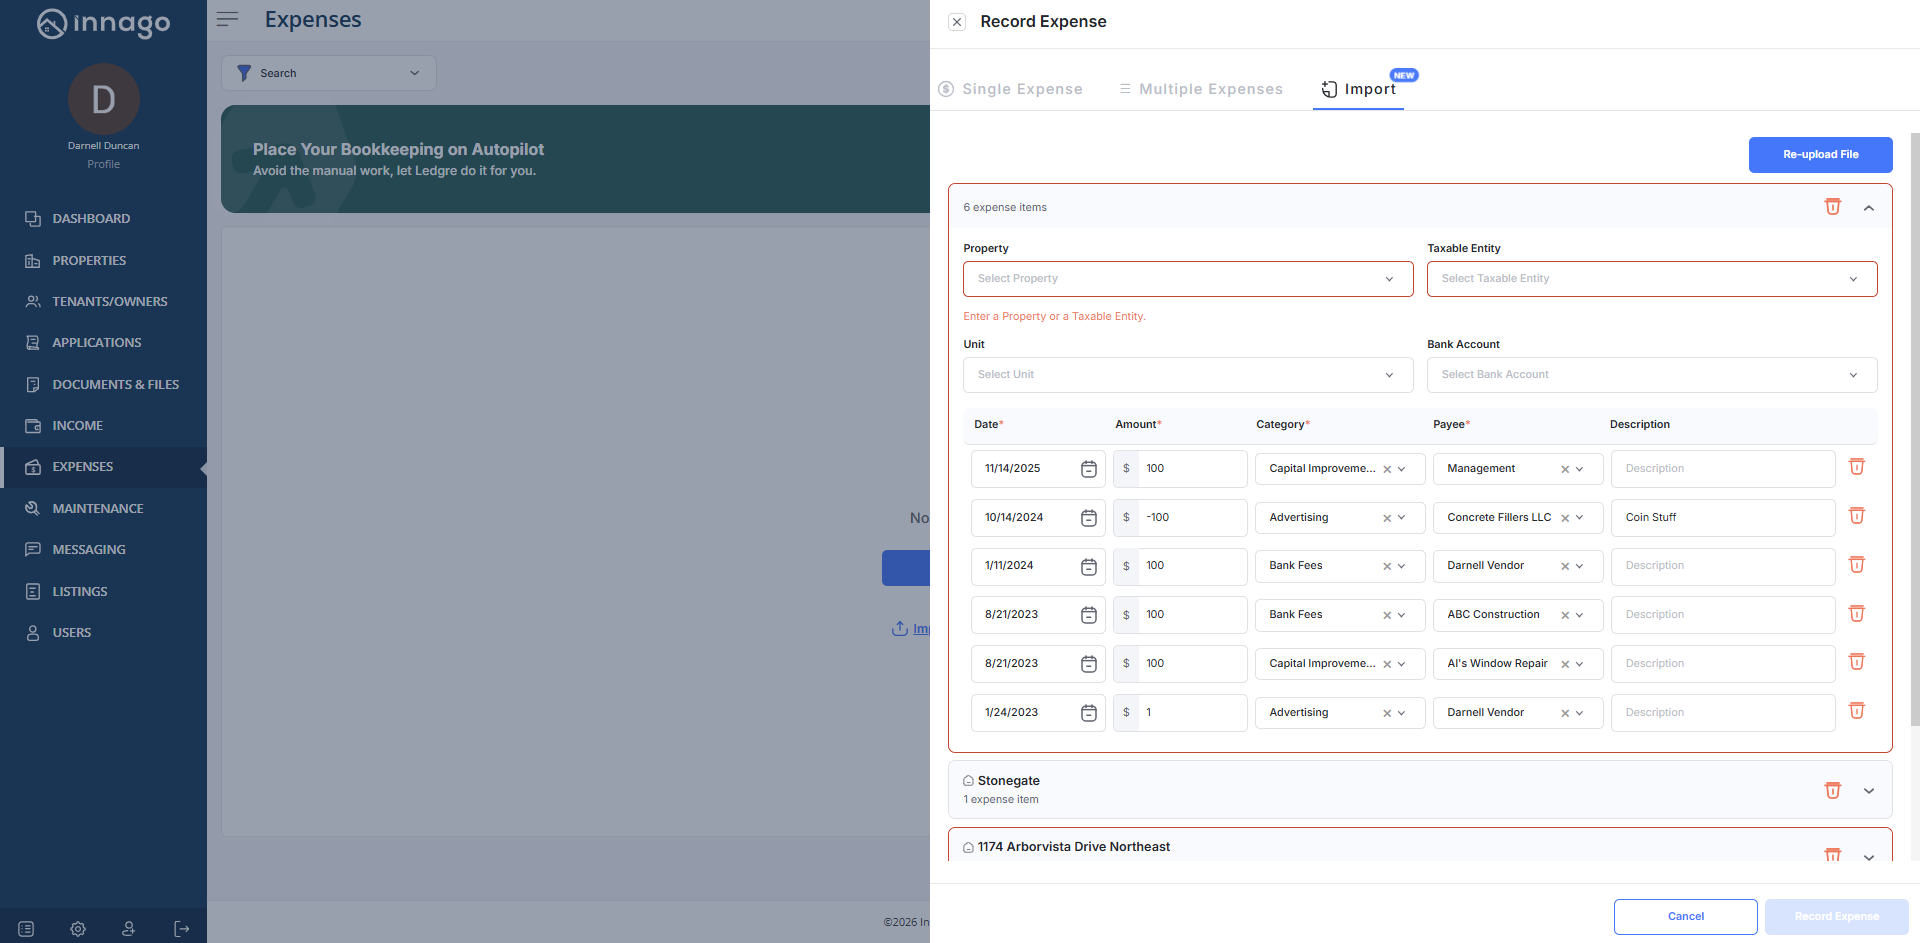
5. Once everything is filled in, click “Record Expense” to save your newly added expenses.
Please note, you cannot create recurring expenses at this time.
For information on how to record a “negative expense”, please click here.