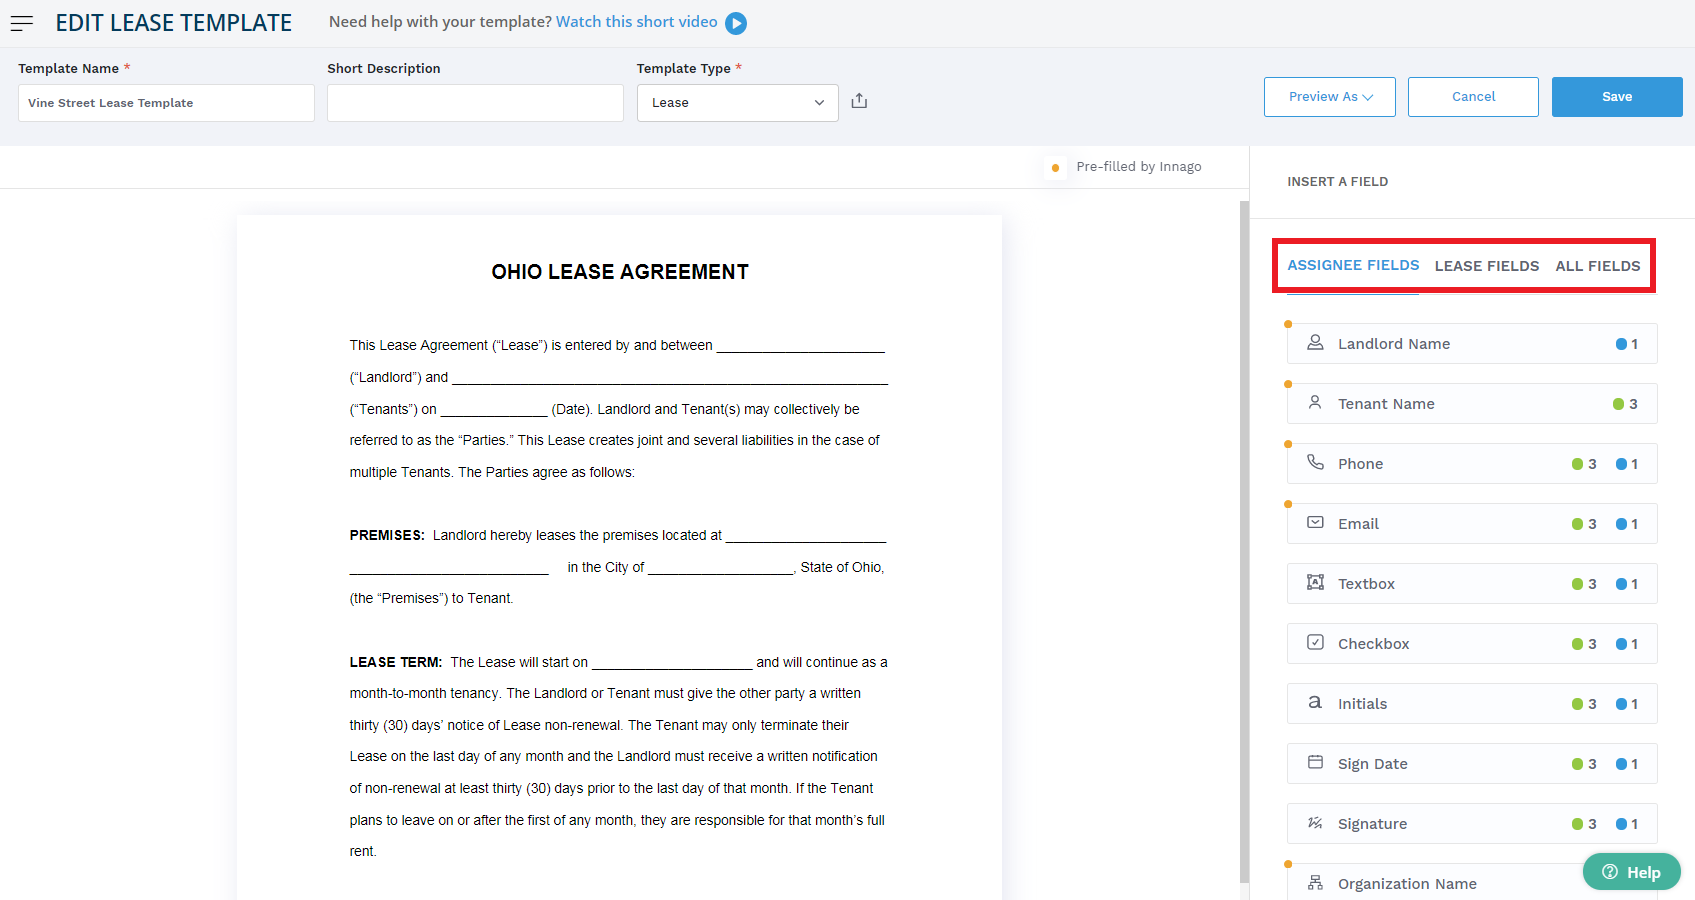
Before adding a lease template, make sure you leave any fields blank that will change from lease to lease. For example, the lease dates, signatures, tenant names, etc. Make sure there’s enough room to drop in fillable text boxes. If the document looks a little tight, you may want to edit it to increase line spacing to add a bit more room for your fields.
When saving your document on your computer, be sure to save it as a PDF. PDFs do the best job of maintaining the lease’s format, so we require that the lease template you upload to the template builder is in the form of a PDF.
Once your lease is uploaded, you can begin customizing the fields that appear. Each field can be assigned to a tenant or you, the landlord. You can change the size and shape of these fields by holding your mouse down on the lower right corner of the field and adjusting the shape or size.
Here are the different field categories:
• Assignee Fields
The assignee fields are anything related to you or your tenants including names, contact information, and signature fields.
• Lease Fields
The lease fields are ones related to the lease such as lease start and end dates, security deposit amount, rent amount, street address, etc. You’ll notice that all of these fields have a little orange dot next to them. These are fields that Innago will autofill with information for you.
• All Fields
The All Fields tab simply shows both the Assignee Fields and the Lease Fields from the other two tabs all in one list.
Other notable fields:
• Signature Boxes
– Signature boxes are how the lease gets signed! Make sure you’ve got a signature field for all tenants and you, the landlord. Click the field, click on the person you want to assign it to (you can also add a new tenant and select them), and then drag and drop the field onto the area you want it to appear on the template.
• Text Boxes
– When filling in a textbox, a signer can essentially enter any information they like. As such, textboxes are used for all unique entries. Just like many of the other fields, text boxes can be assigned to any of your tenants or to yourself, the landlord.
– When assigning a Textbox field to a landlord, the system will provide you with three options:
Right Now — If you select this option, you can directly enter the information for this text field. Note: Any information entered here will be displayed on all future leases created from this template.
Before Sending — By selecting this option, the system prompts you to fill in this field right before issuing your lease to your tenants. The last-minute information you enter in the draft stage right before issuing the lease will only appear on that specific lease document and not on the main template saved on your templates page.
After Sending — Once the lease has been sent out to your tenants, you can go ahead and fill any “after sending” fields. Many fields, such as signature fields, are fields you will fill in after sending the document for signature.
• Check Box
– Checkboxes can be assigned to both tenants and the landlord. If you assign this field type to yourself, then it can be checked by you right now, right before you send out the lease, or after the lease has been sent for signature to your tenants. For tenants, they can check this field only once the lease has been sent out for signing.
Check out our tutorial video to learn more! – https://vimeo.com/477321142

