QuickBooks:
QuickBooks is an accounting software package developed and marketed by Intuit. It is a full-featured business and financial management suite complete with tools for accounting, inventory, payroll, tax filing, invoicing, bank account tracking and reconciliation, expense management, budgeting, payment processing, accounts receivable and accounts payable management.
We sync the following data below to QuickBooks from Innago:
-
Properties
-
Units
-
Leases
-
Invoices
-
Payments
-
Expenses
How to Integrate QuickBooks with Innago:
Step – I:
-
Create an account on QuickBooks.
-
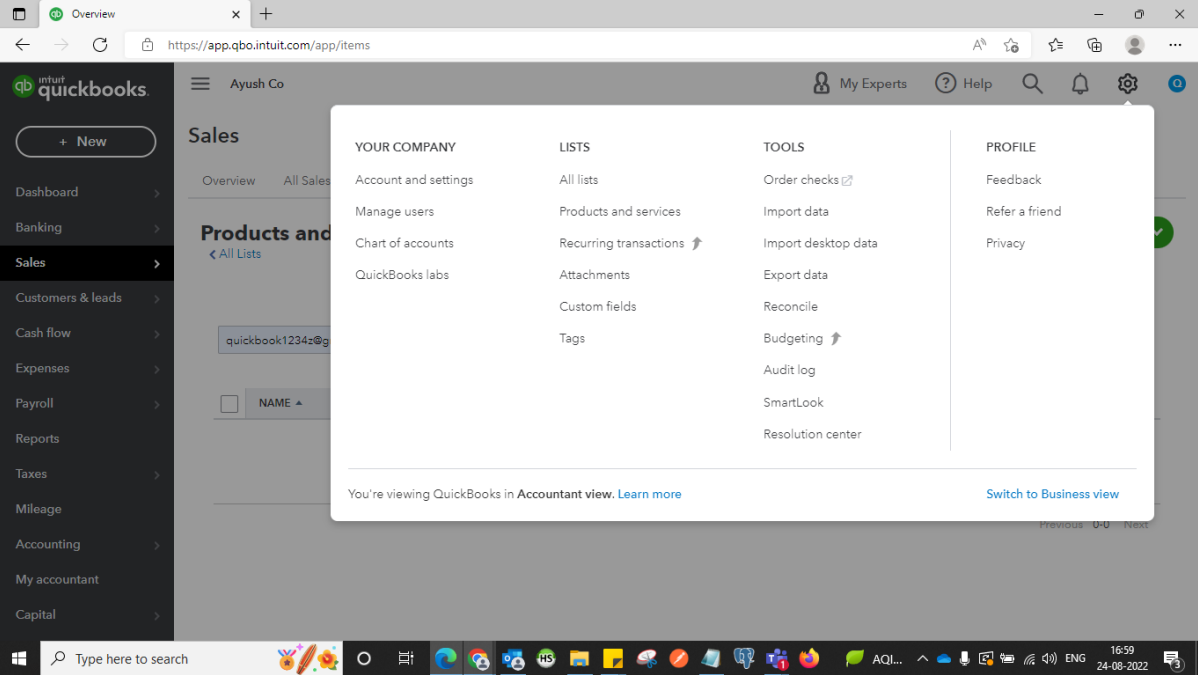
Once the account is created on QuickBooks click on the settings button (gear icon).
-
Now click Account and Settings under your Company.
-
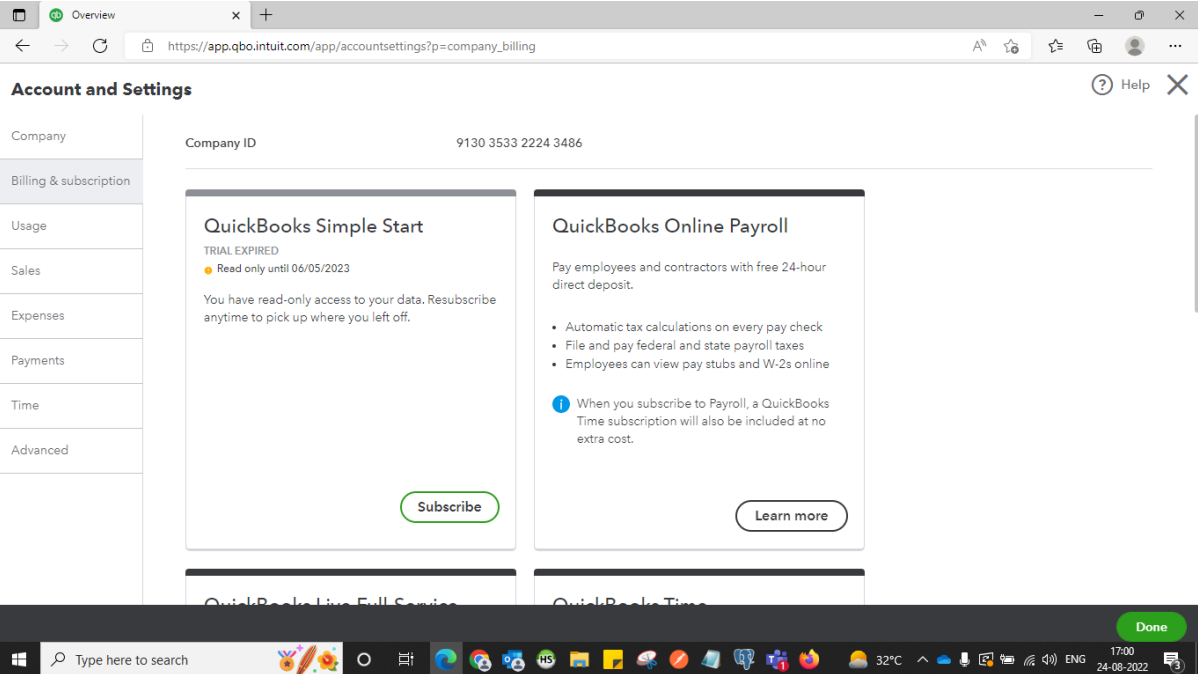
Now click on Billing and Subscription and on the top, you can find your Company ID.
Step – II:
-
Visit your Settings page in Innago and select the Integrations tab.

-
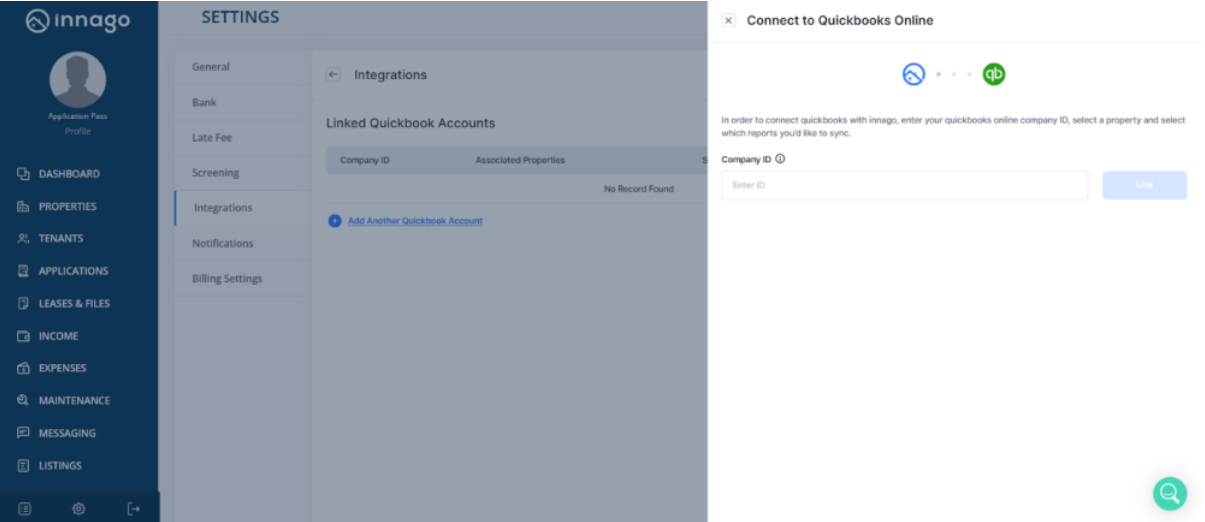
Click on View & Connect under Quickbooks and enter you QuickBooks Company ID.
-
Now click on the Link button. You will be taken to the Intuit Quickbooks website to provide login details for your Quickbooks account and to select your Company
-
Select your property type. You will have the option to Add as a Customer or to Add as a Class for your chosen properties. This will impact how data is synched over to Quickbooks.
-
Please note, if using the free or paid version of Quickbooks, you can have unlimited Customers within their software. If using the free version of Quickbooks, you can only have a maximum of 40 classes and sub-classes, meaning if you plan to synch more than 40 units from Innago, you will be required to pay for a premium version of Quickbooks. Keep this in mind when deciding to synch properties as a Customer versus as a Class.
-
-
After making your selection, you can now select the properties you want to integrate and what data you would like to synch. You have the option of synching both Invoices/Payments and Expenses.
-
Once you’ve made all your selections, click “Integrate Now” to complete the setup.
-
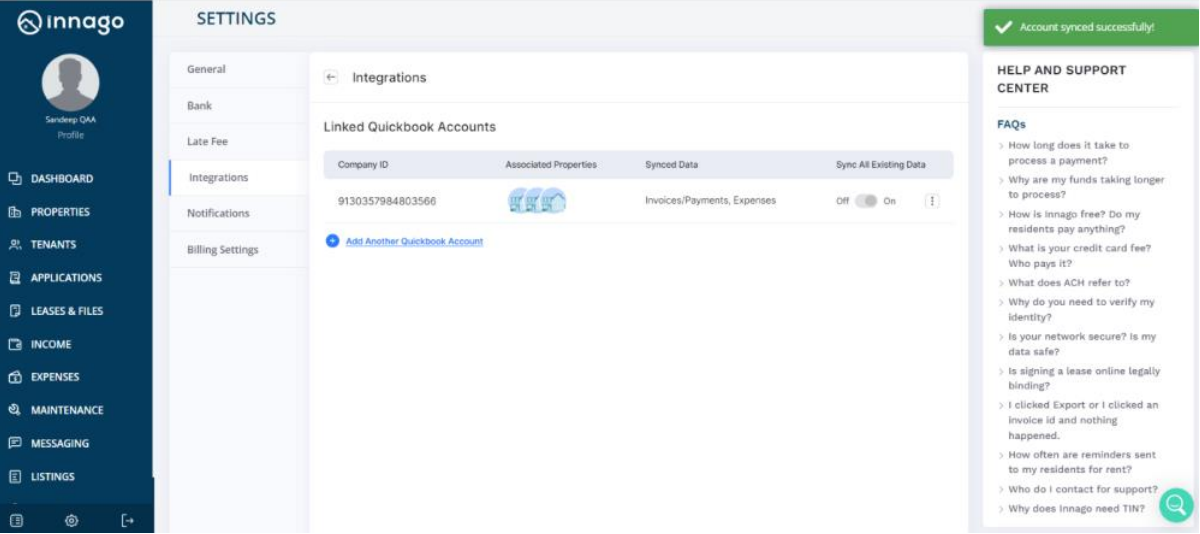
The following screen will show you all of your currently linked Quickbooks accounts. Here you can review the Company ID, any associated properties, and which data is being synched. If you would like to sync existing data, you’ll have the option to toggle on the selection from here as well.
-
Clicking the action menu (three vertical dots) to the right of the account will give you the following options:
-
View Synched Reports
-
Edit
-
Remove
-
-
In the report you can filter data by Properties, Units, Leases, Invoice, Payments, and Expenses and can check their sync status.
Please note, manually recorded payments and expenses will synch immediately with Quickbooks, however electronic payments will only synch after they are disbursed to your bank account. In order to check our synched data in QuickBooks, see the next set of steps below.
Step-III
-
Login with QuickBooks and go to Sales on the left side.
-
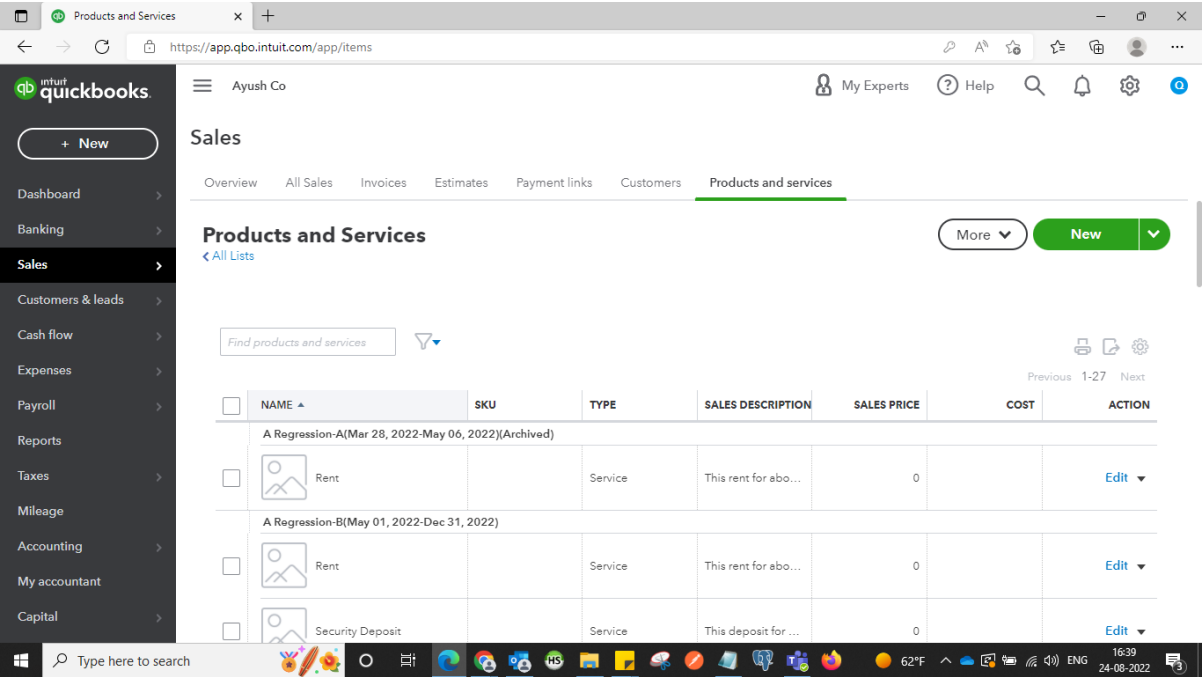
Click on Products and Services where you can check all leases data for any property.
-
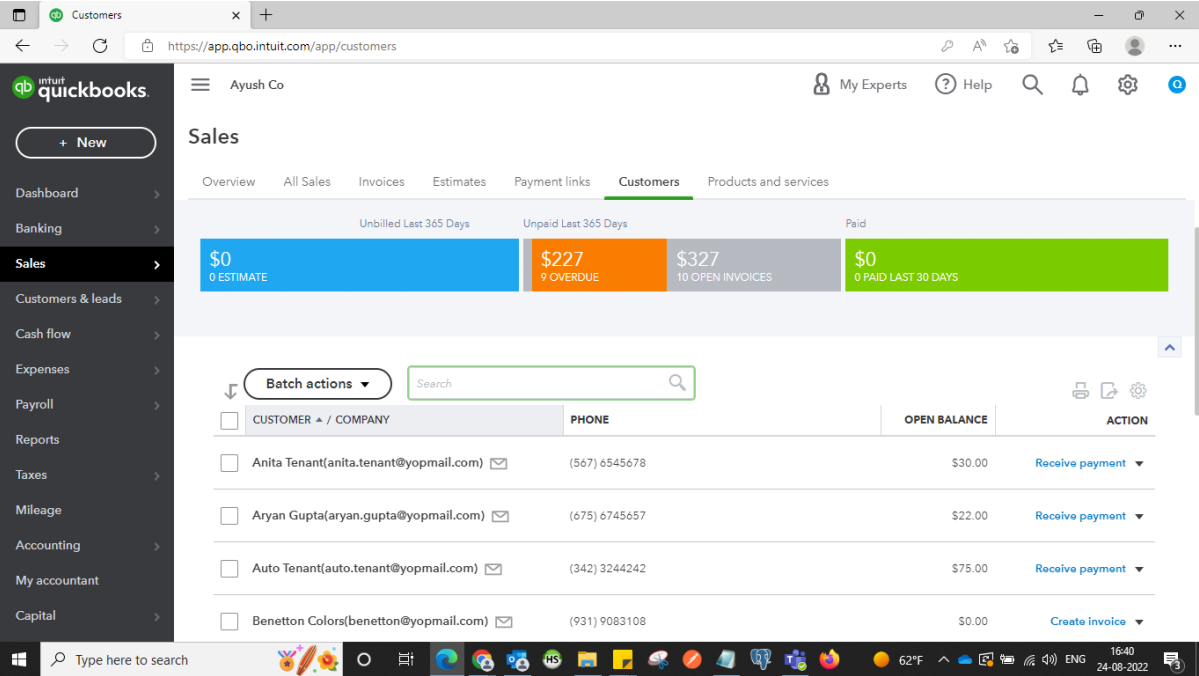
Click on Customers where you can check all tenants’ details.
-
Please note, if you’ve added properties by class, your leases will synch as “customers” in Quickbooks, and units will synch as “sub-classes”.
-
-
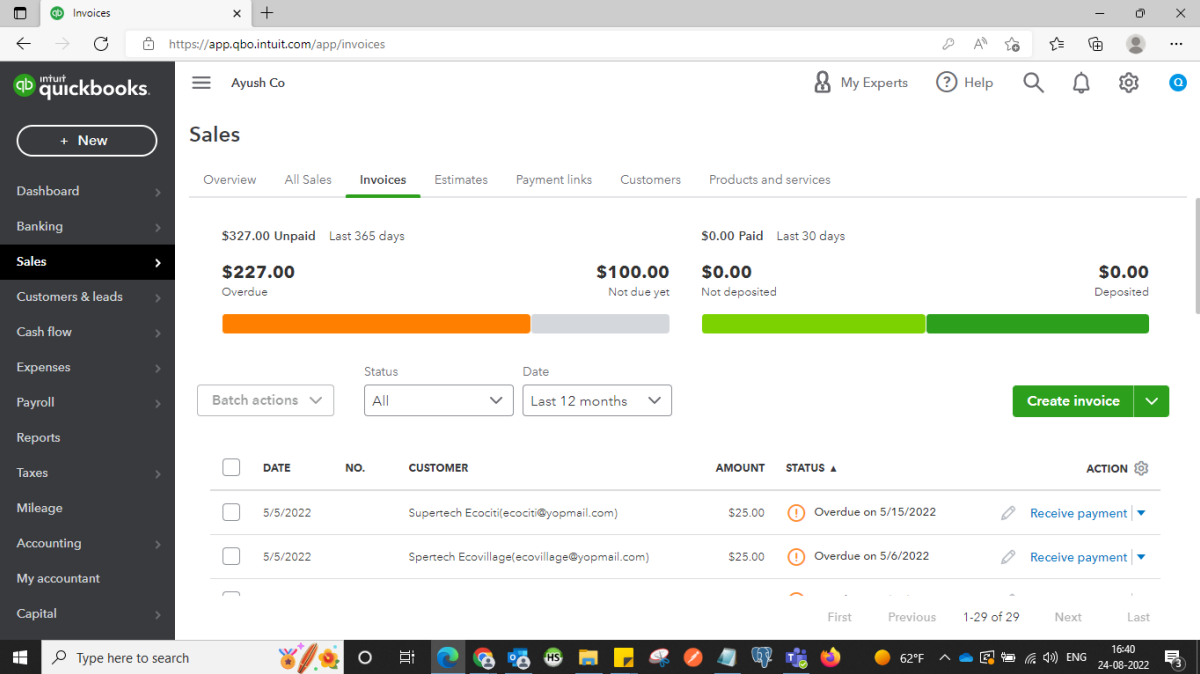
Click on Invoices where you can check invoice details.
-
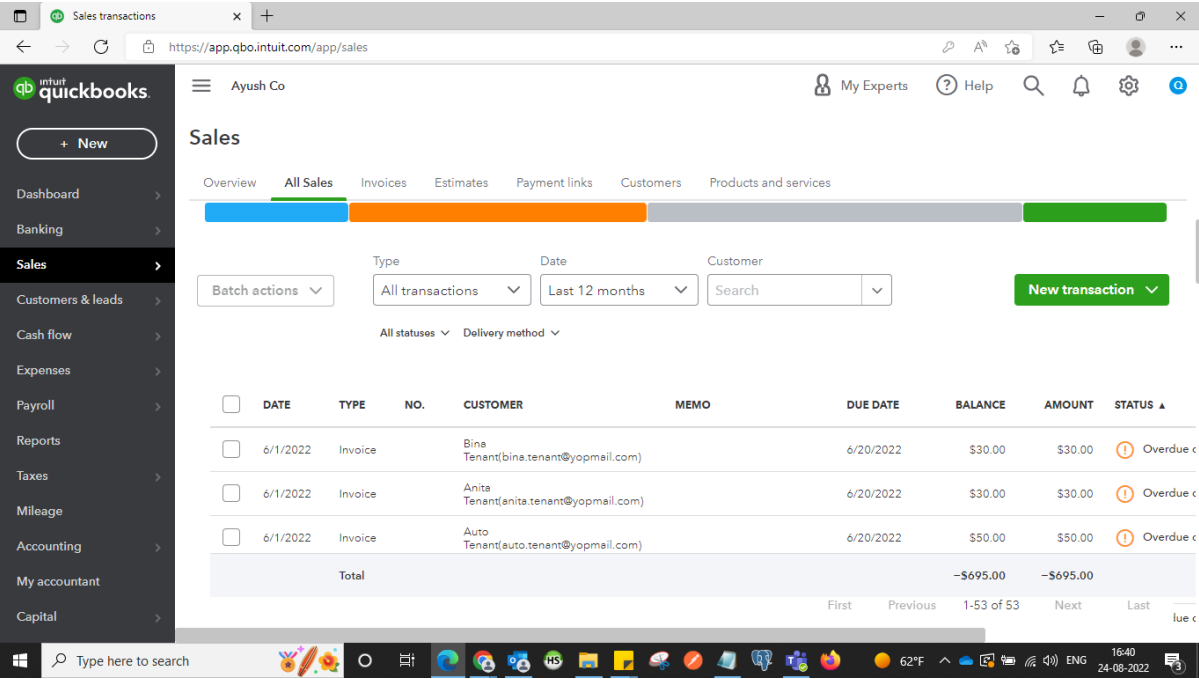
Click on All Sales where you can check all transactions with respect to customers.
For more direct help with on using Quickbooks Online, please click here.


