In order to enable tenant screening, you’ll just go to your Settings by clicking the gear icon located near the bottom left corner of your screen. On the General tab, you’ll toggle on the option for Application and Tenant Screening.
You’ll notice that there is now a Screening tab available on your Settings page. As soon as you enable tenant screening, you’ll be navigated here to finish setting up your screening options. For more information on the screening settings and the different tiers of screening, please click here.
Once application and screening services are set up on in your account, you can begin requesting applications from prospective tenants. There are two places from which you can request and review applications:
1. If you know the property, lease dates, rental amount, etc. for the tenant(s), you can require that they fill out an application as part of the Add Tenant process.
2. If you have not yet determined the lease terms for the tenant(s), you can first request an application from the Applications page.
To request an application from the Applications page:
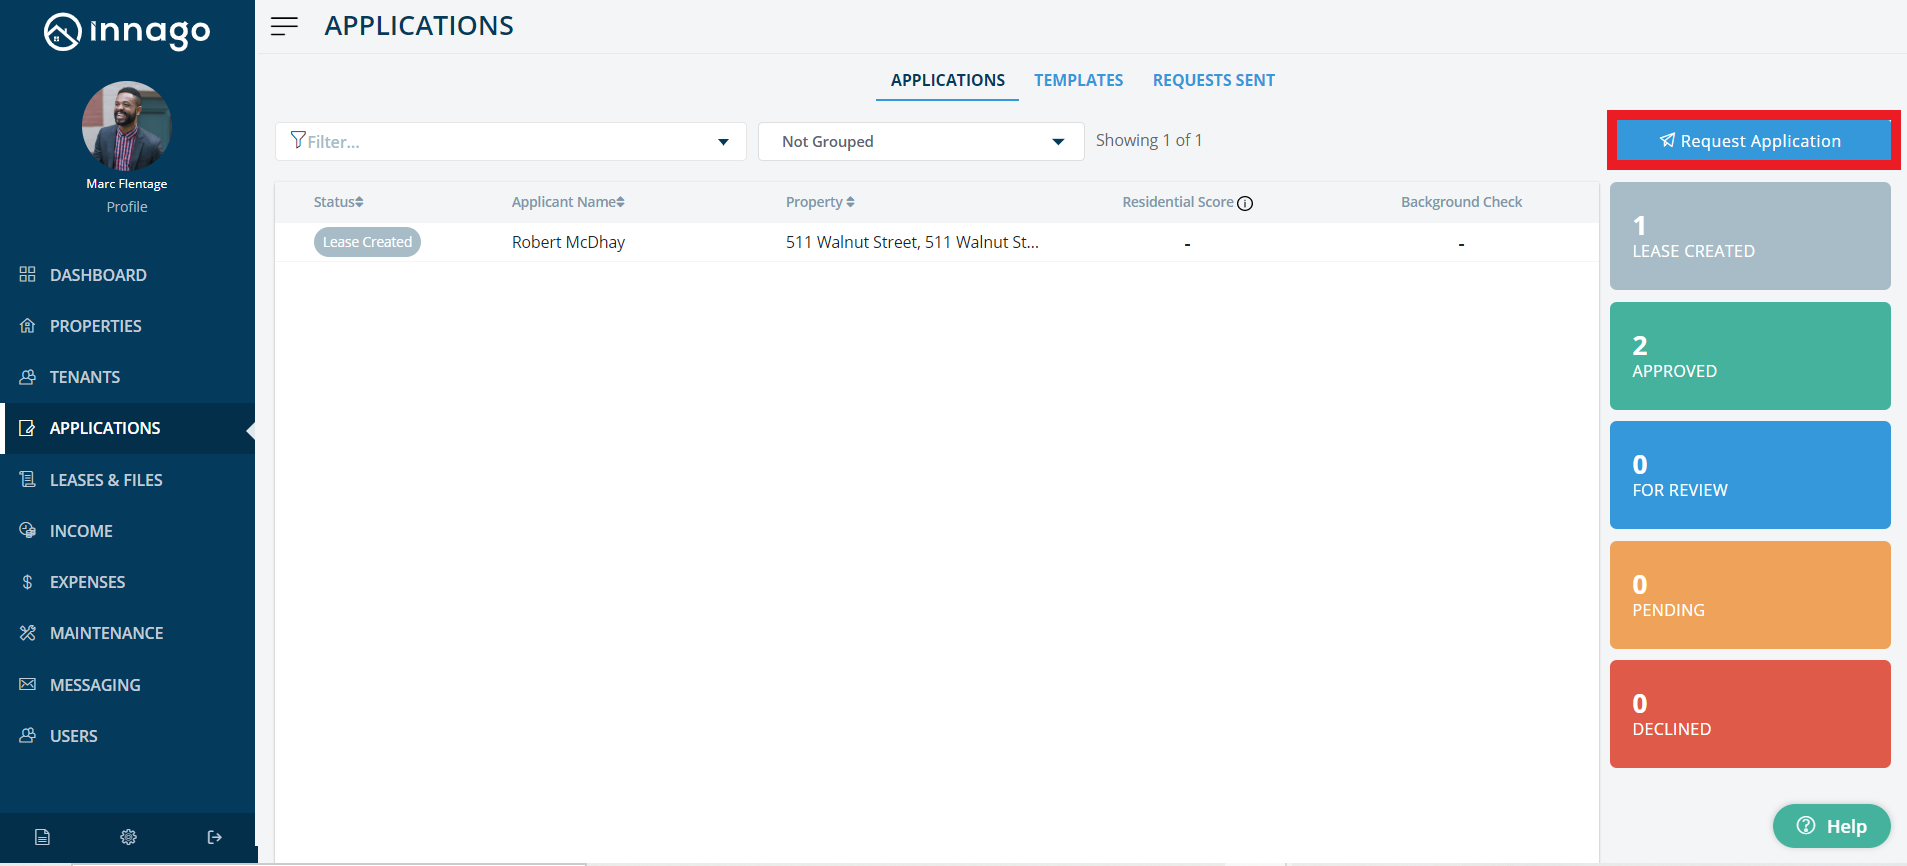
1. From the Innago menu on the left, click “Applications”.
2. In the top right corner, click “Request Application”.
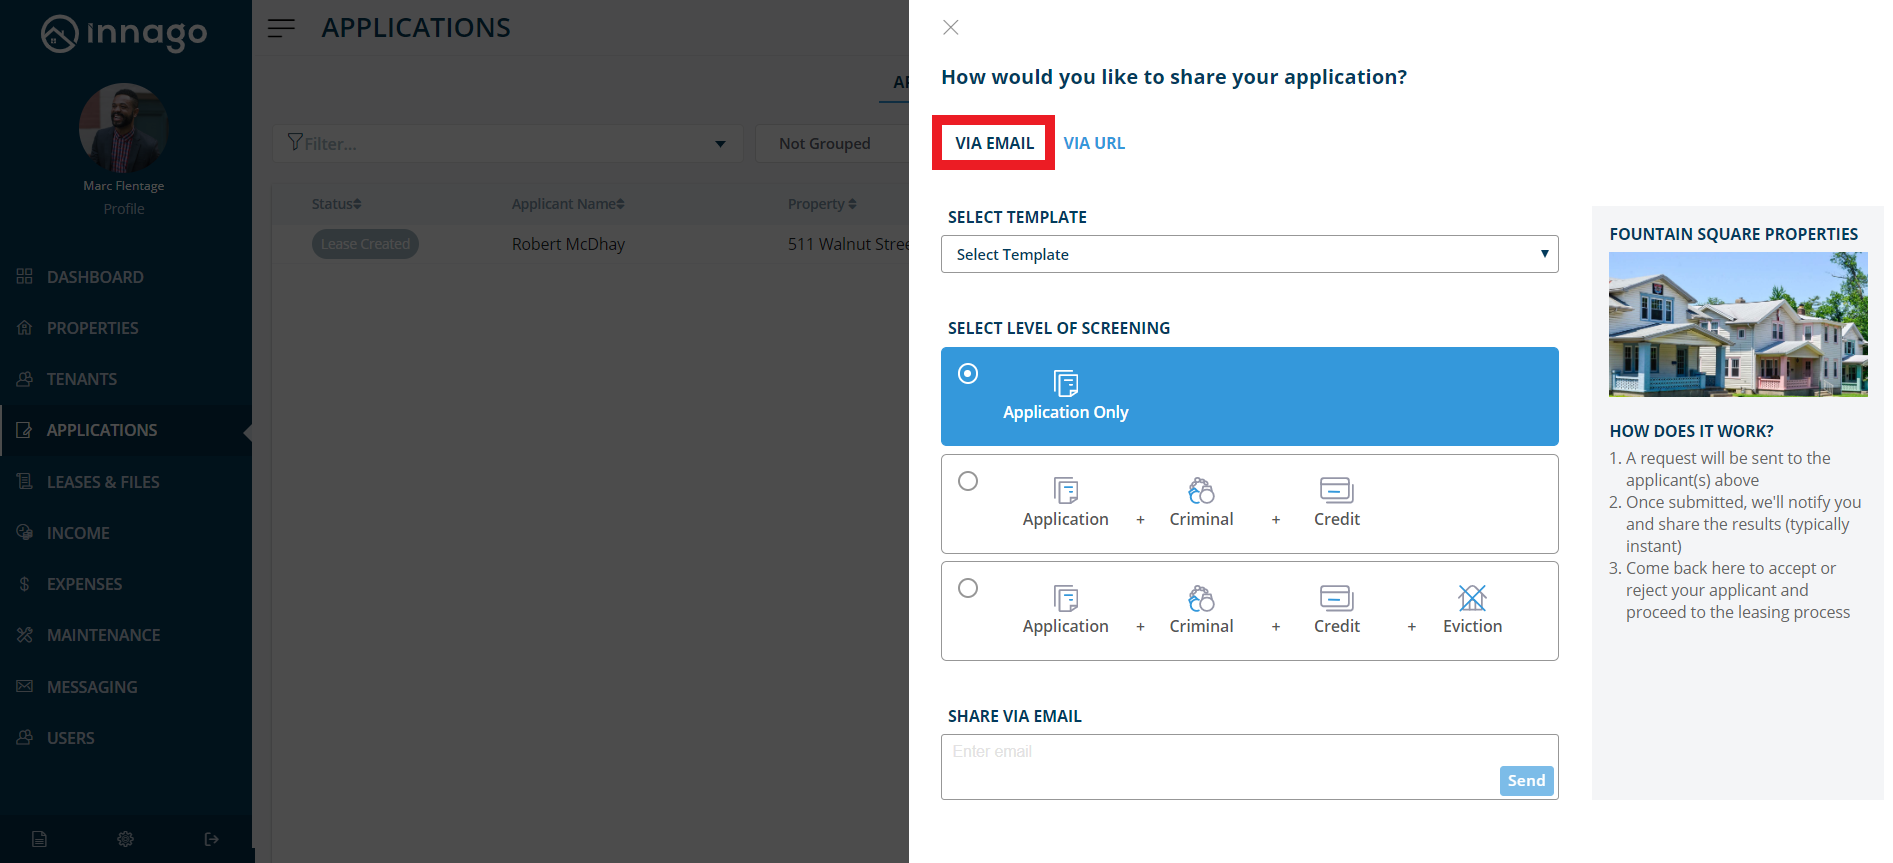
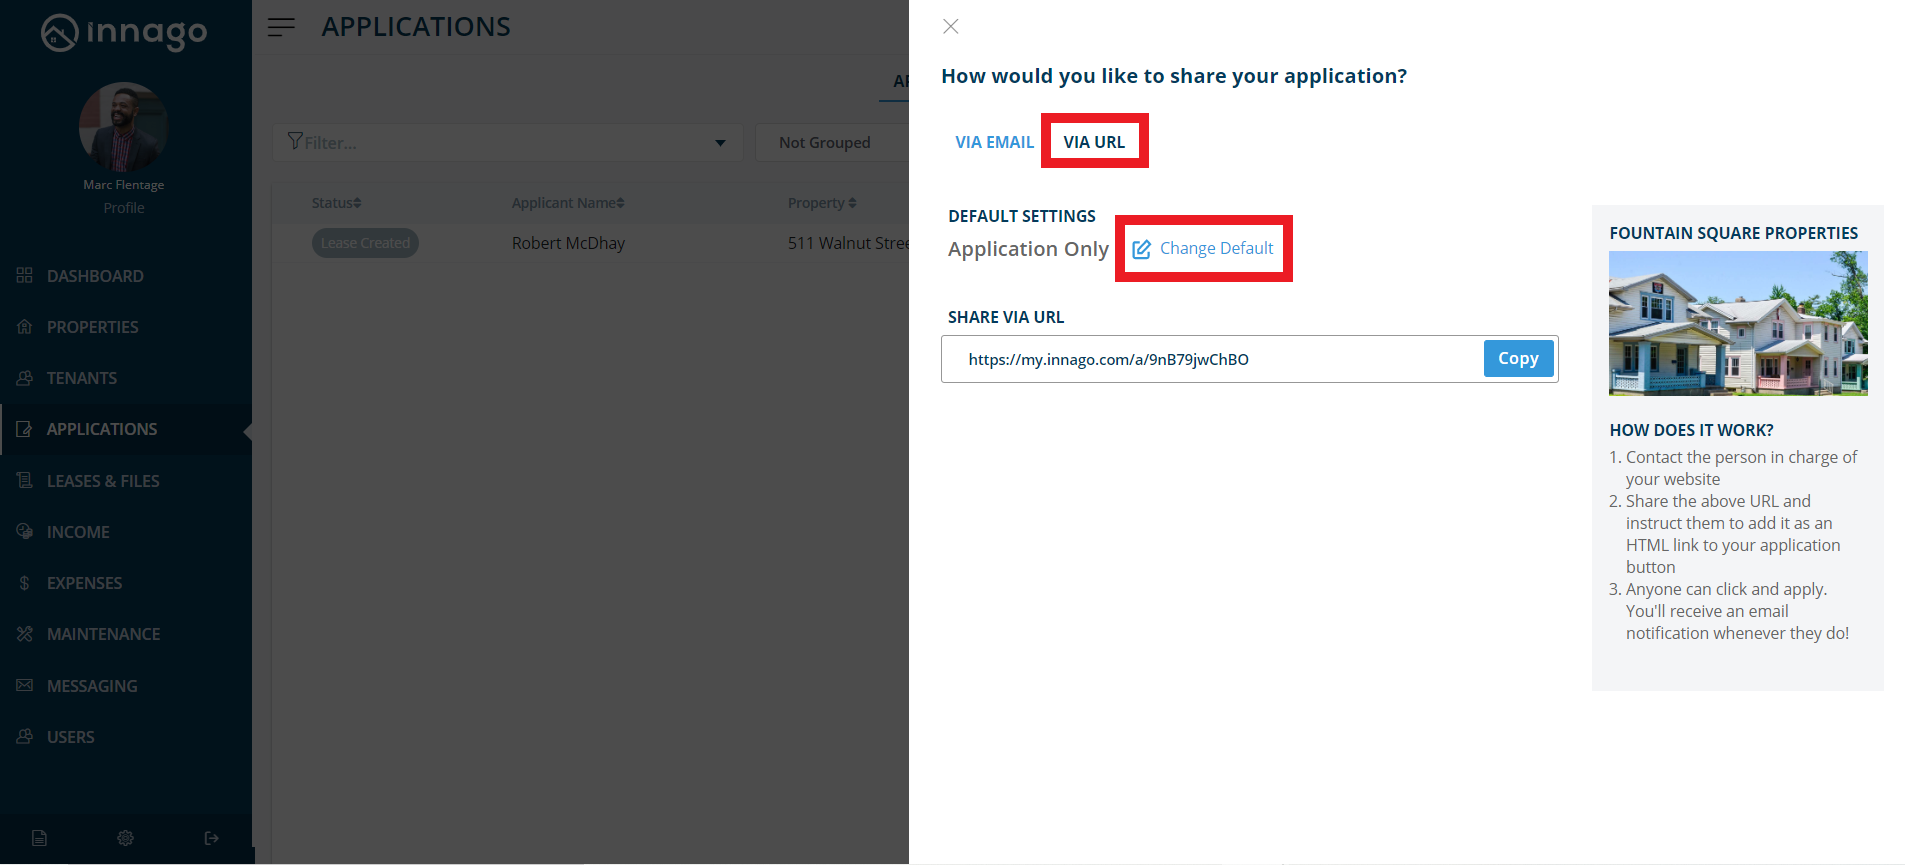
3. You can send out your application in the following ways:
• Share via Email – Enter your applicant’s email address here and your application will be accessible directly through their inbox.
• Share via URL – Copy the application URL. Anyone can click this link and use it. You can send it directly via email and text. You can also add it anywhere you market your rentals (e.g. Zillow, Craigslist, or your website). Try pasting this URL into your web browser to see what it will look like for your applicants!
Check out our tutorial video to learn more – https://vimeo.com/539398525


