You can add tenants into Innago that are already on an active lease, even if the lease began before you started using Innago.
To add a current tenant to Innago:
1. From the dashboard, click ‘Add Tenant’.
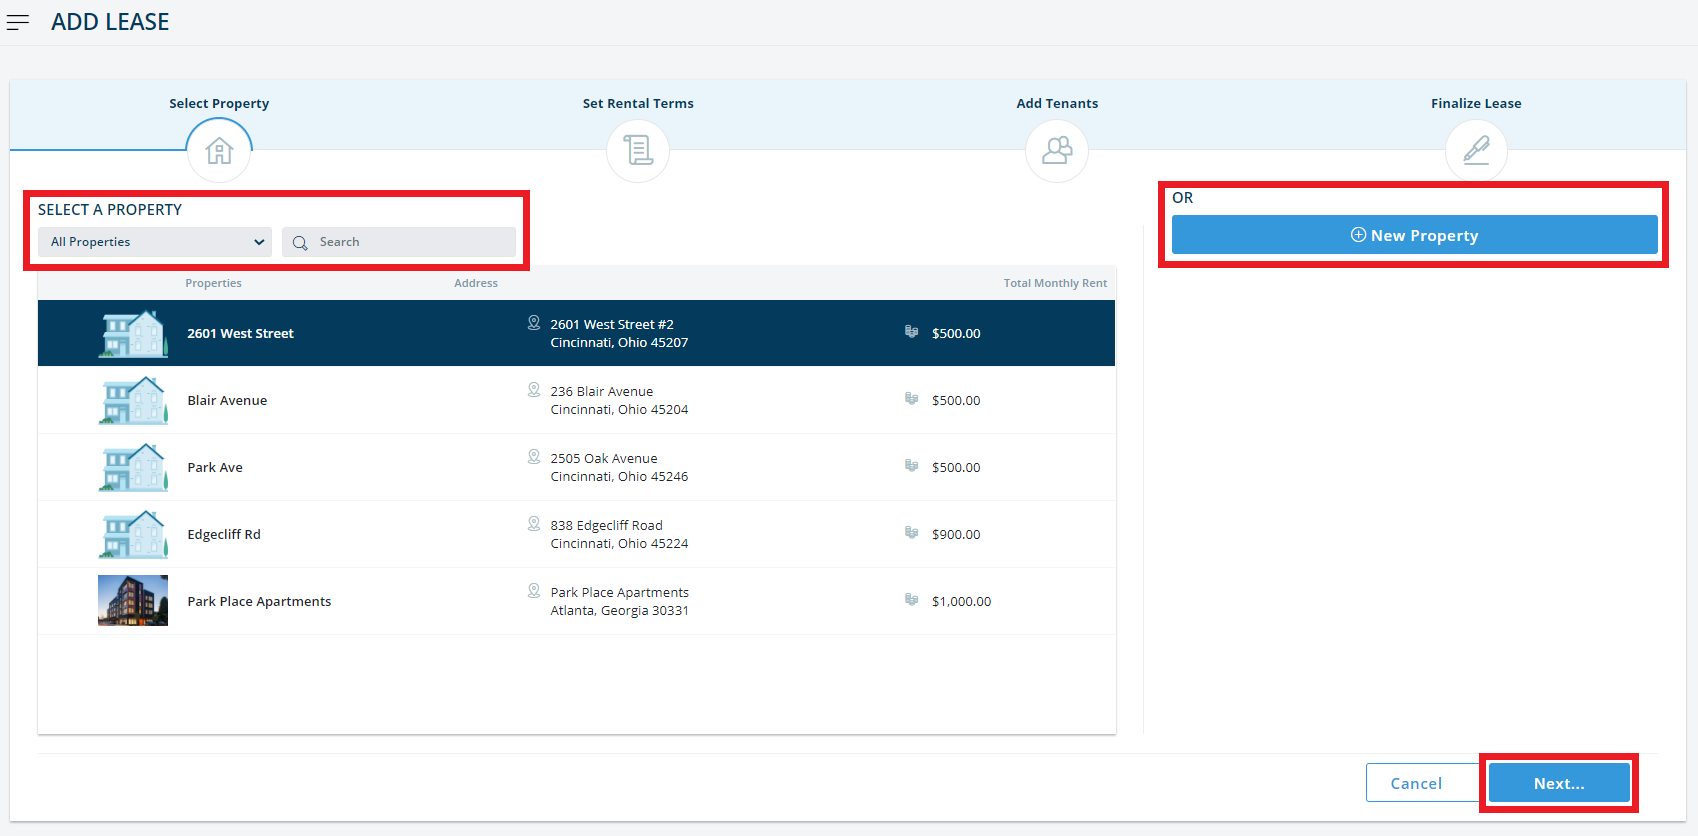
2. On the left side of the screen, you’ll see a list of properties you’ve already added into Innago. Select the property to which you’d like to add a tenant and click ‘Next’.
3. If the property is not listed, click ‘+ New Property’ to add it.
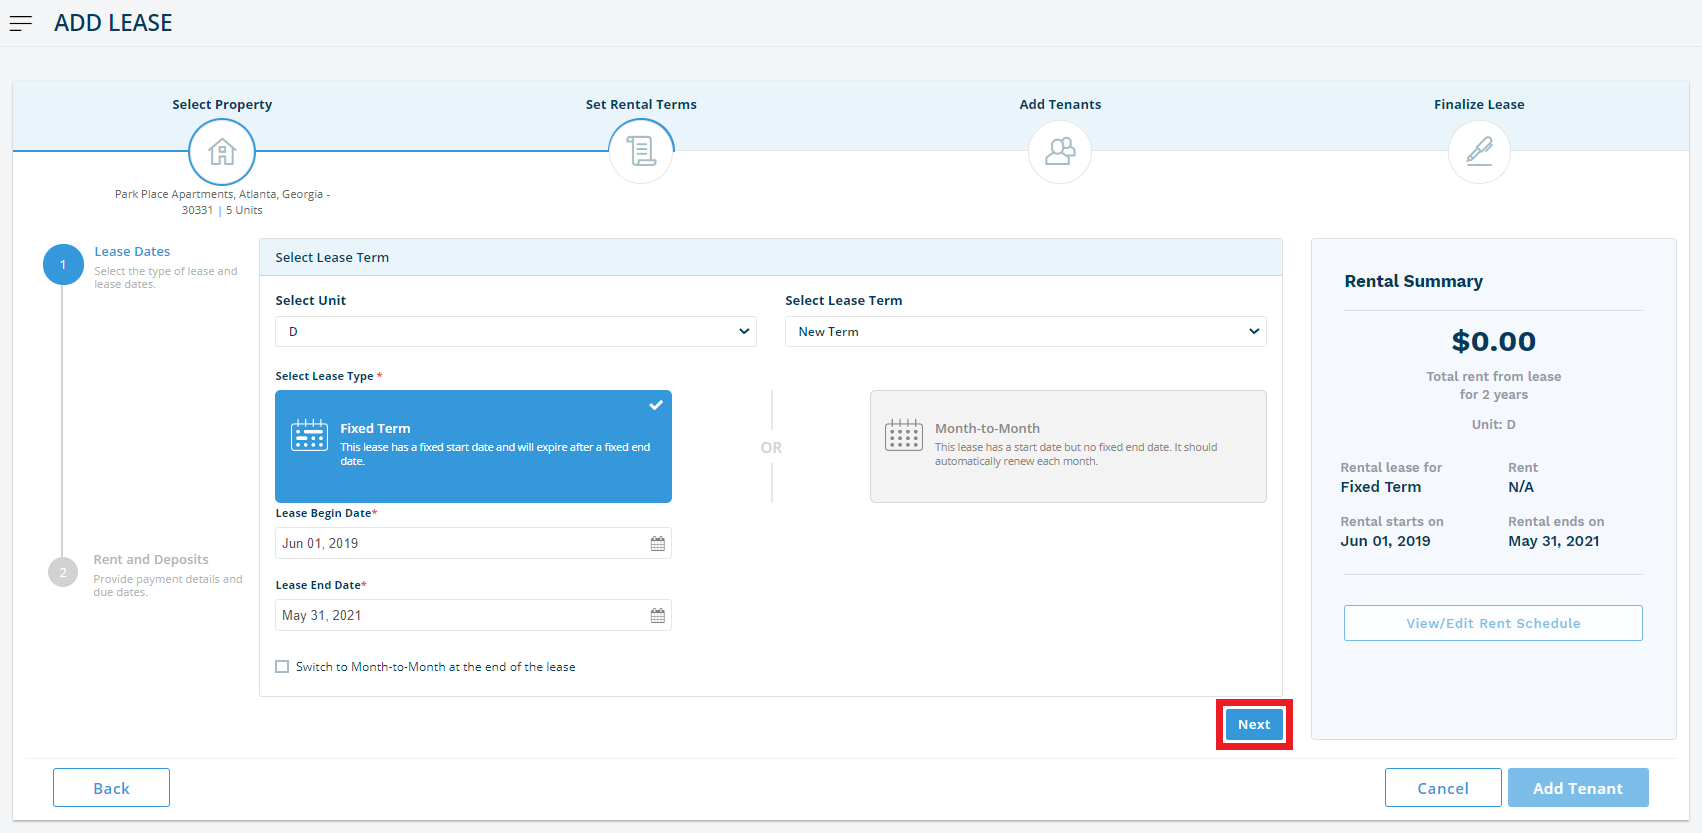
4. After selecting the correct property, make sure you’ve chosen the right unit.
5. Select the lease type and begin entering the lease start and end date (if it’s a Fixed Term lease)
6. Here, you can enter any start or end date you like, even if it is in the past.
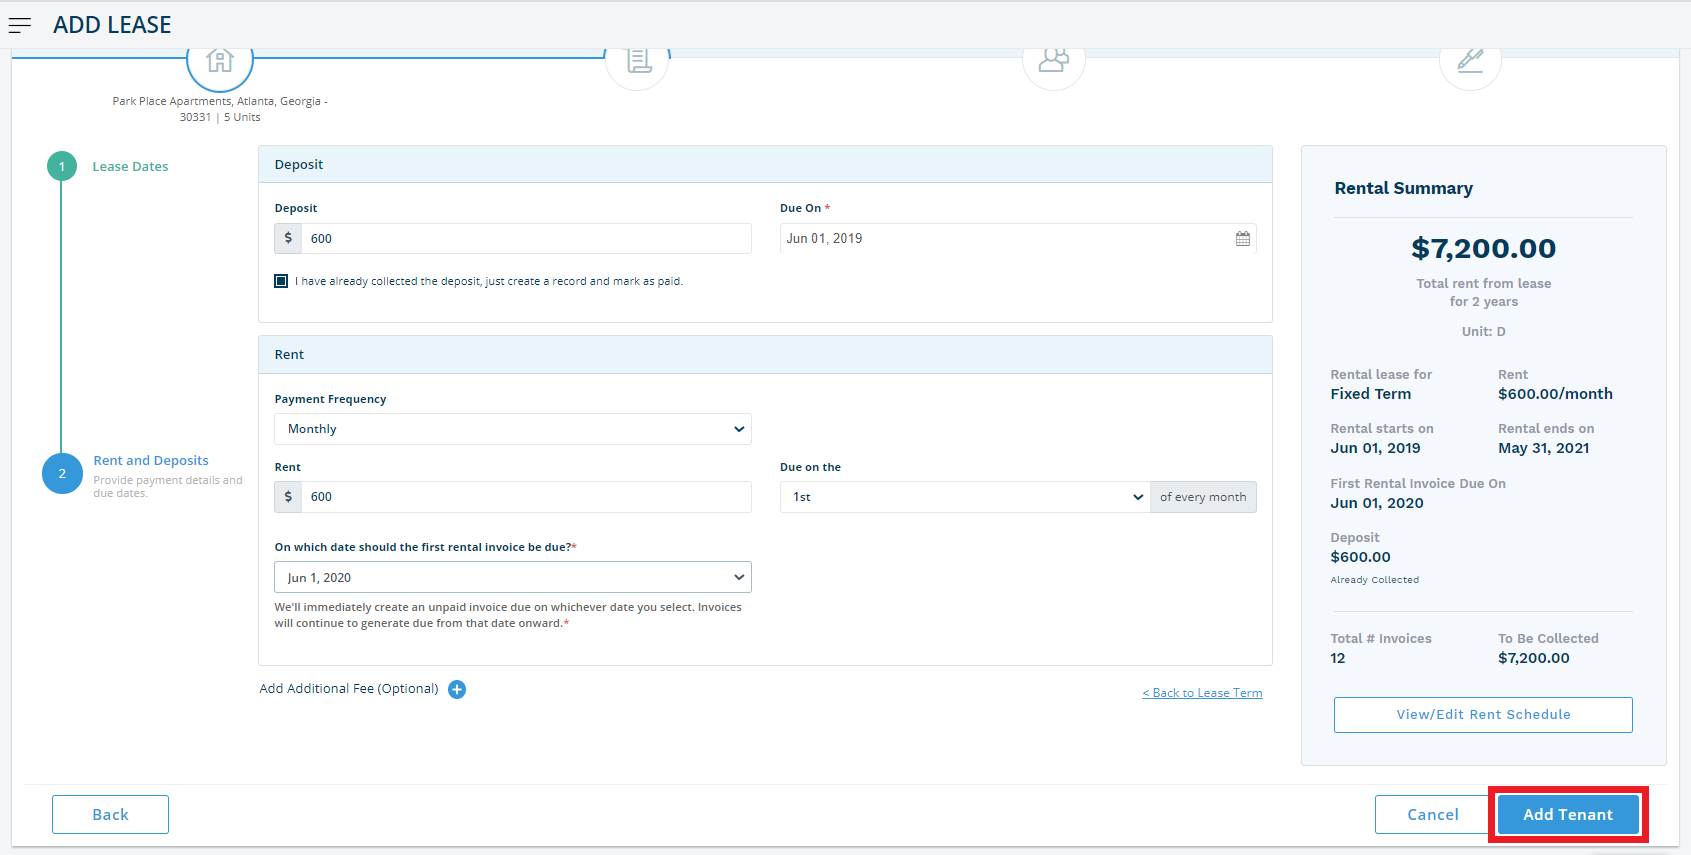
7. When entering the rent amount, you will be prompted to select the first date on which you would like a rental invoice to be due in Innago. Innago will only generate invoices that are due after that date.
8. Once complete, review the terms of your lease in the summary section and, if everything looks good, click the button that says, ‘Add Tenant’.
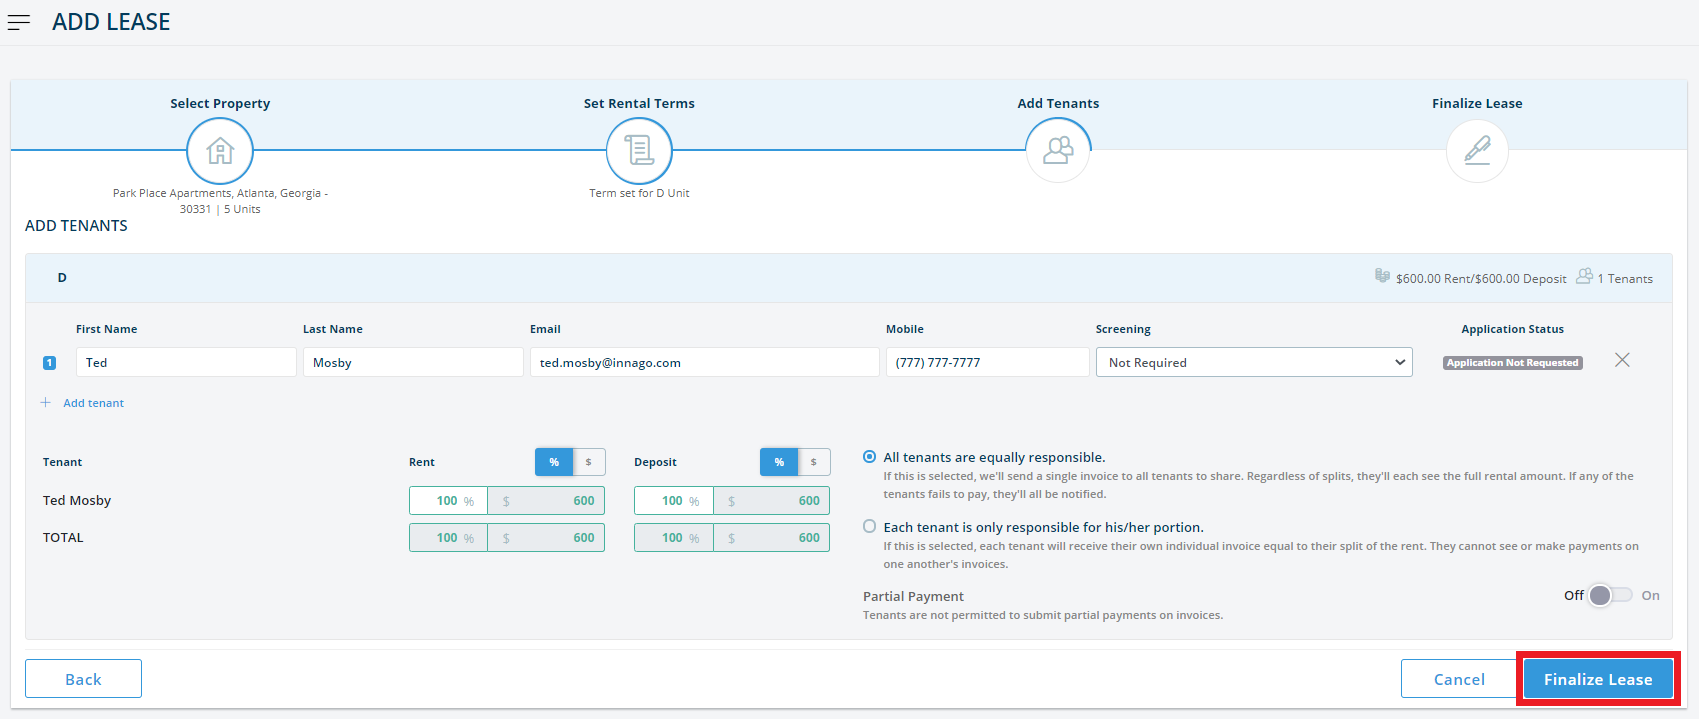
9. On this page, add tenants by name, email, and phone number. If you have screening services turned on, you will be prompted to select a screening level for the tenant. Select ‘Not Required’ to proceed (assuming you don’t need to screen tenants that are already renting from you!).
10. You can also set rental splits and decide whether or not you’d like to accept partial payments.
11. Once all tenants have been added, click ‘Finalize Lease.’
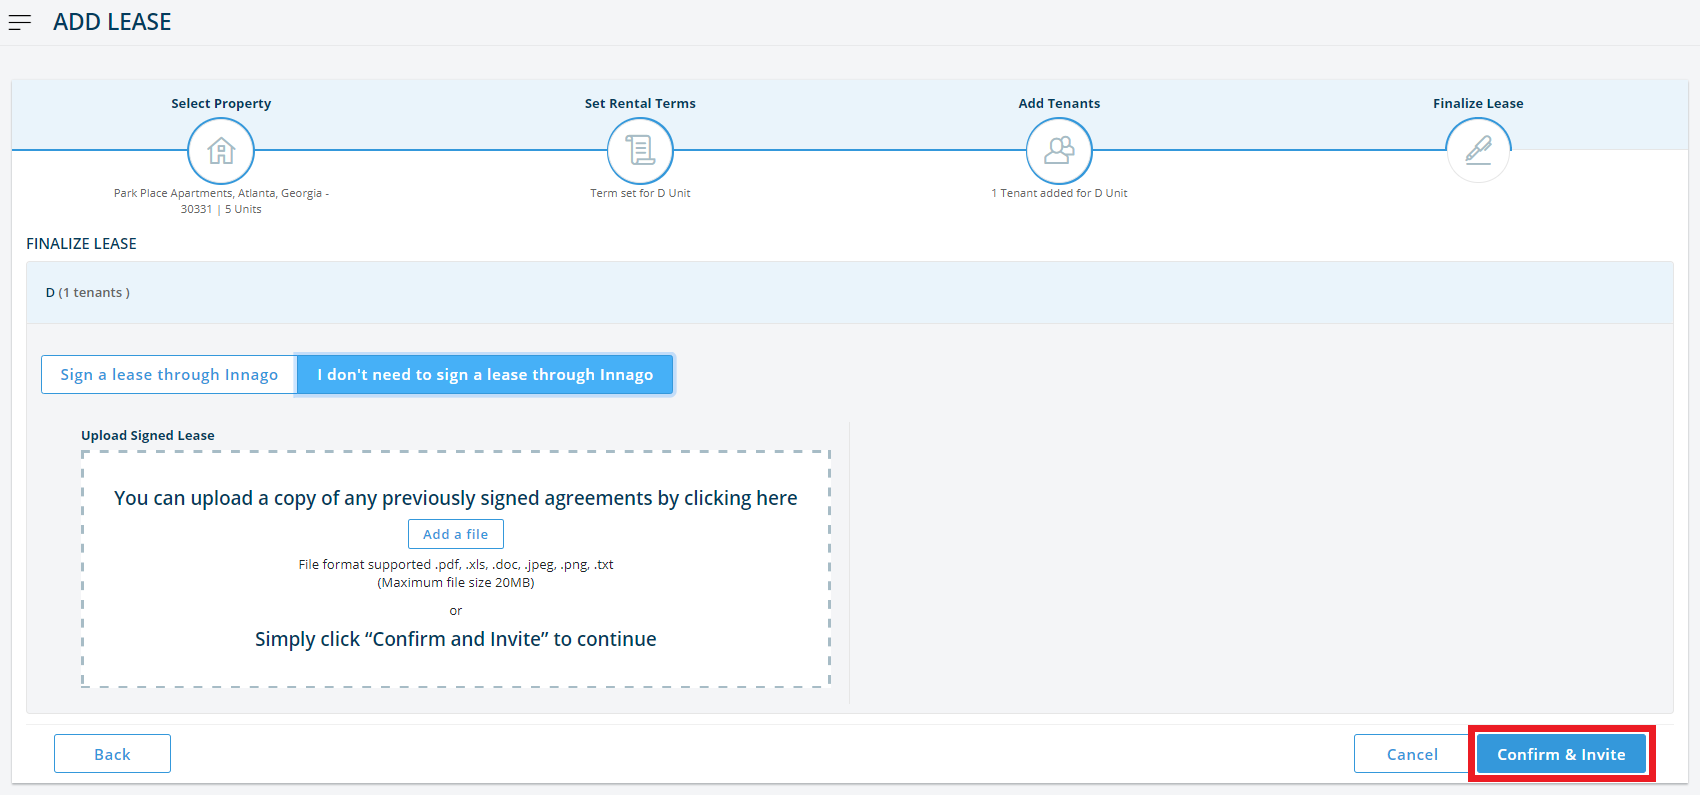
12. Here, select the option ‘I don’t need to sign a lease through Innago’ (again, assuming you’ve already done that!). You can choose to either upload a copy of your signed lease agreement or click ‘Confirm and Invite’ to continue.
Check out our tutorial video to learn more! – https://vimeo.com/500578120

