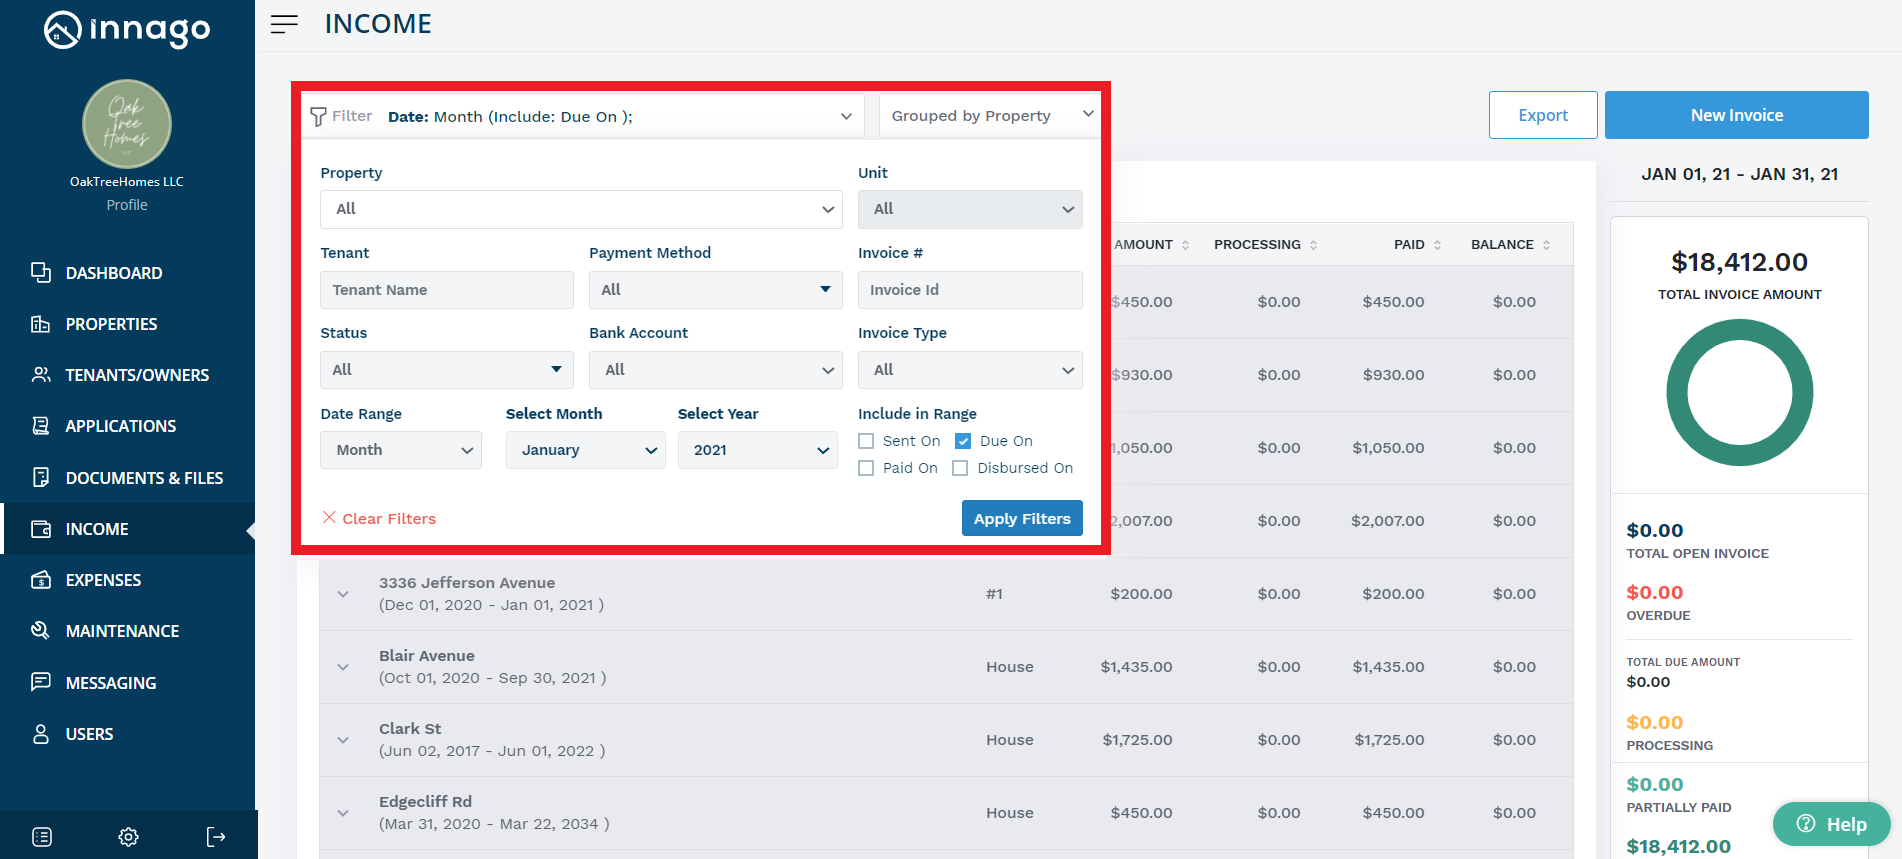
1. Property – you can view invoices for a specific property, or all properties at once.
2. Unit – once a property is selected, you can view invoices for a specific unit, or all units at once.
3. Tenant – start typing a tenant’s name. We’ll give you some auto-fill options based on the letters you enter. Once selected, you’ll only see invoices associated with that tenant.
4. Payment Method – you can select all payment methods, or a combination of Credit Card, Check, ECheck, Cash, and Money Order payments.
5. Invoice Number – if you know the exact invoice number you’re looking for, you can enter it here.
6. Status – you can select all payment statuses, or a combination of Processing, Overdue, Partially Paid, Open, and Paid statuses.
7. Bank Account – if you use more than one bank account to collect funds in Innago, you can view invoices for bank accounts, or one specifically.
8. Invoice Type – you can filter to view all invoice types at once or select a specific invoice type. Every time you add a new invoice type, it will appear in this drop-down to be used as a filter.
9. Date Range – by default, Date Range will be set to ‘Month.’ In this case, you can select the month and year to which you’d like to limit your invoices. You can also choose date ranges like ‘Week,’ ‘Quarter,’ ‘Year,’ and ‘Custom Range.’ ‘Year’ and ‘Custom Range’ are a great way to find an invoice you’re having trouble locating.
10. Include in Range – there are three ways to apply your date filters: by Sent On date (the date the invoice was generated in Innago and sent to the tenant), by Due On date, and by Paid On date.


