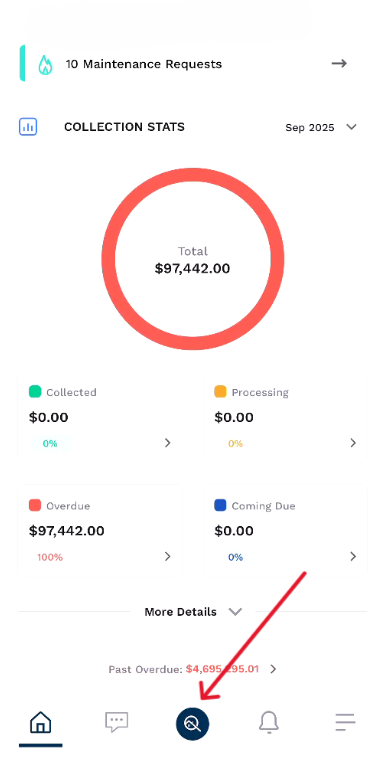
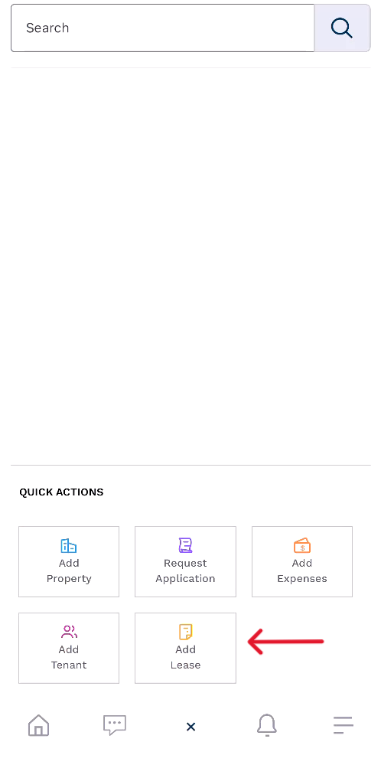
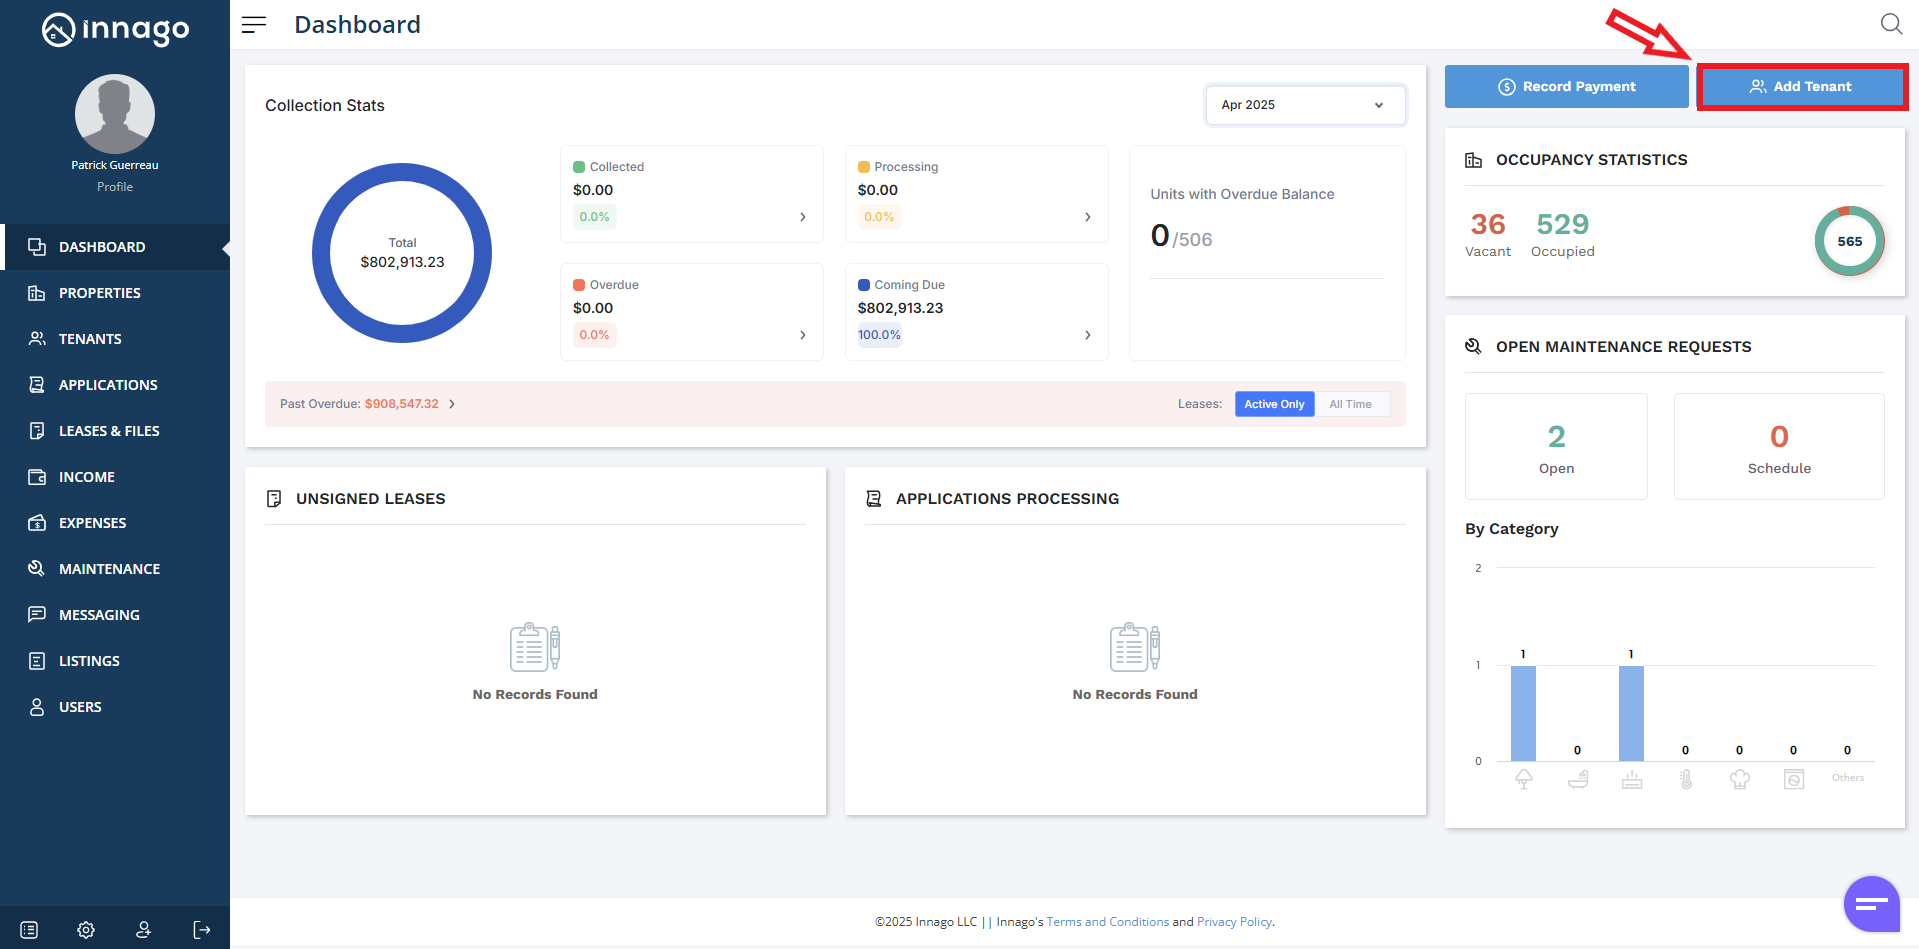
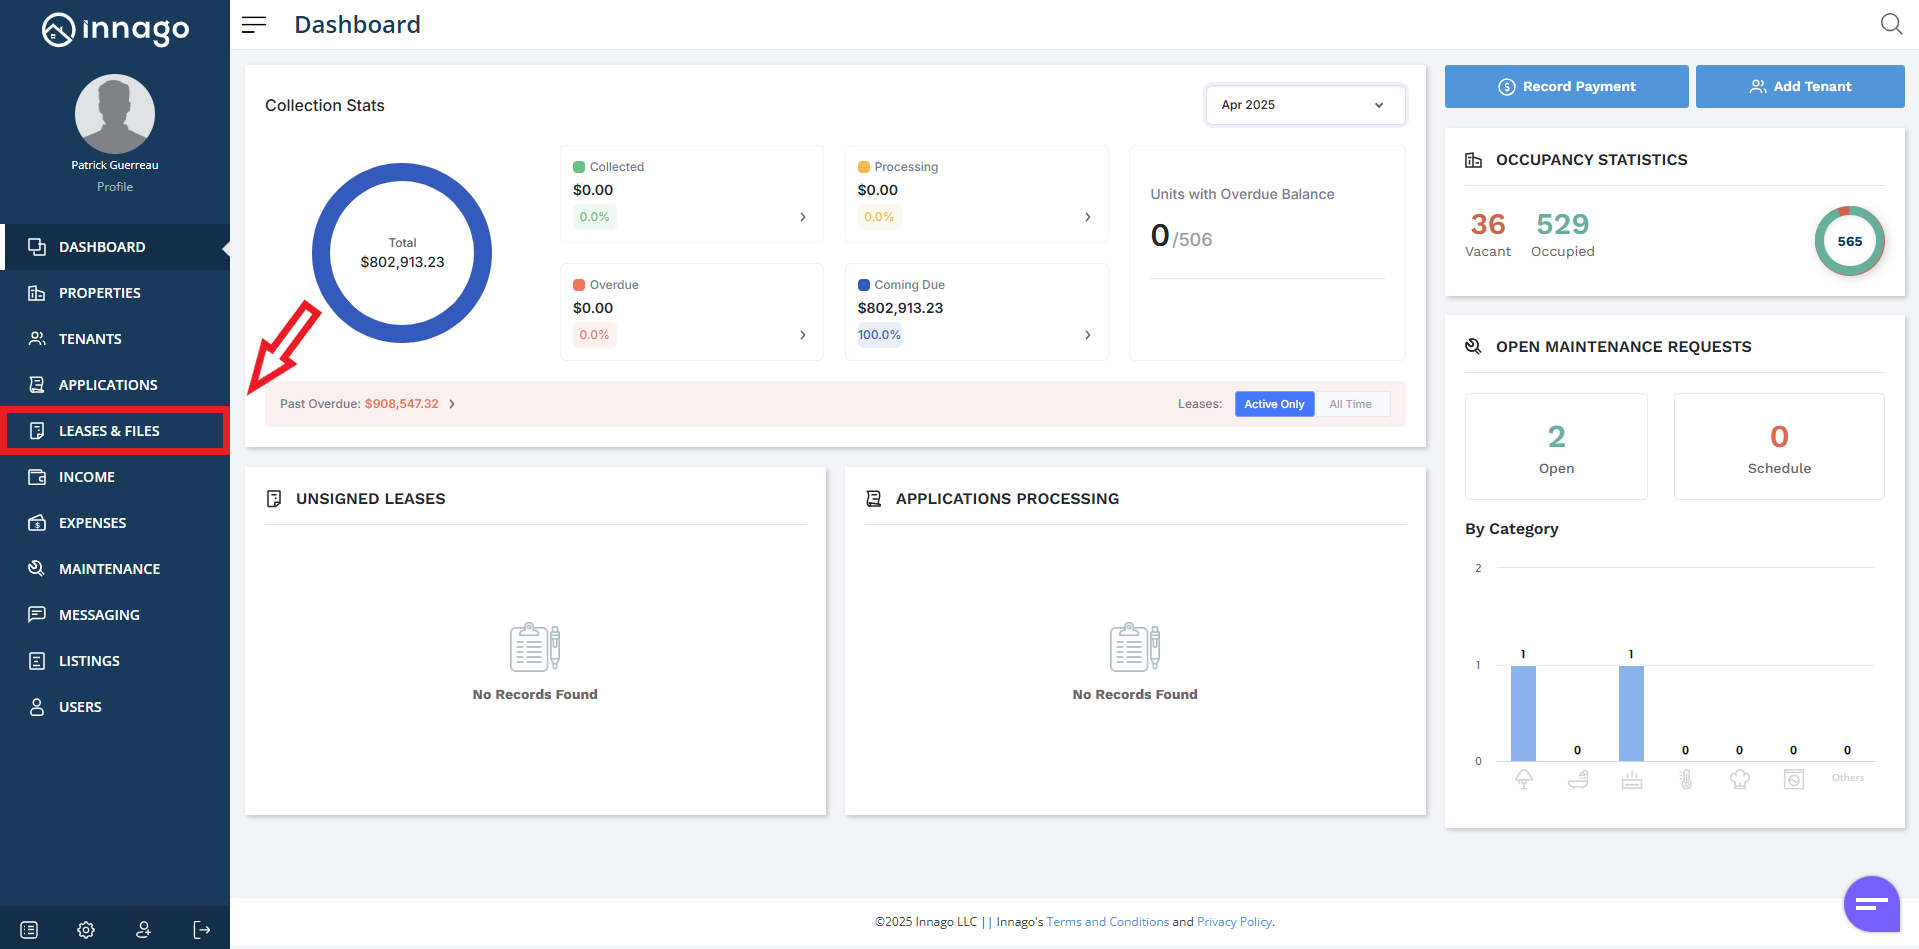
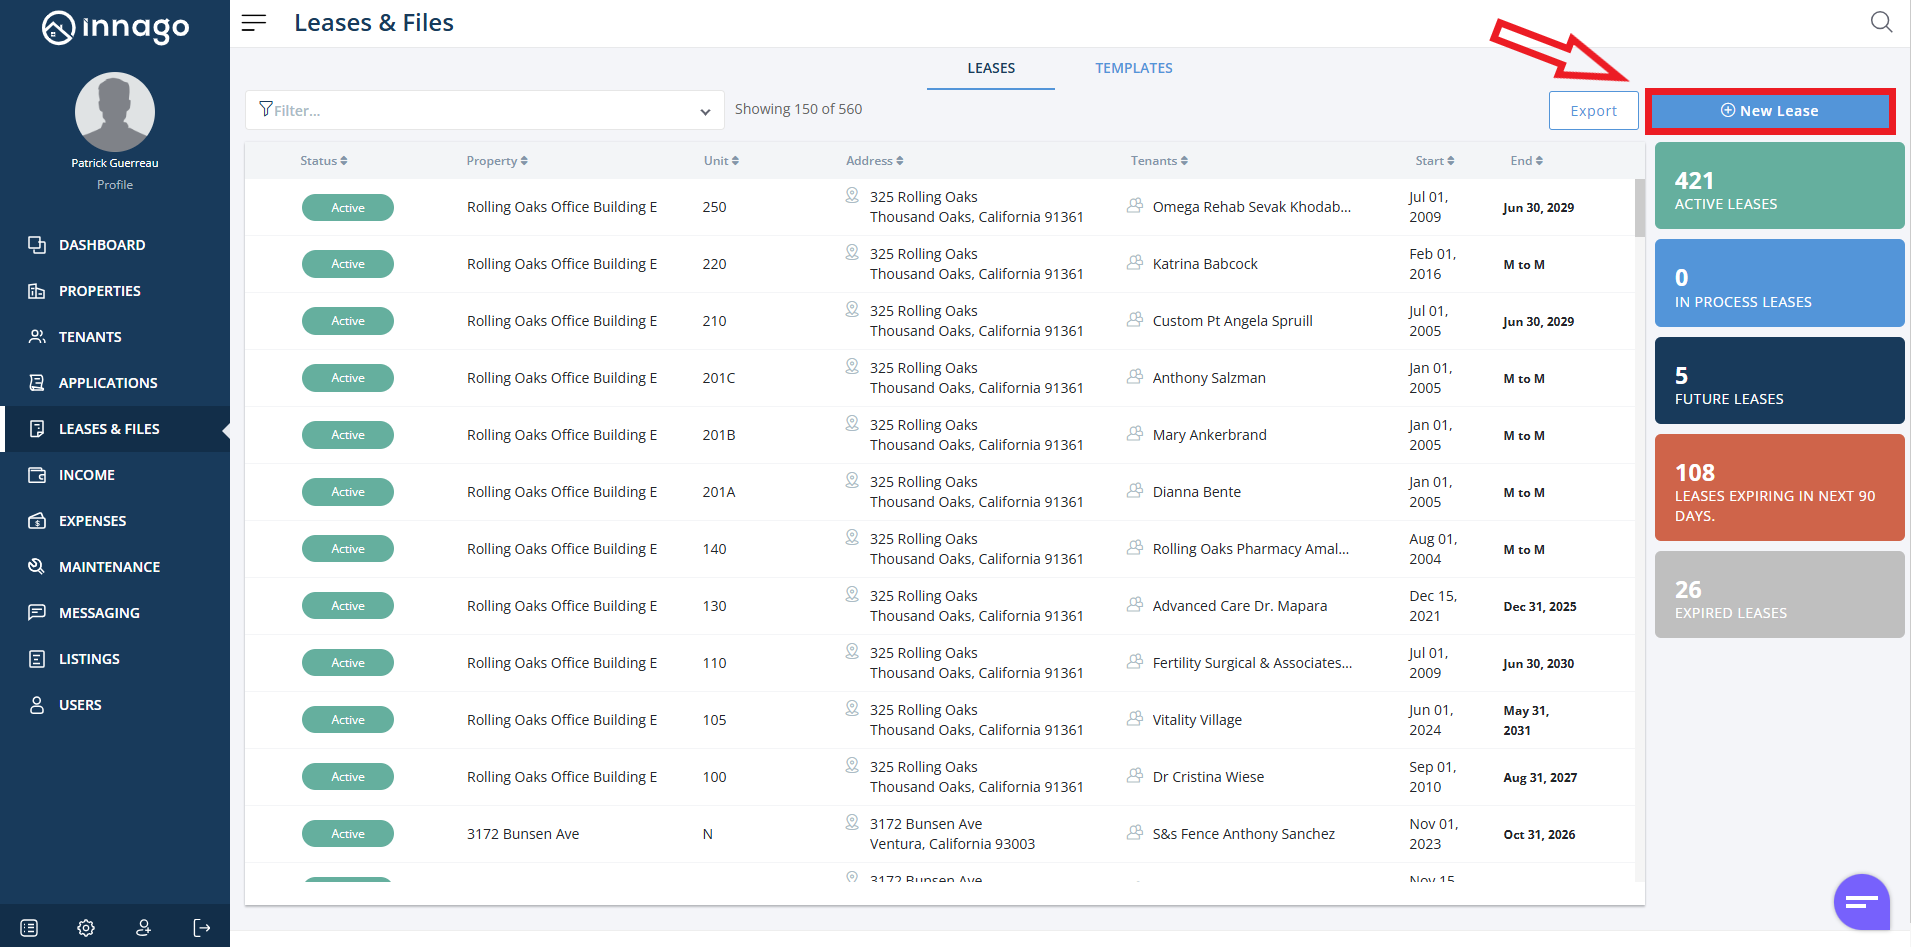
1. From your Dashboard, click “Add Tenants” in the upper-right-hand corner, or click “Leases and Files”. If you clicked “Leases and Files”, click “New Lease” on the following screen.
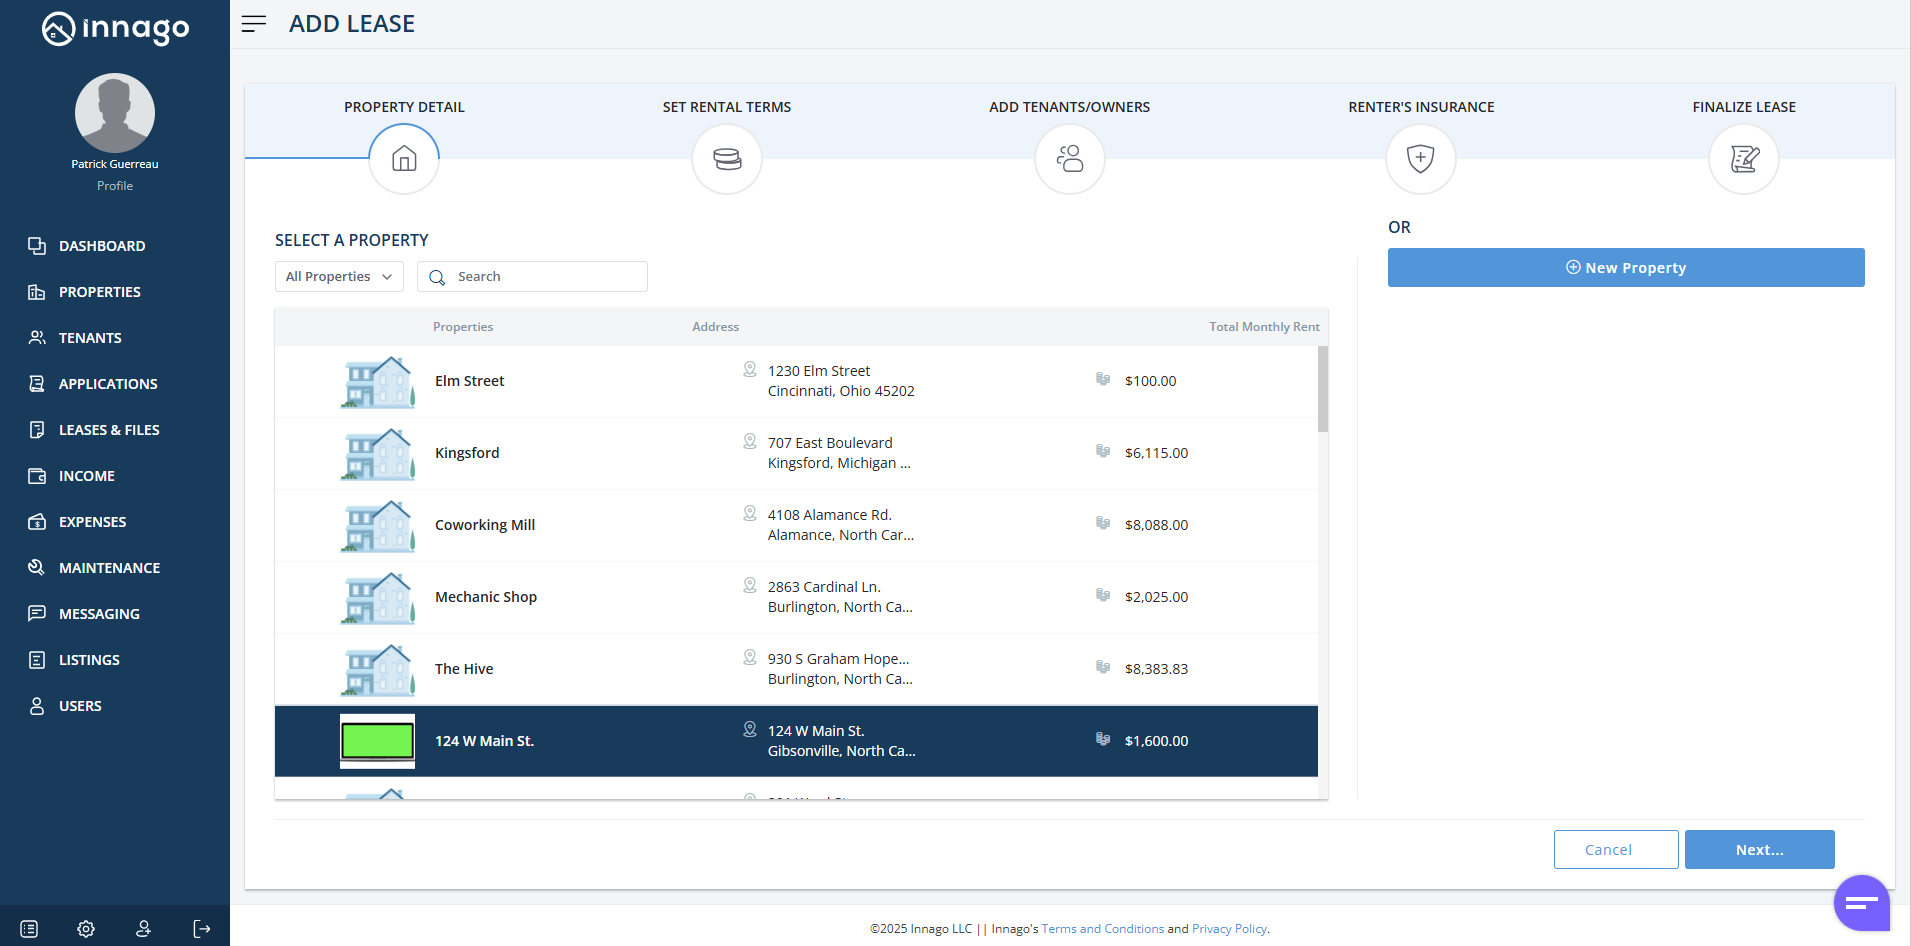
2. Select the property to which you’d like to add tenants and click the “Next” button. If your property has not been added to Innago yet, click the “New Property” button to add it now.
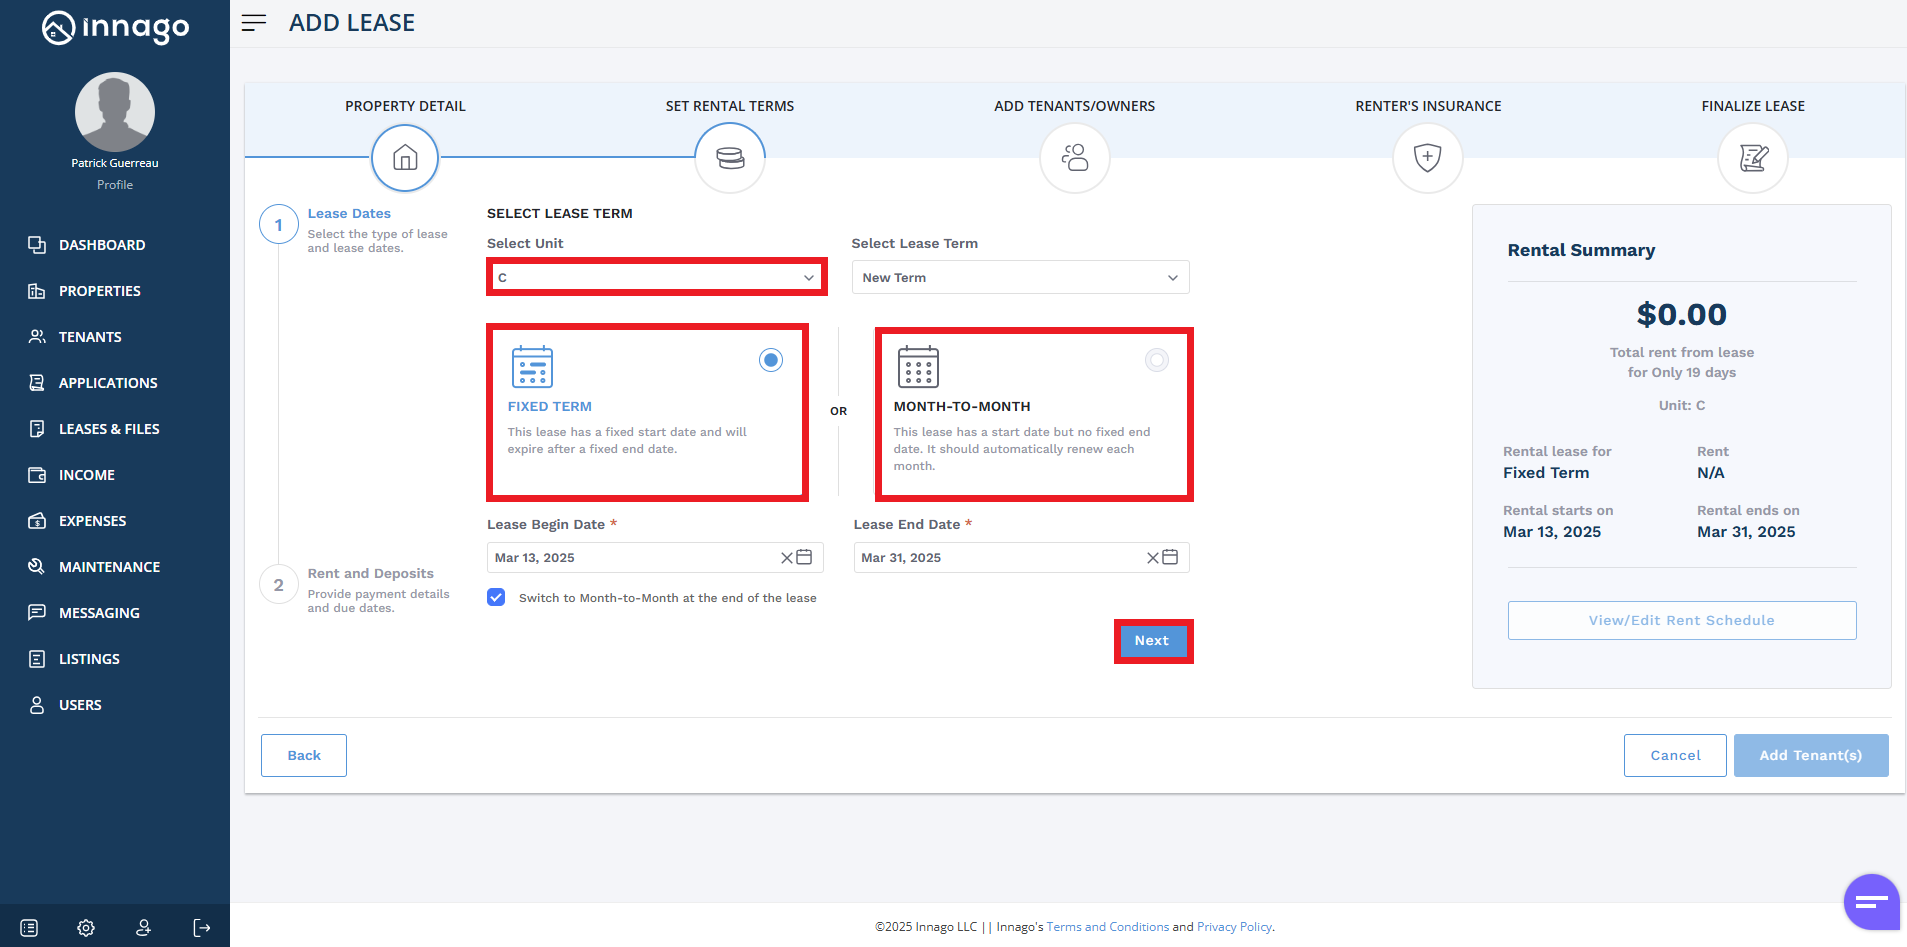
3. Select the unit in which you’d like to add tenants. From there, select whether you’d like to add the tenant to a Fixed Term or a Month-to-Month term.If you select a Fixed Term,you can check the box next to “Switch to Month-to-Month at the end of the lease.” if you’d like the lease term to convert automatically after the Lease End Date. Click “Next” when you’re done.
For more details on the lease terms available to setup on this page and the following page, please click here.
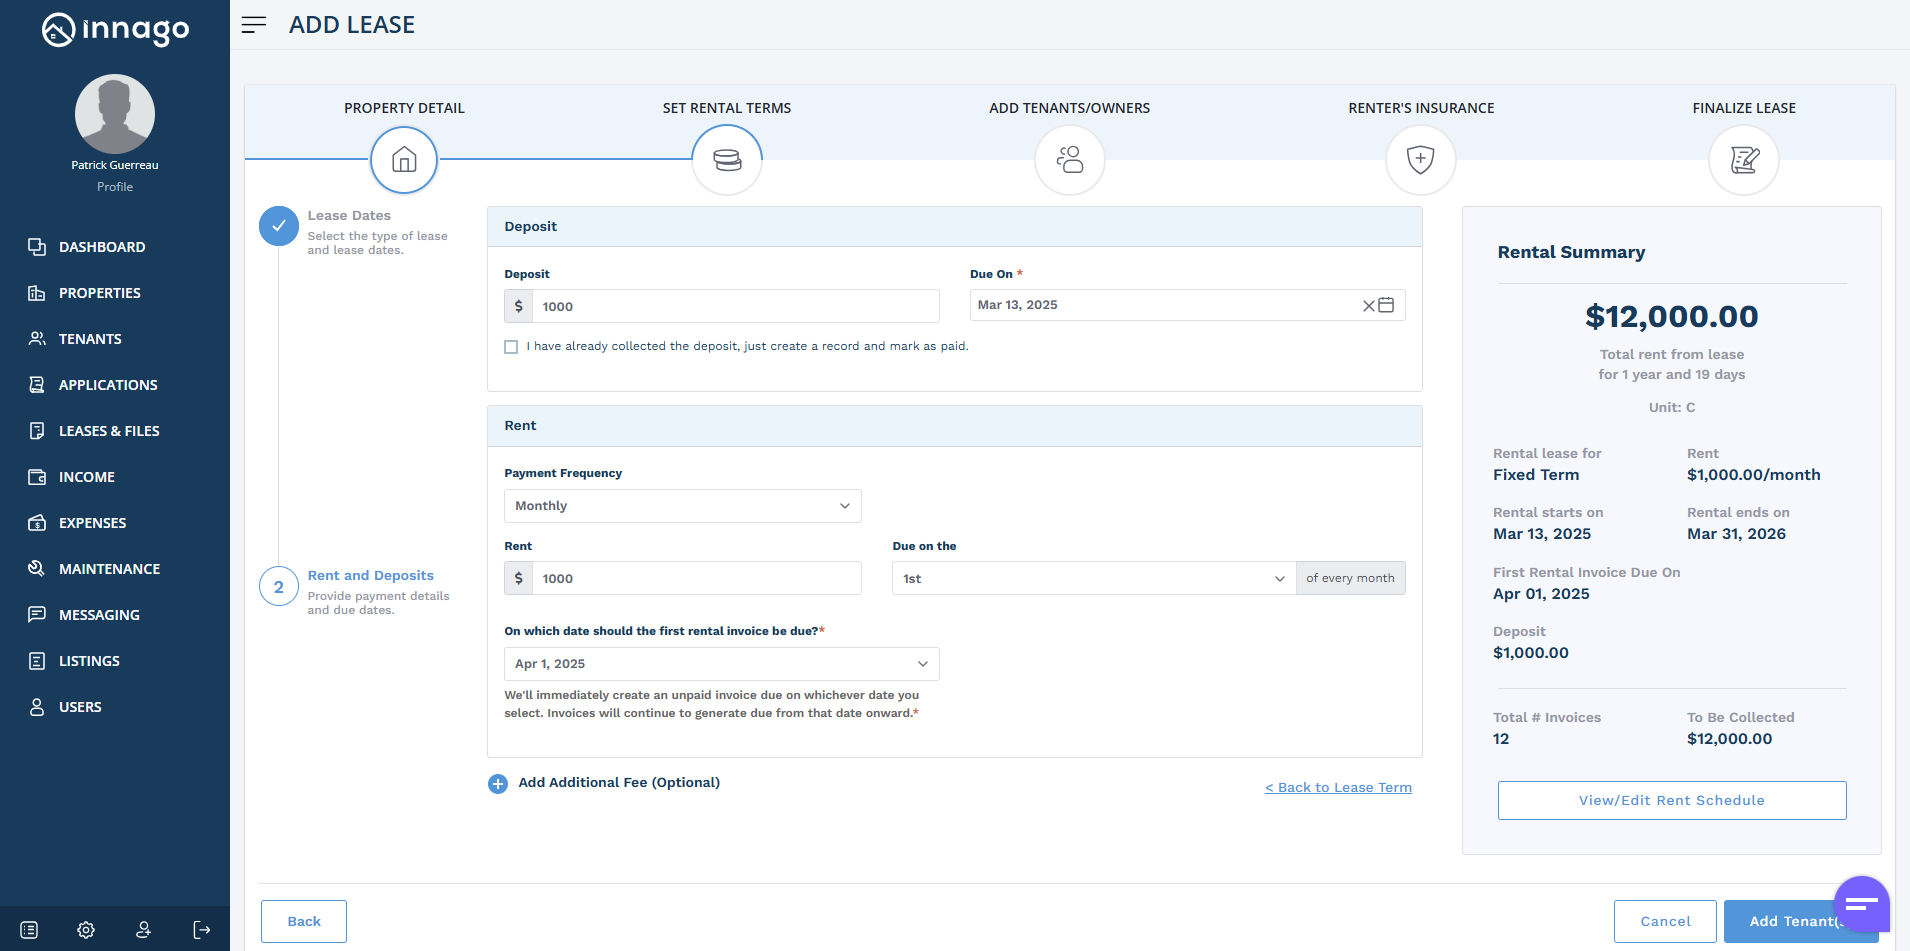
4. Enter your security deposit amount, rent amount, due on date and first rental invoice due date. You can also add any additional fees associated with this tenant from this page. If you need to pro-rate an invoice or edit your rent schedule in anyway, you can click “View/Edit Rent Schedule”.
Once complete, review the terms of your lease; if everything looks good, click the button that says “Add Tenant(s)”.
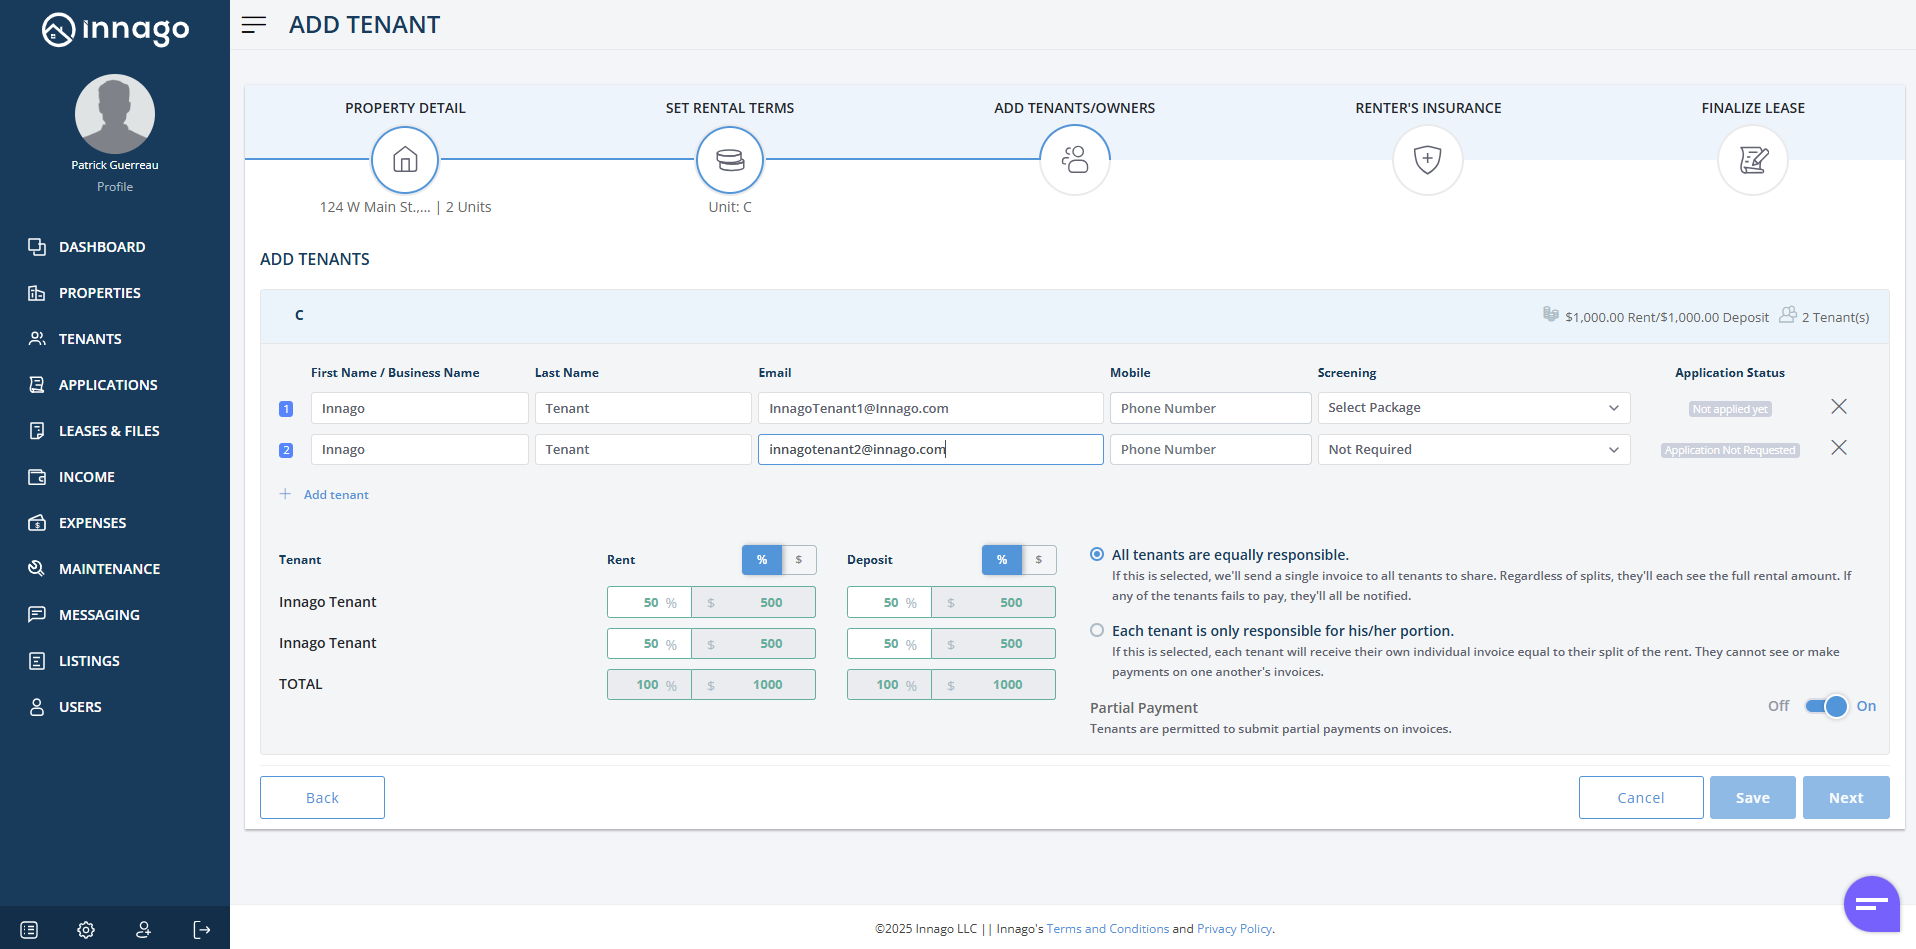
5. At this step, you’ll be able to add tenant details including name, email, and phone number.
Please note, if you add a tenant profile with an email address, they will be emailed an invitation to activate an account with Innago once you’ve finalized the lease term. If you exclude an email address at this step, you can always add one later on to invite the tenant.
You can also set rental/deposit shares and decide whether or not you’d like to accept partial payments. Please note, if you select the option that “All tenants are equally responsible”, all invoices will be shared and either tenant can pay the full amount due on the invoice (regardless of the rental share percentage). If you select “Each tenant is only responsible for his/her portion”, then invoices will be assigned separately, and the amount due for each tenant will be based on the rental share percentage.
Once you’re ready to move on, click “Next”.
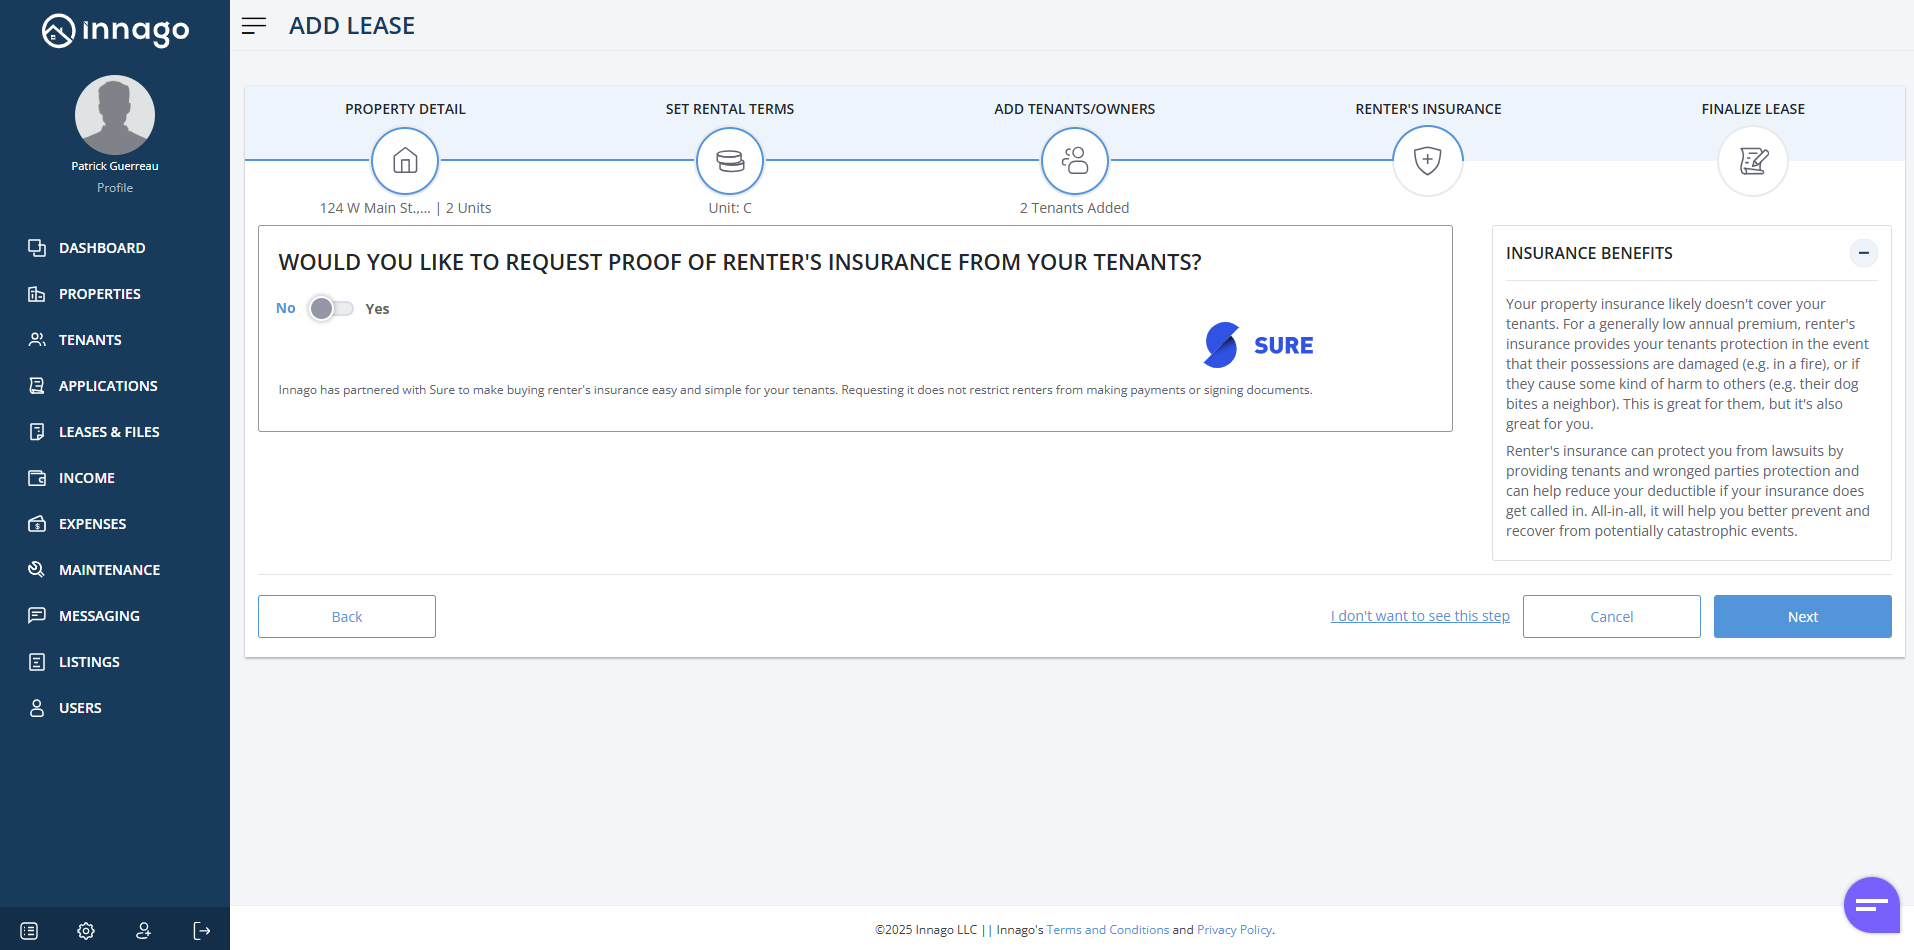
6. On the following screen, you will be able to choose whether or not you want to require renter’s insurance from your tenants. You can click here to see how the process for purchasing or uploading insurance will look from the tenant’s end.
If you no longer want to see this step when creating a lease term, simply click “I don’t want to see this step”. Click “Next” once you’re ready.
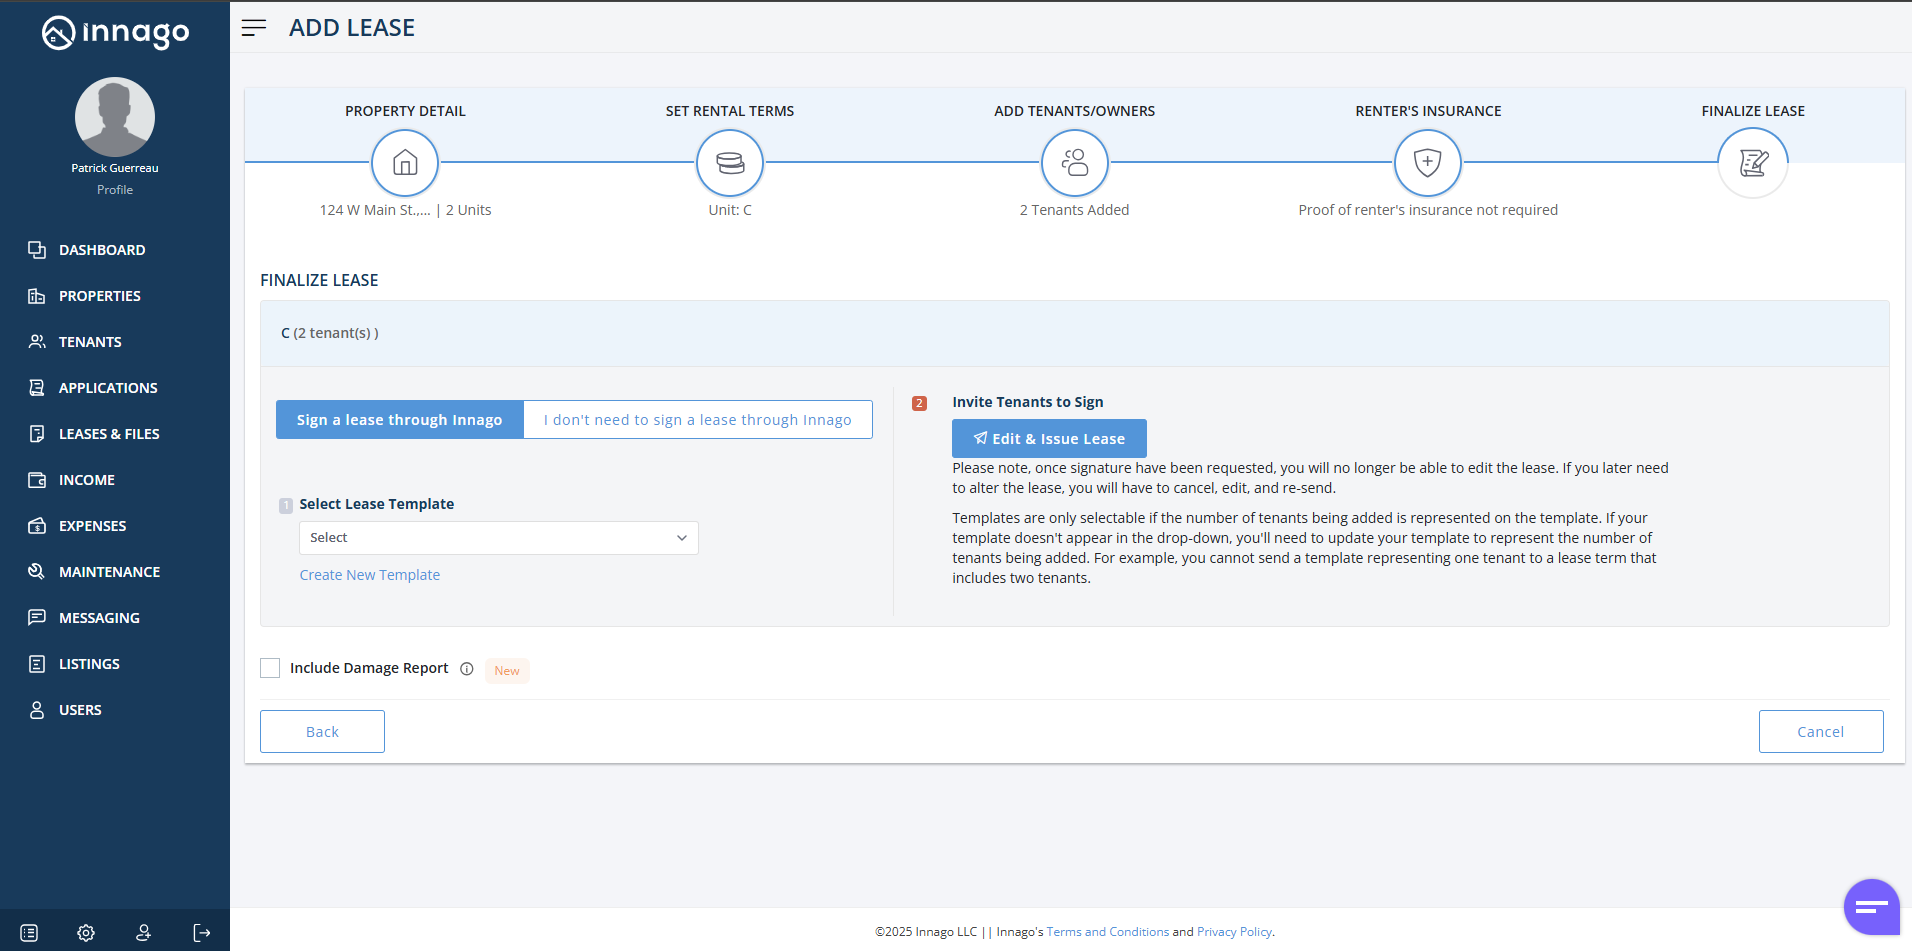
7. Finally, you can select whether or not you’d like to send out an actual lease document for signature. If you want to send out a document to be signed, you’ll select the template or create a new template. For more information on creating a lease template, click here. Once you’ve selected a template, click “Edit & Issue Lease” to finalize the document and send it out for signature.
Please note, if you’ve created a template and it’s not available to send, keep in mind that the number of tenants represented on the template must match the number of tenants on the lease term you’re creating. For example, if your lease template only has fields to represent one tenant, you will not be able to send it out on a lease term that includes two or more tenants.
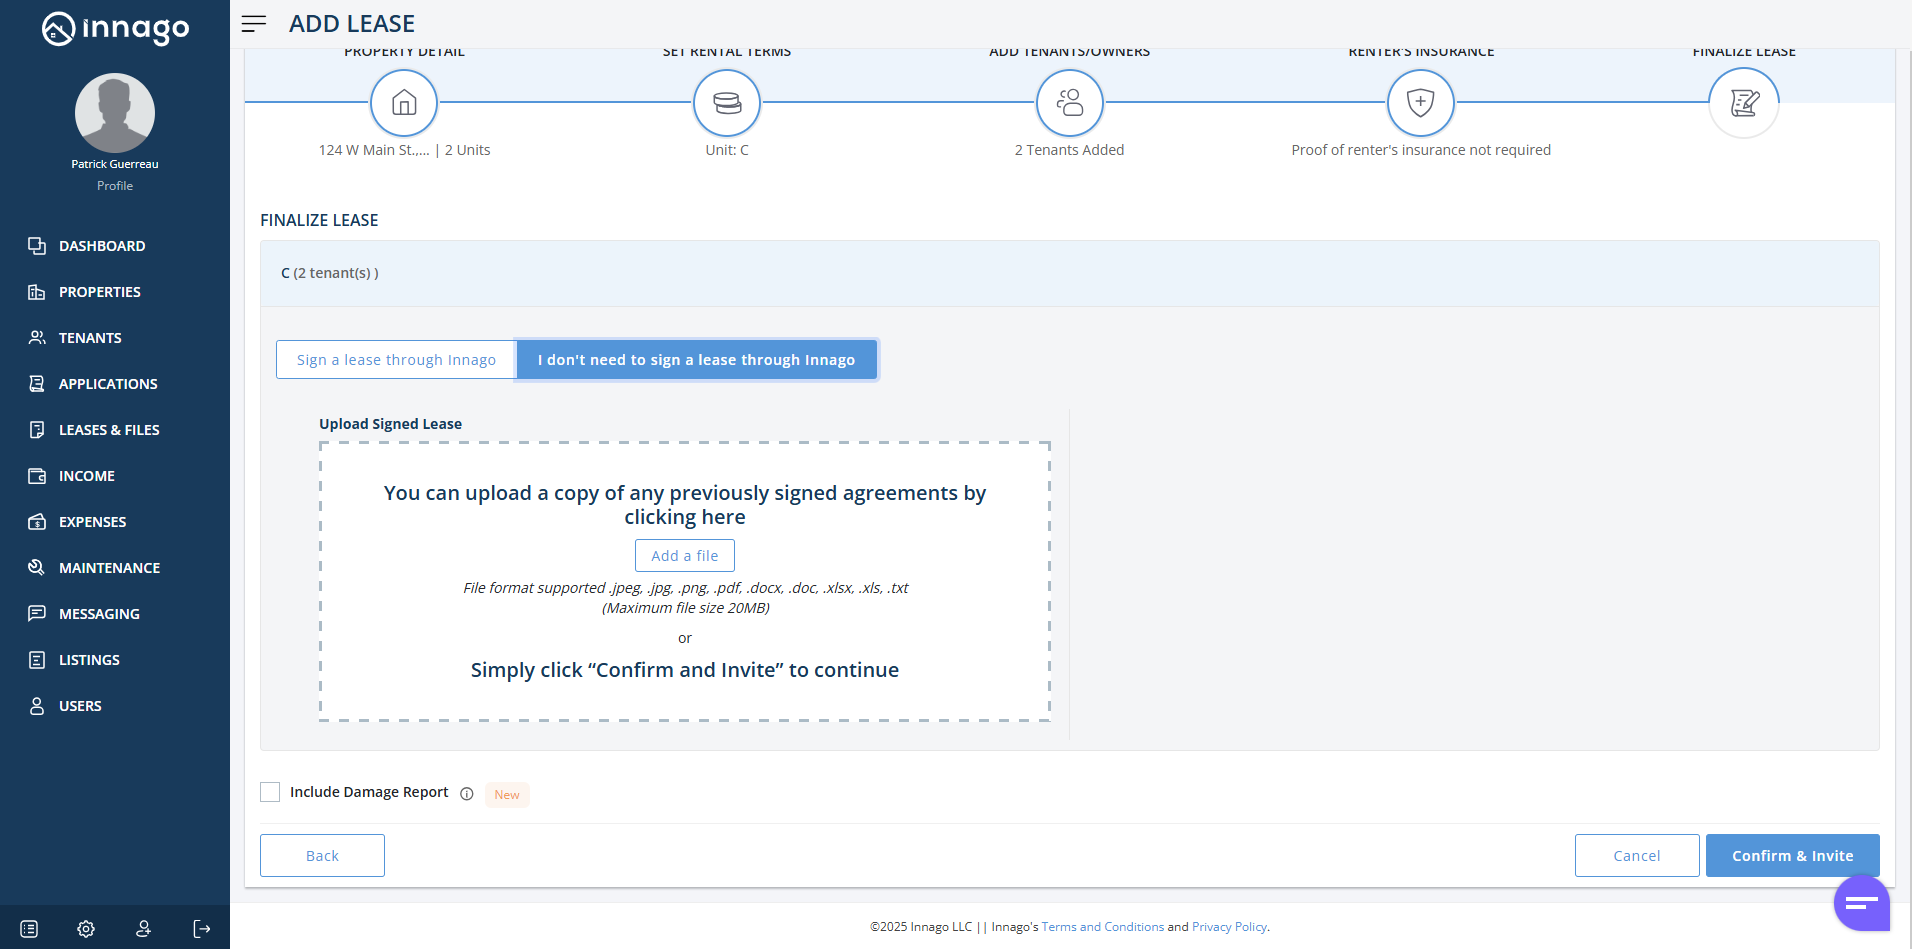
If you’re not ready to send a document, or do not need to send one you can select the option “I don’t need to sign a lease through Innago”. You can also select this if you have already signed a document offline and would like to upload it. Keep in mind, you can always send or upload a document later on if needed. Click “Confirm & Invite” once you’re finished.
(Note: If you click “Cancel” at any step, all your data will be lost.)
Check out our tutorial video to learn more!