Creating eye catching listing through Innago will allow you to advertise your rentals to thousands of potential renters. Follow the steps below to add a listing to Innago:
-
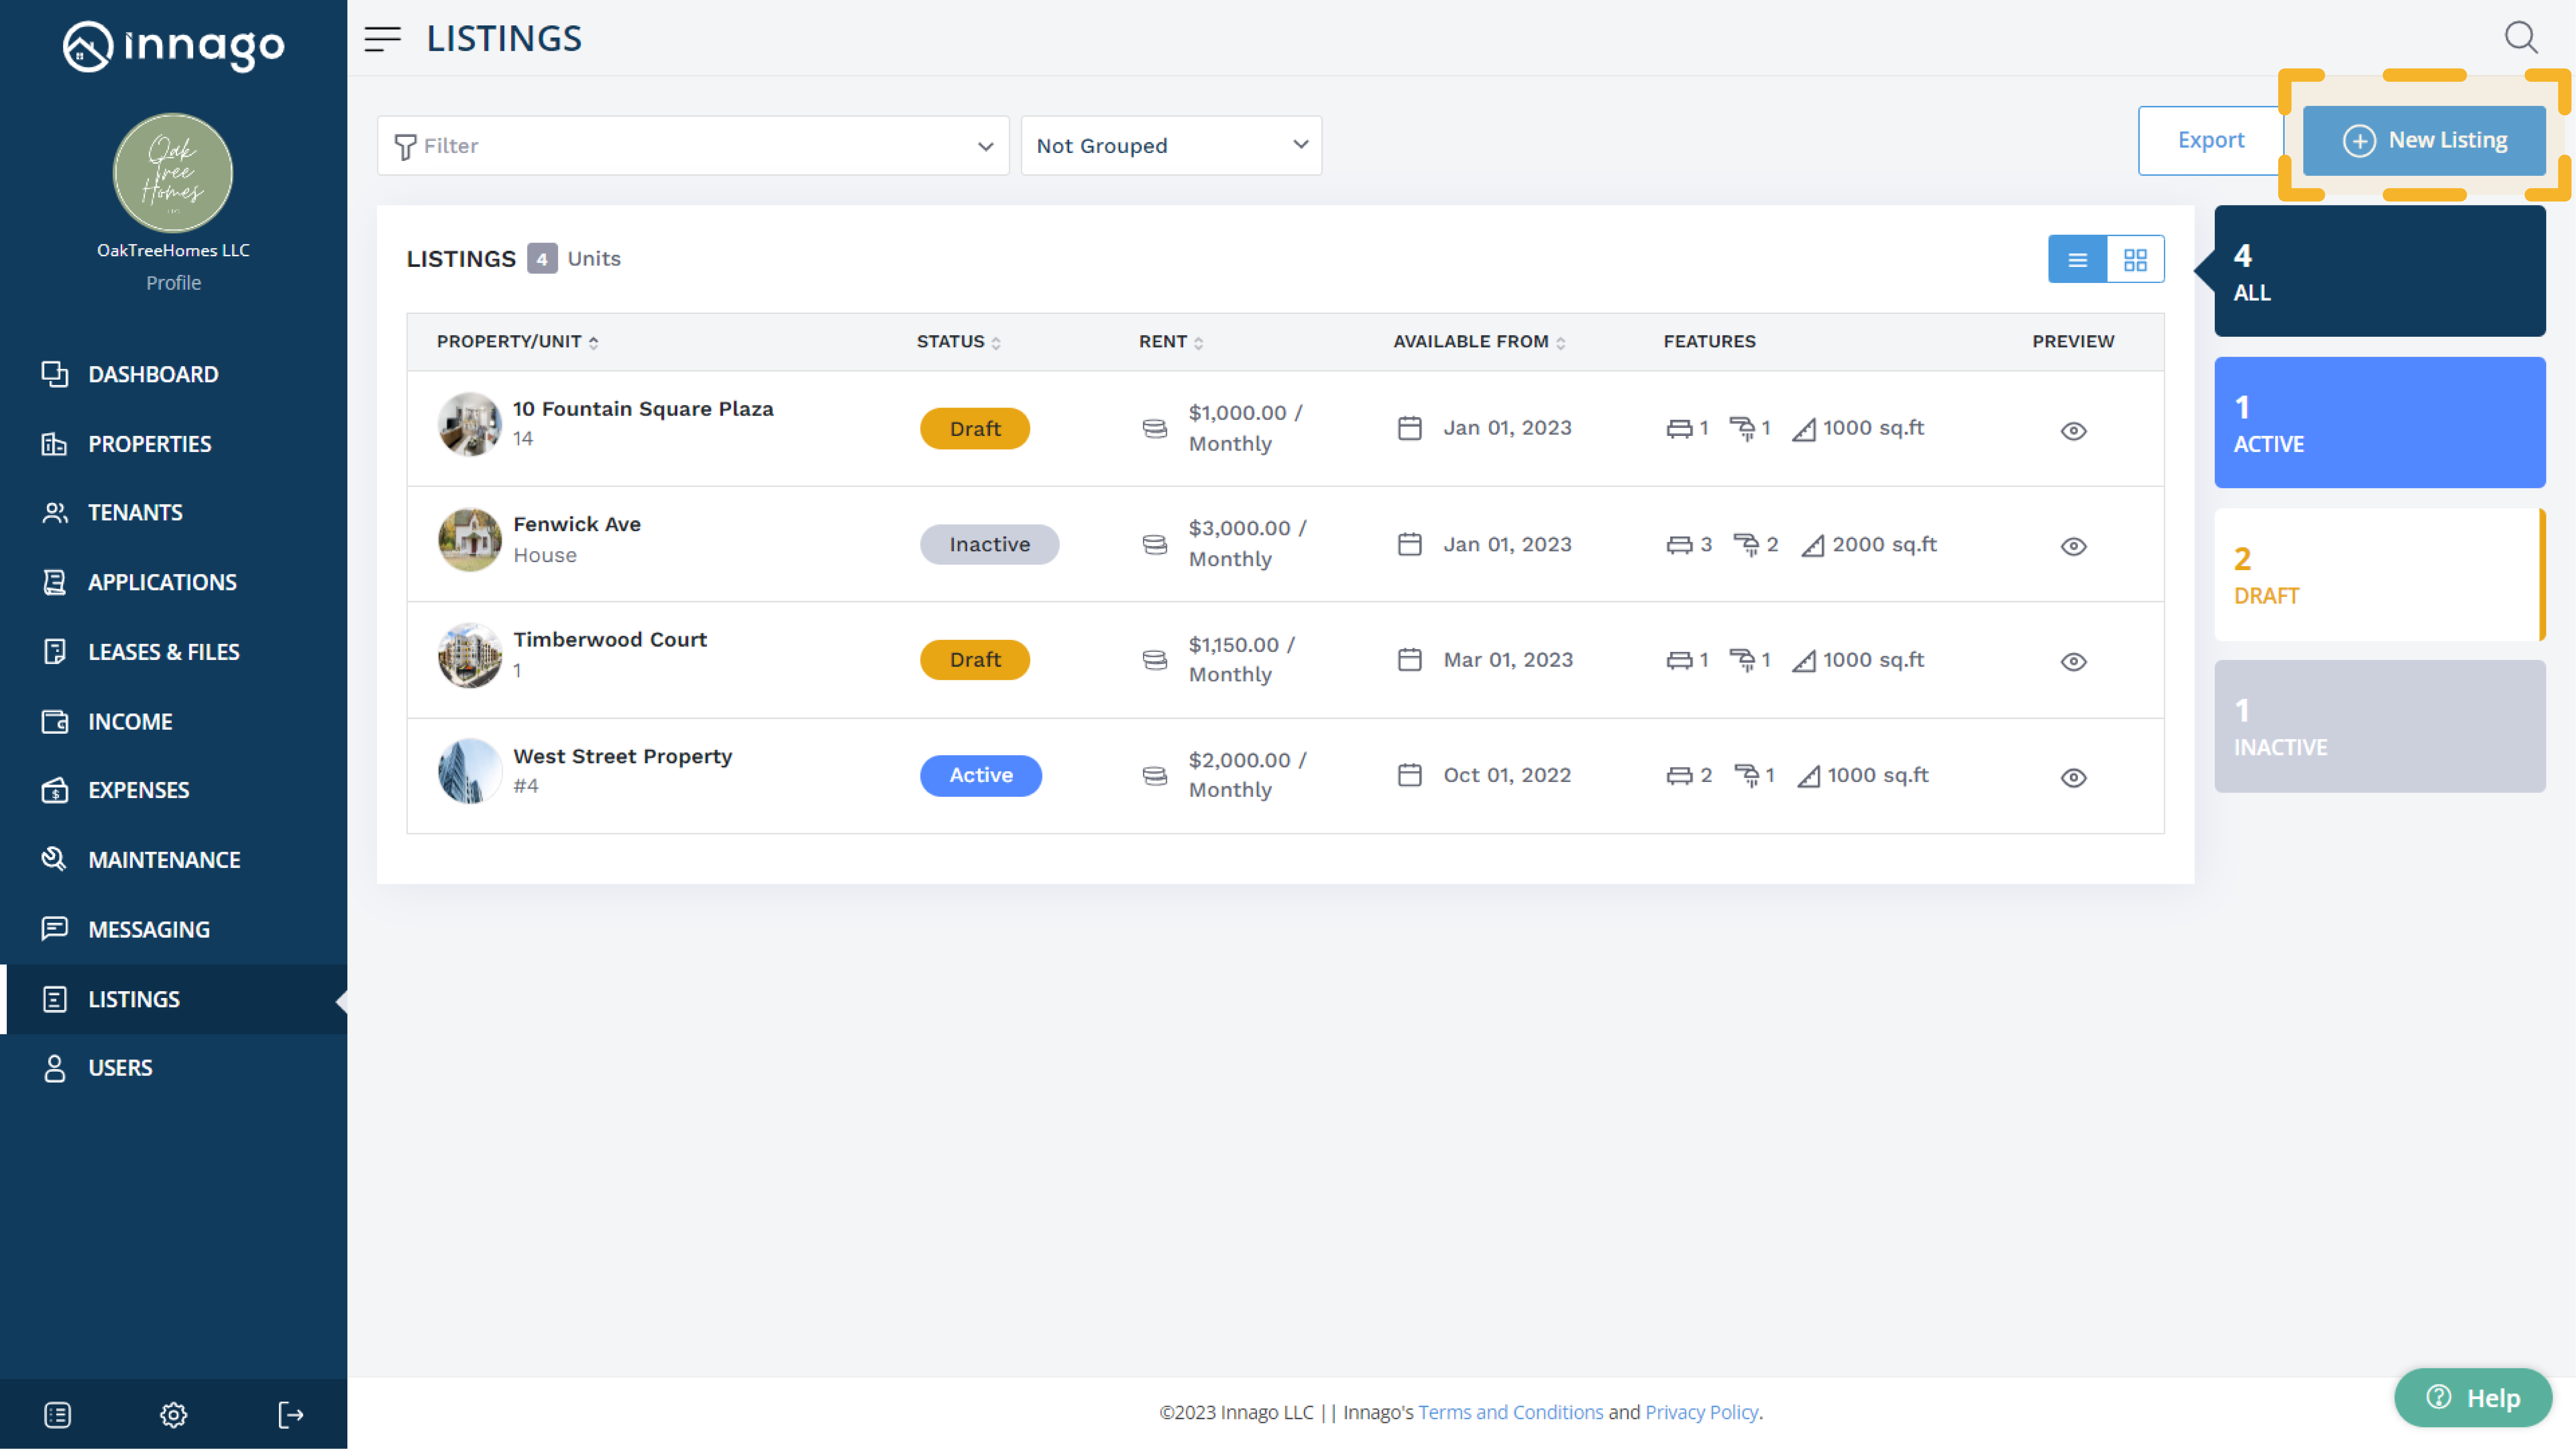
From Innago menu on the left, click “Listings”
-
In top right corner, click “New Listing”
-
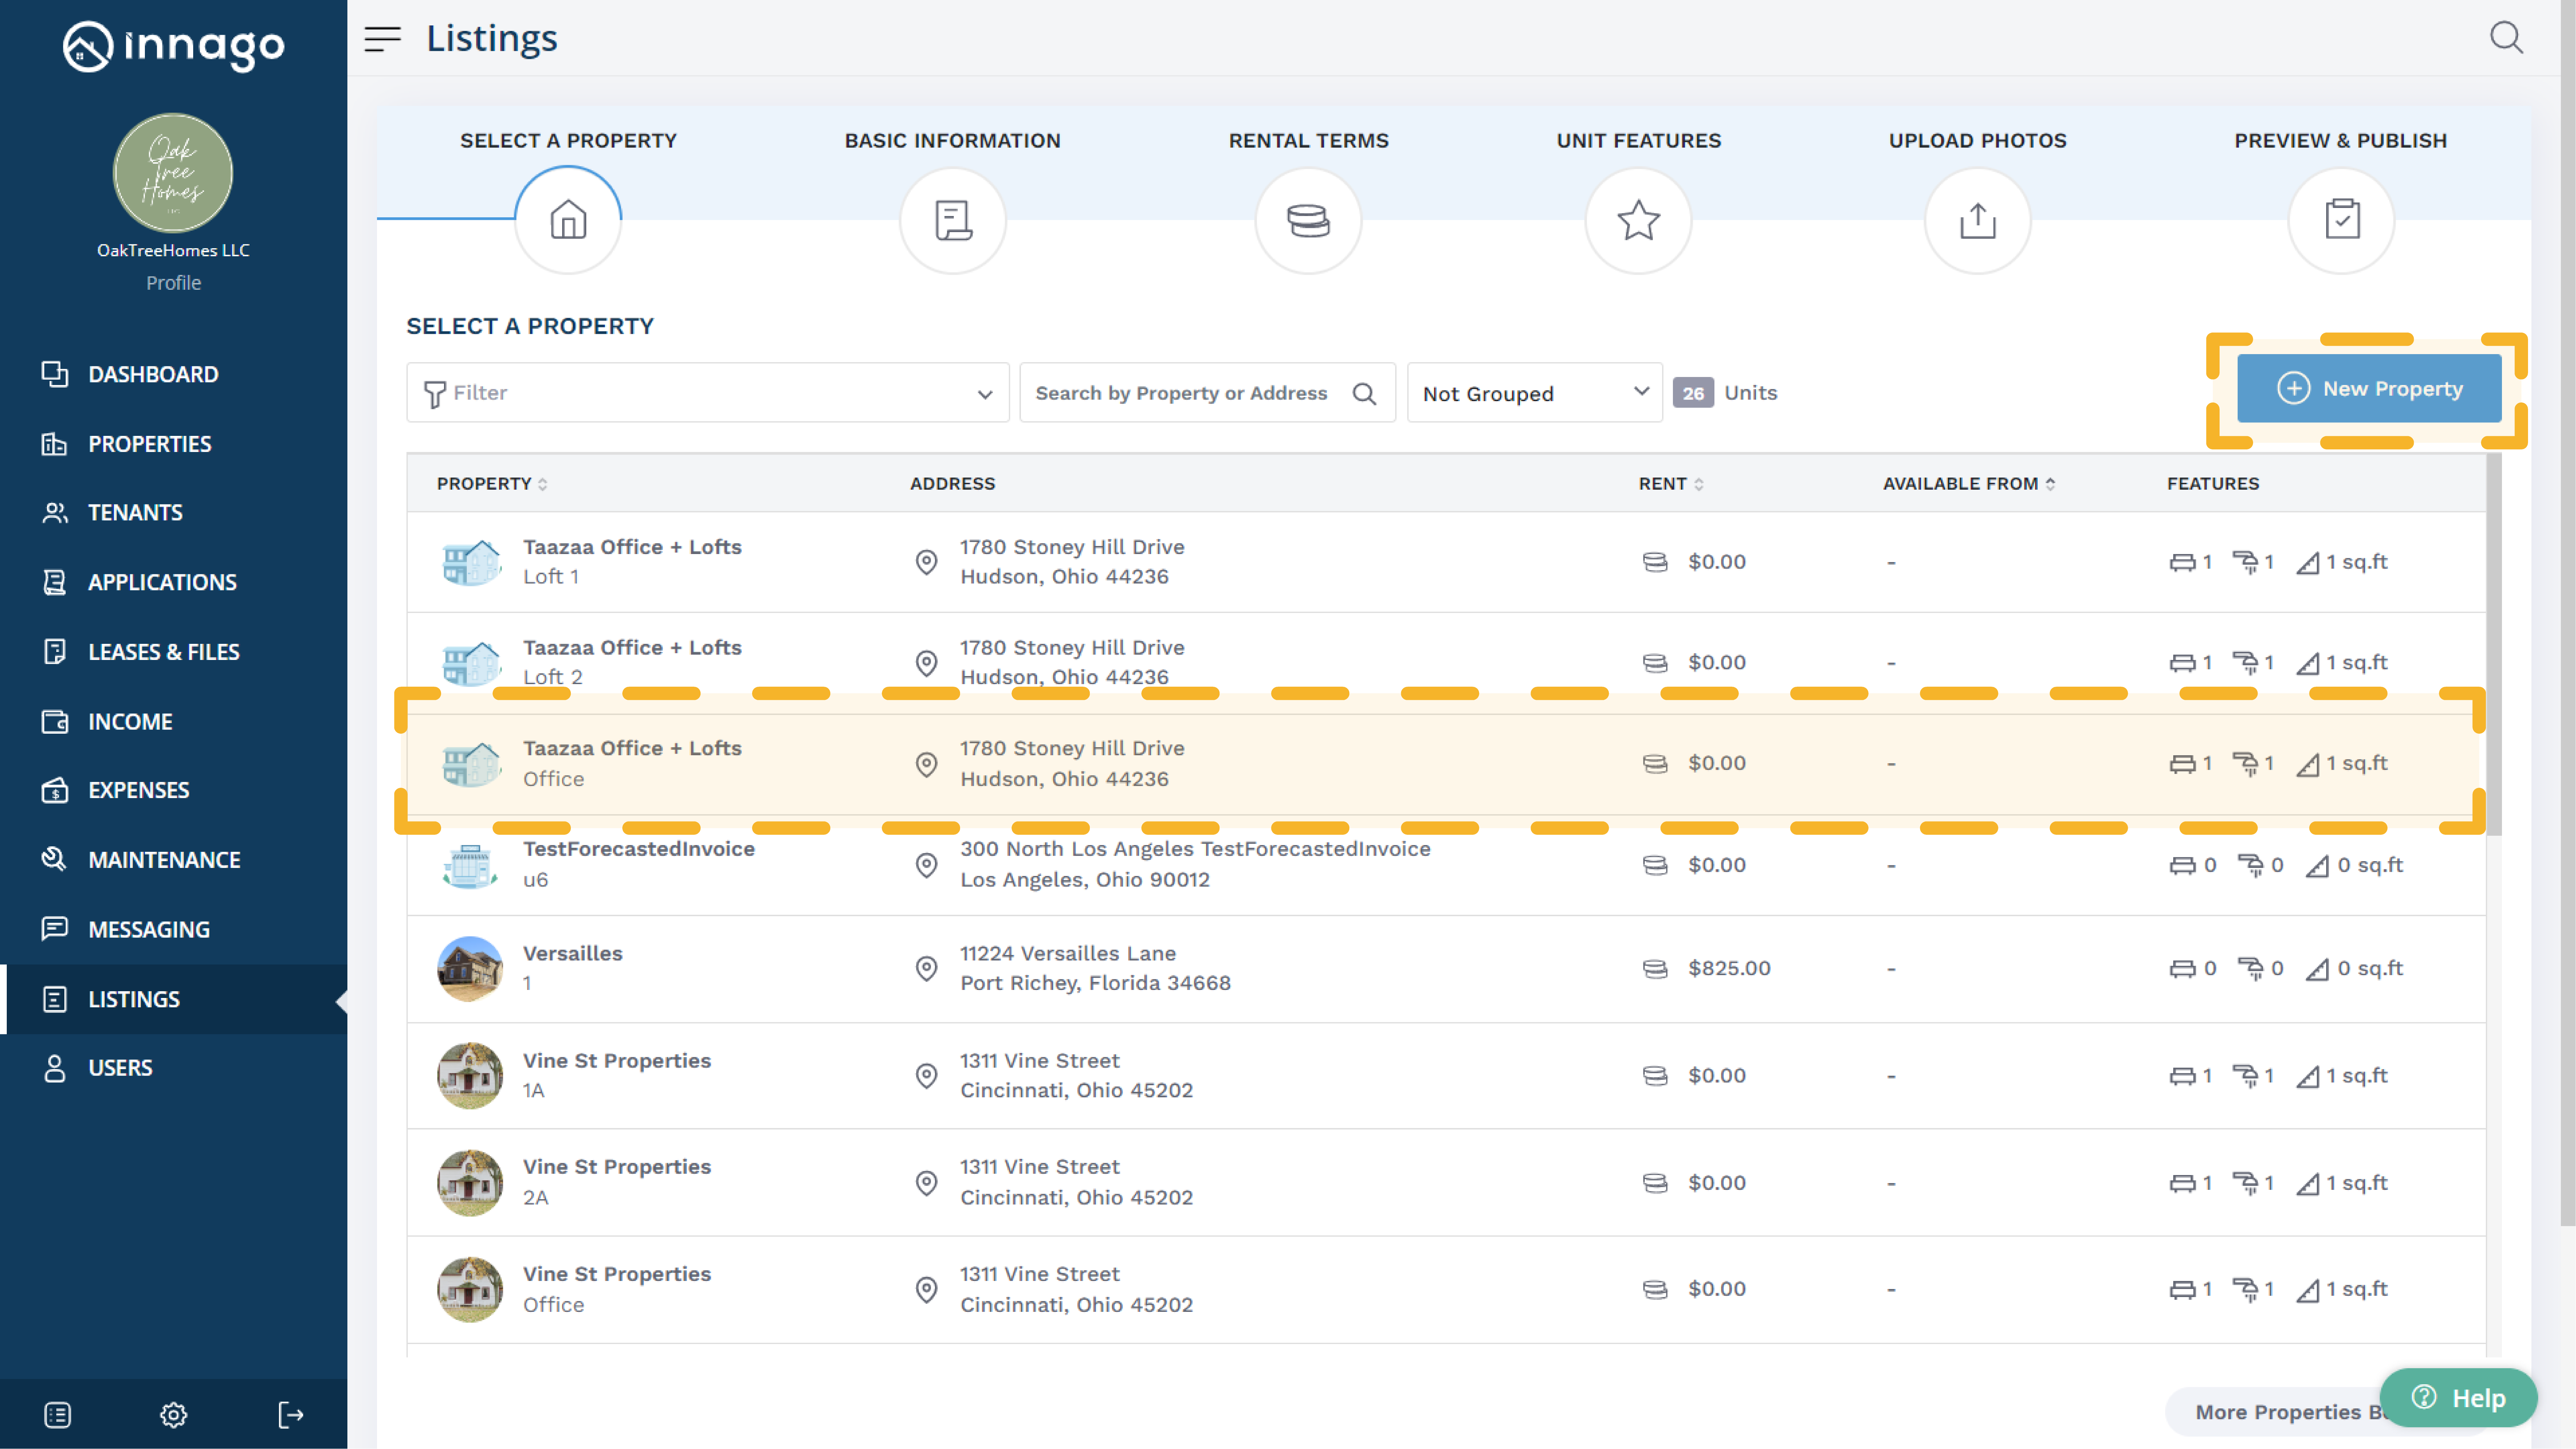
On this page, you can either select an existing property and unit and click “Next”, or click on “New Property”
-
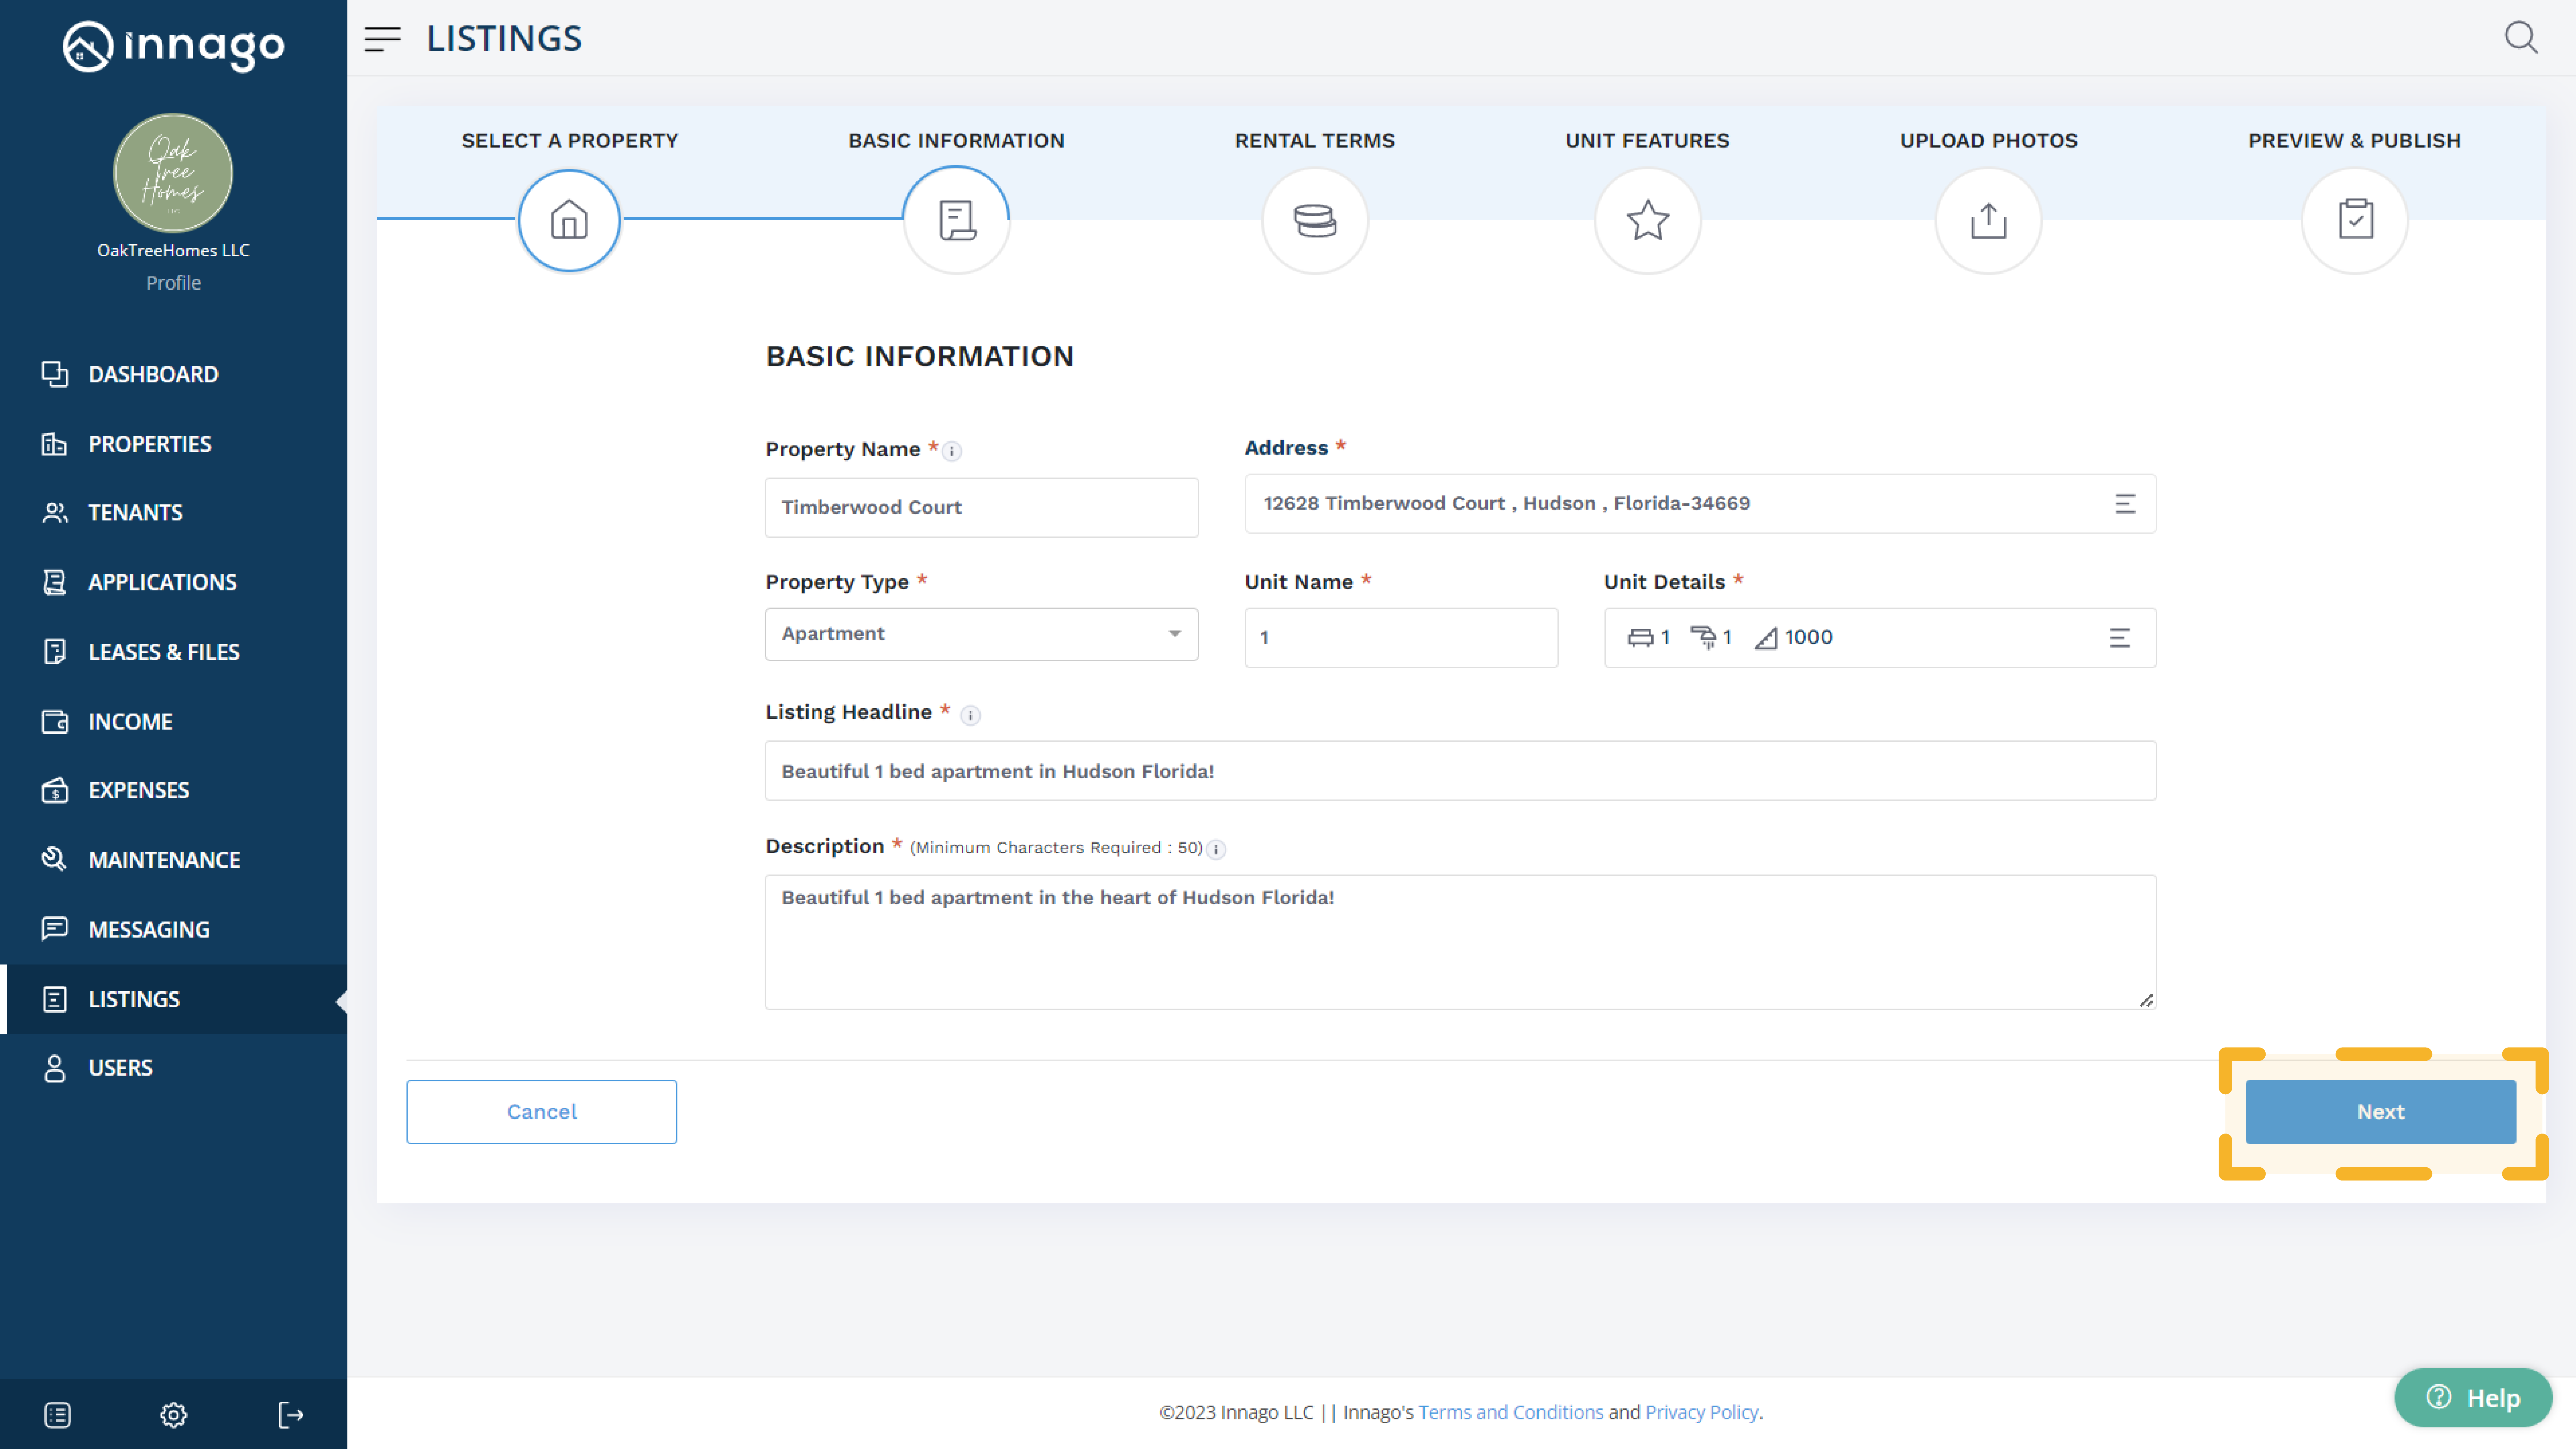
On the Basic Information page, enter your property name, address, property type, unit name, unit details and a listing headline and description. Double check this information and if it looks good, click “Next”. Please note, only Realtor.com and Zumper will display URL’s. Other networks will remove any URL links that you include in your description.
-
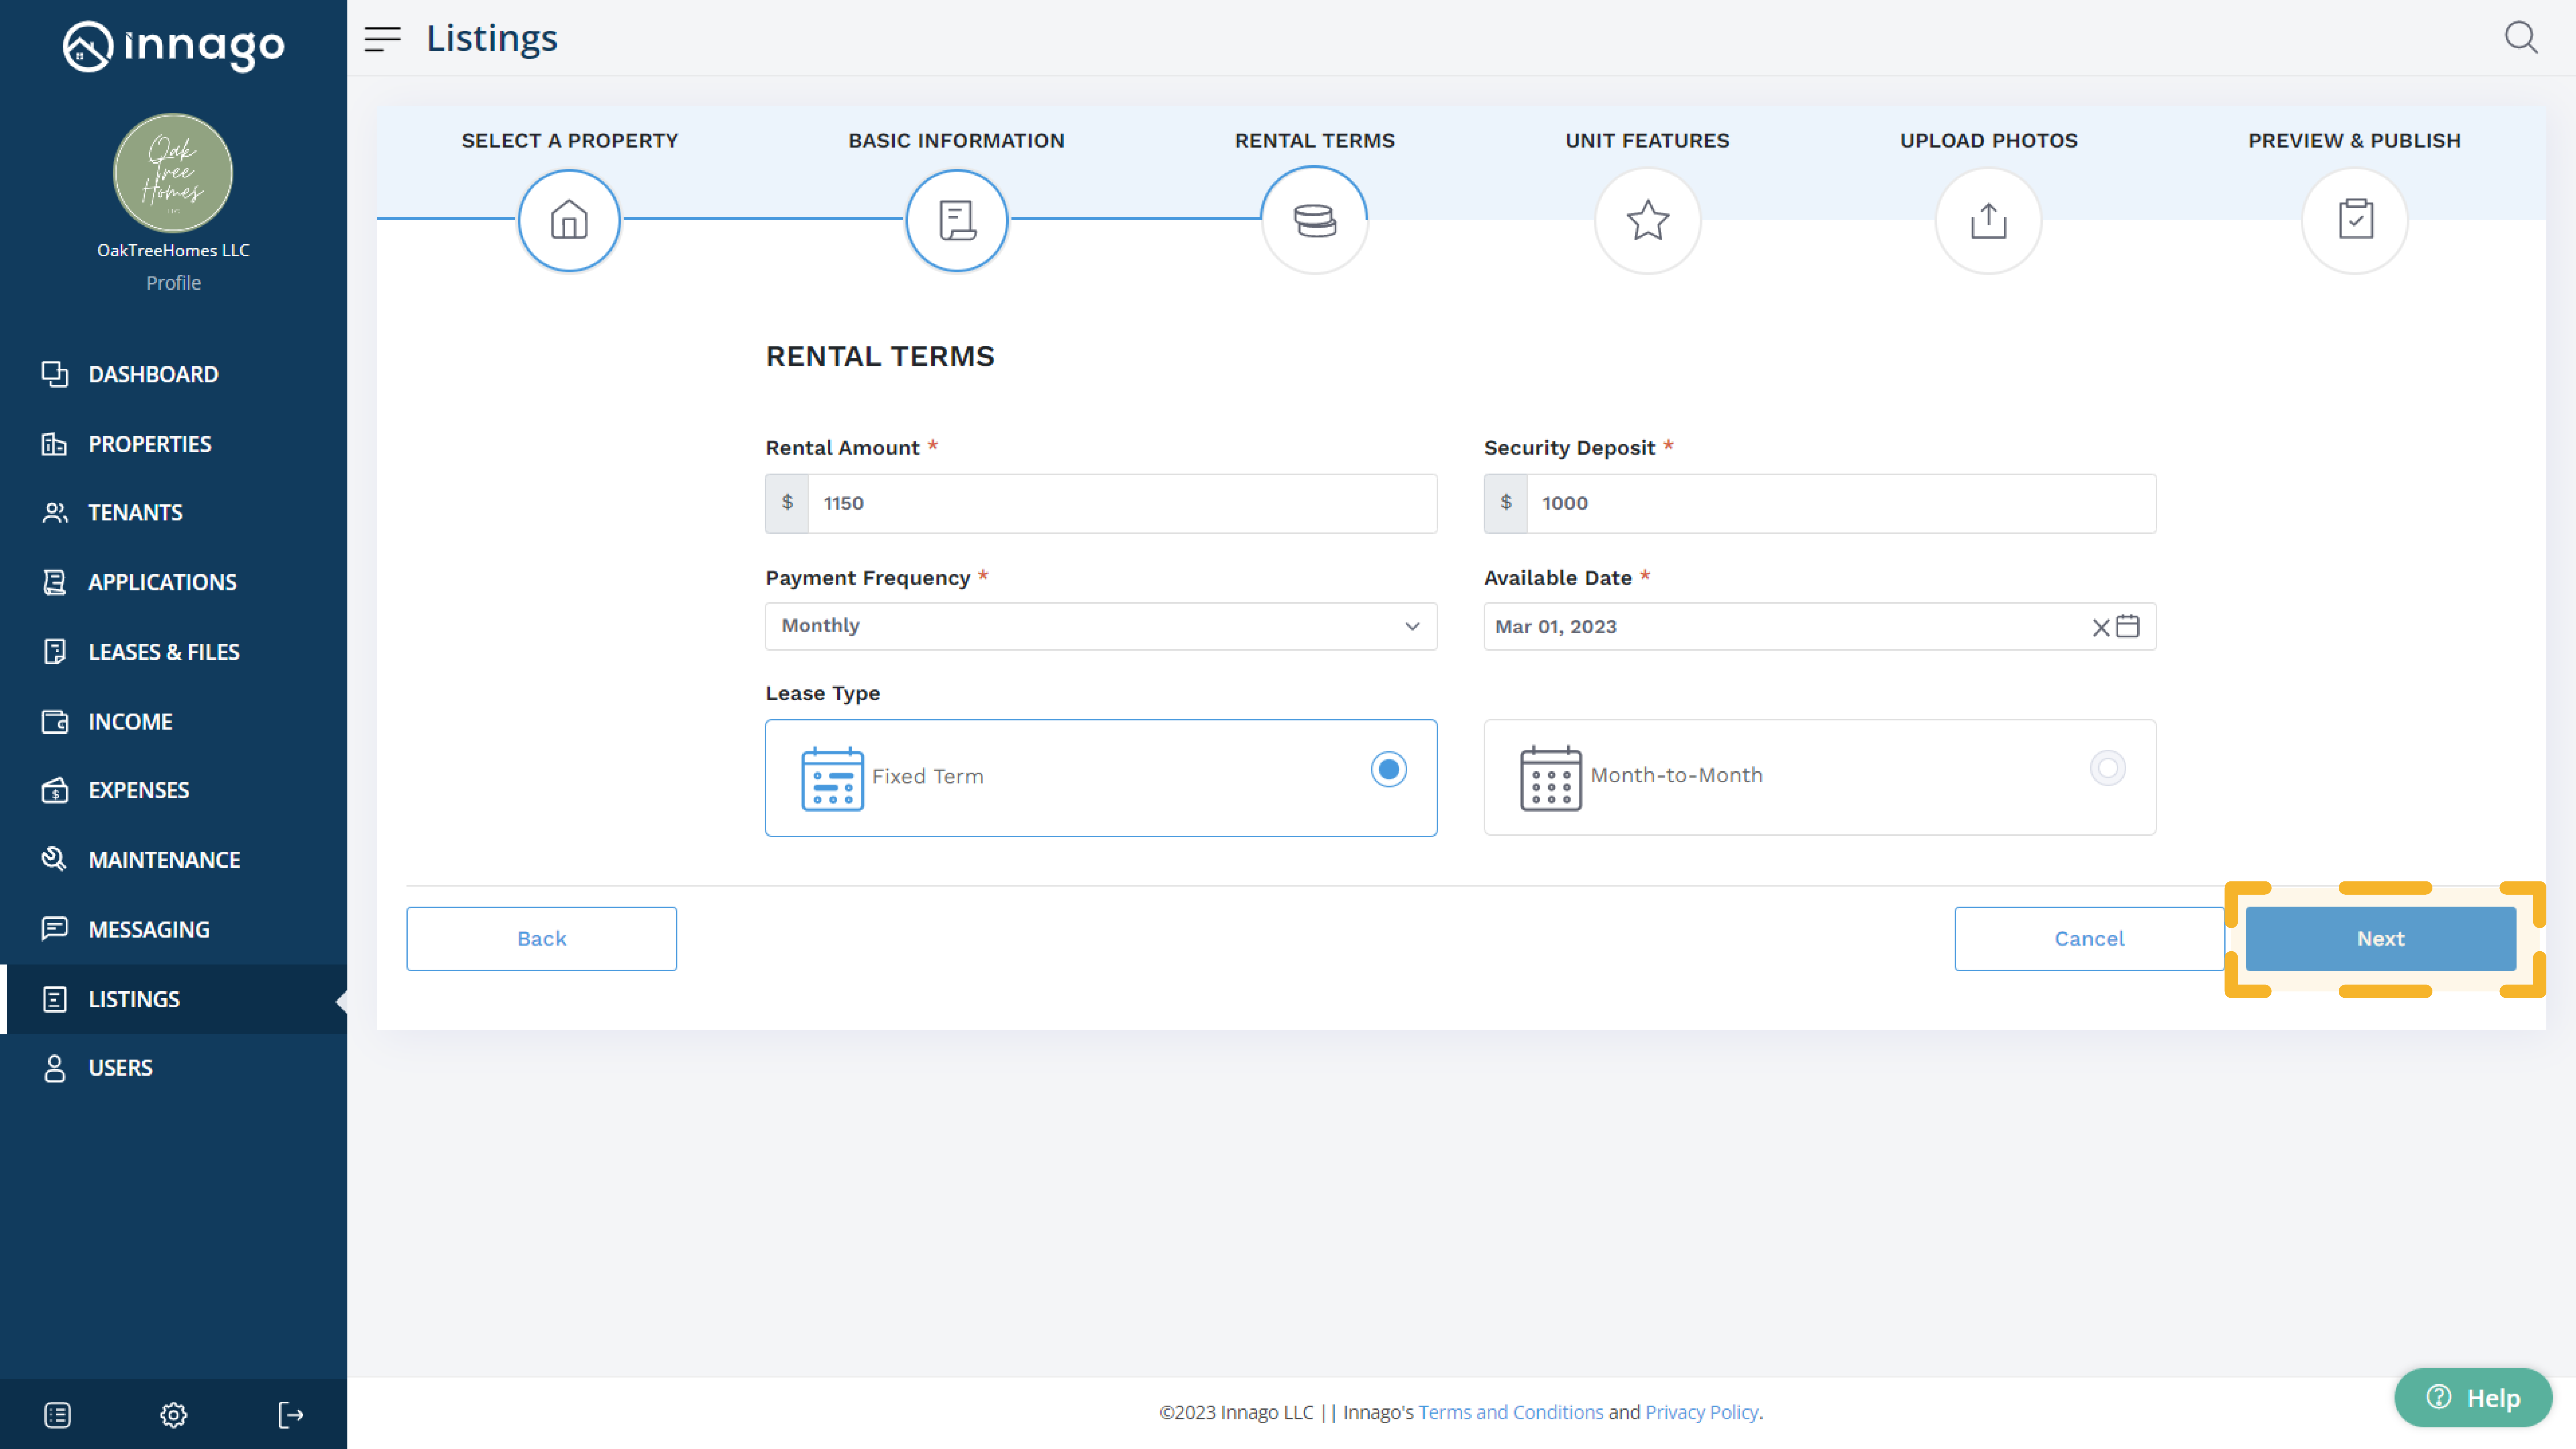
From the Rental Terms page enter rental amount, security deposit, move in and move out dates. All of this information is optional. Click “Next” to continue.
-
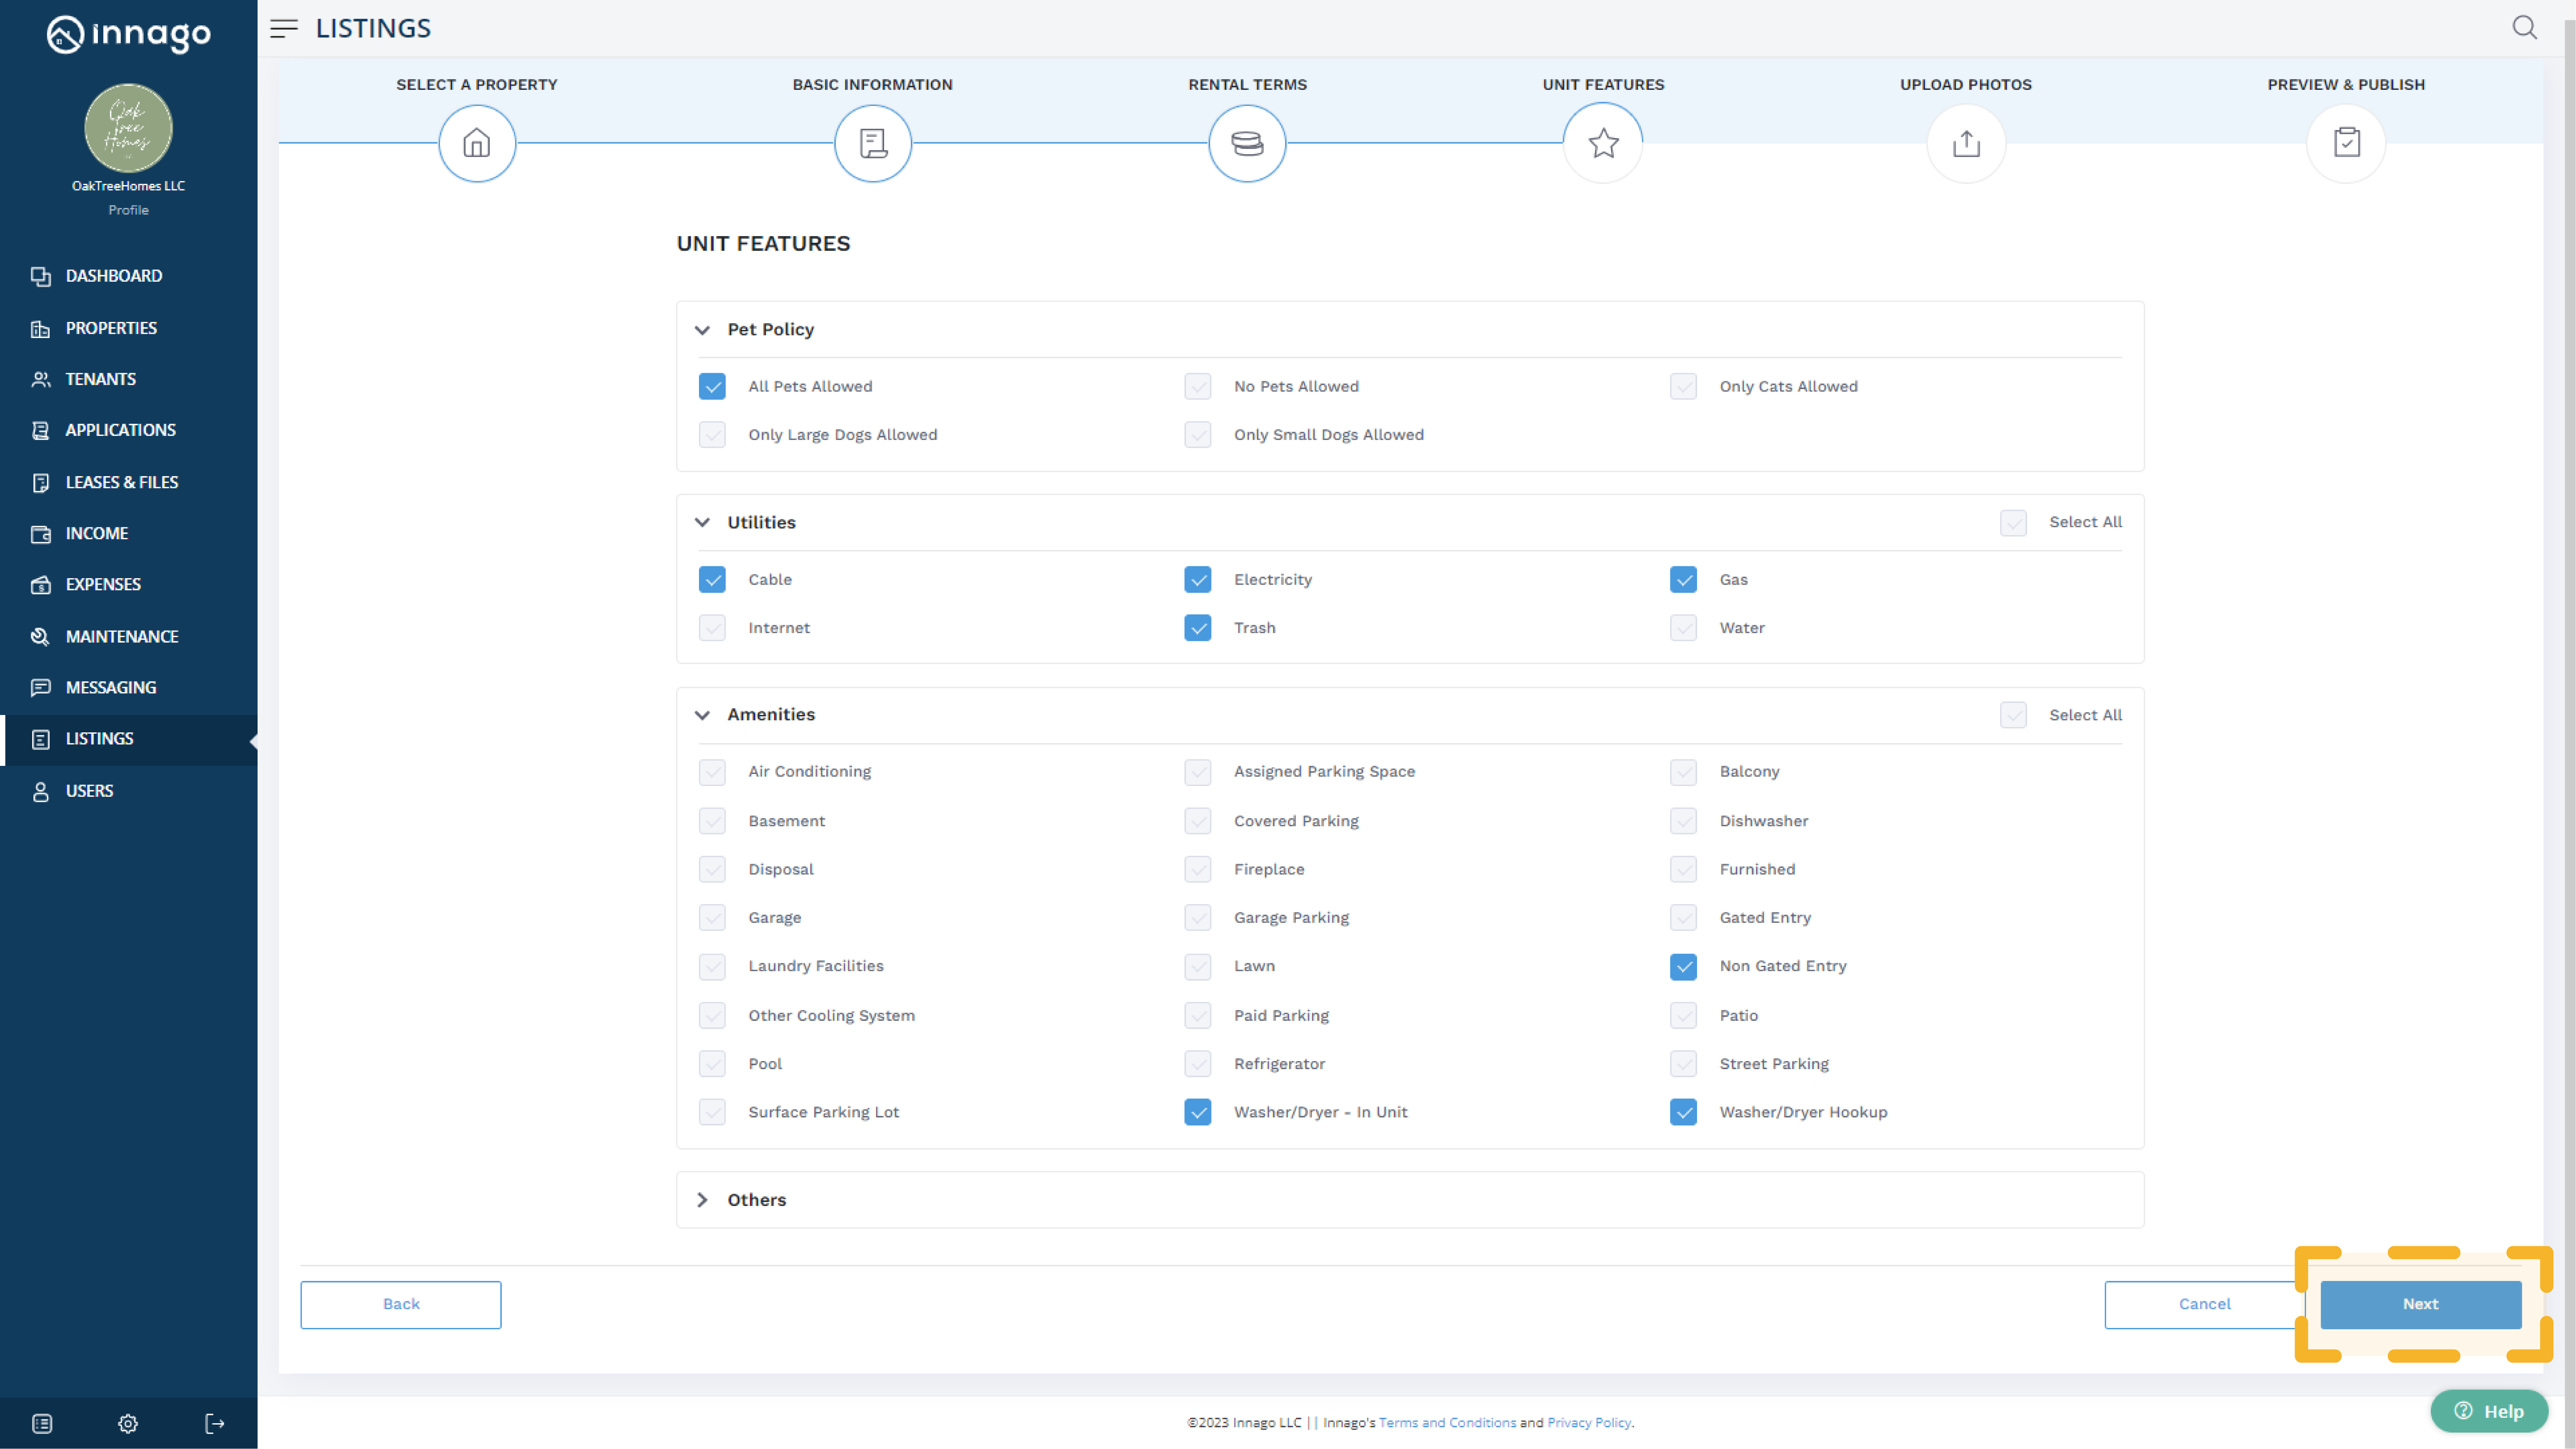
On the Unit Features page, you have the option to select an applicable pet policy, along with utilities and amenities, and add any other additional information. Click “Next” to continue.
-
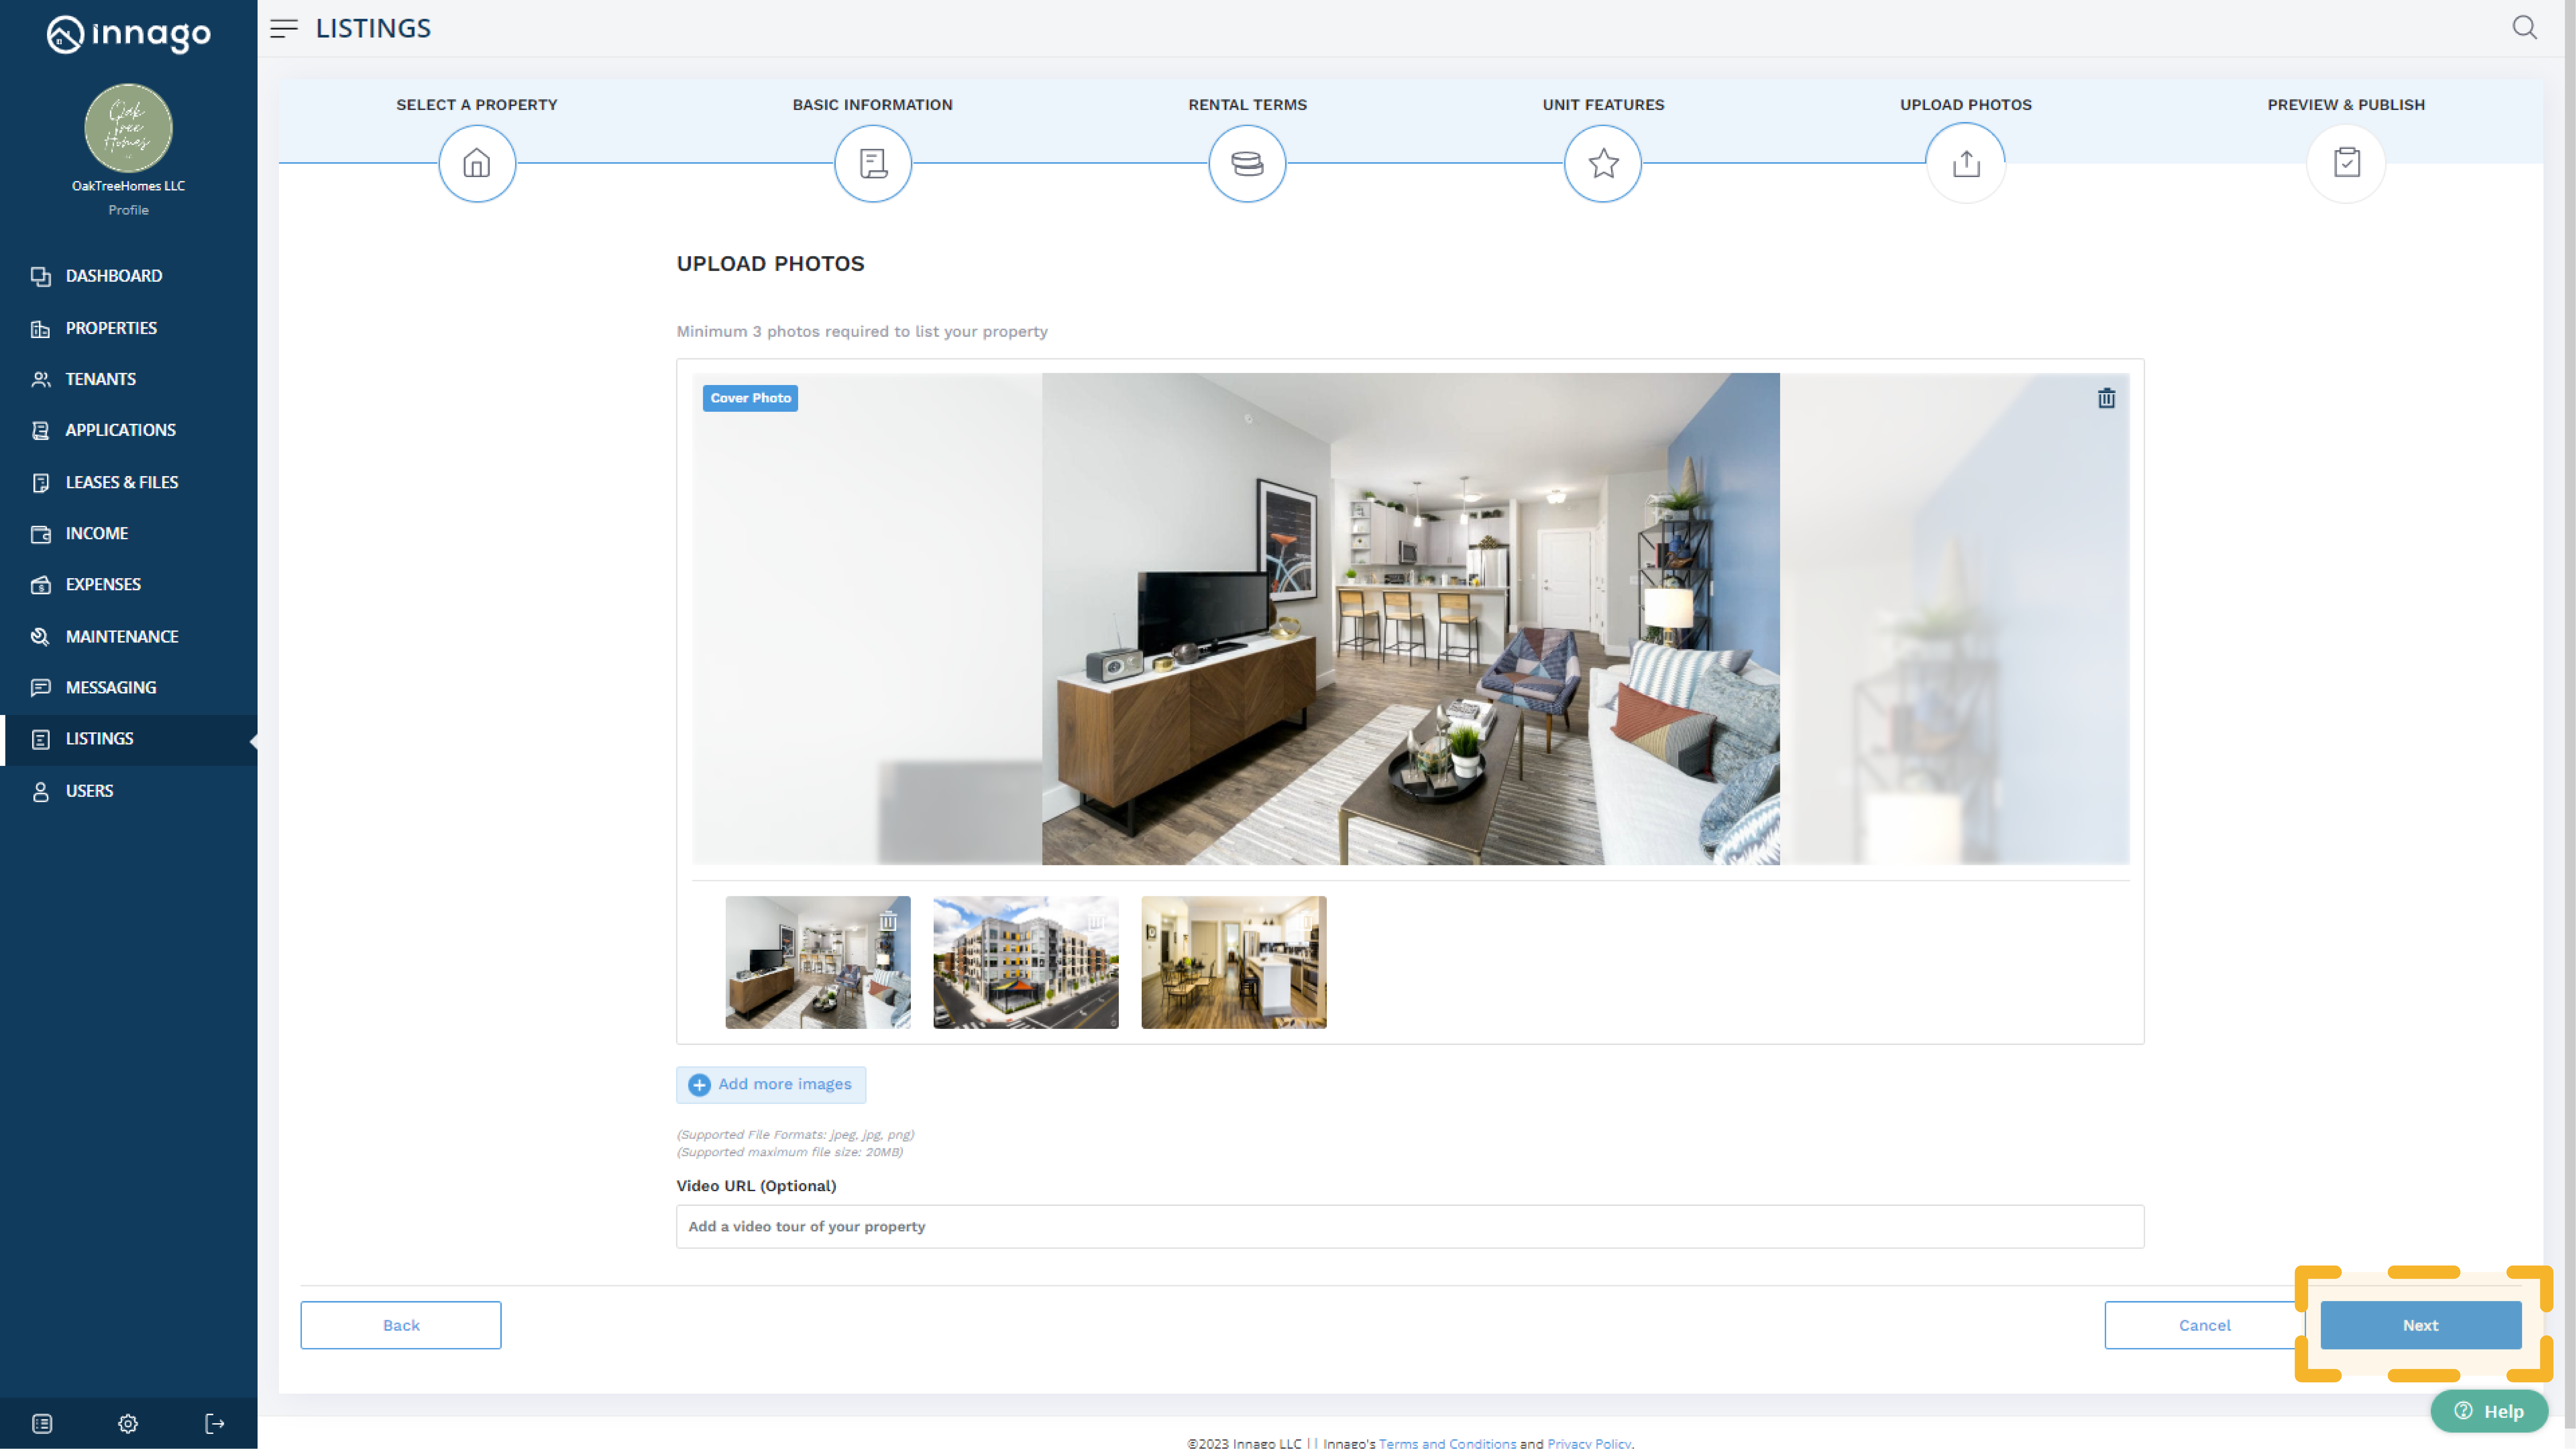
On the Upload Photos page, add a minimum of three photos and add an optional video URL to your listing. Click “Next” to continue.
-
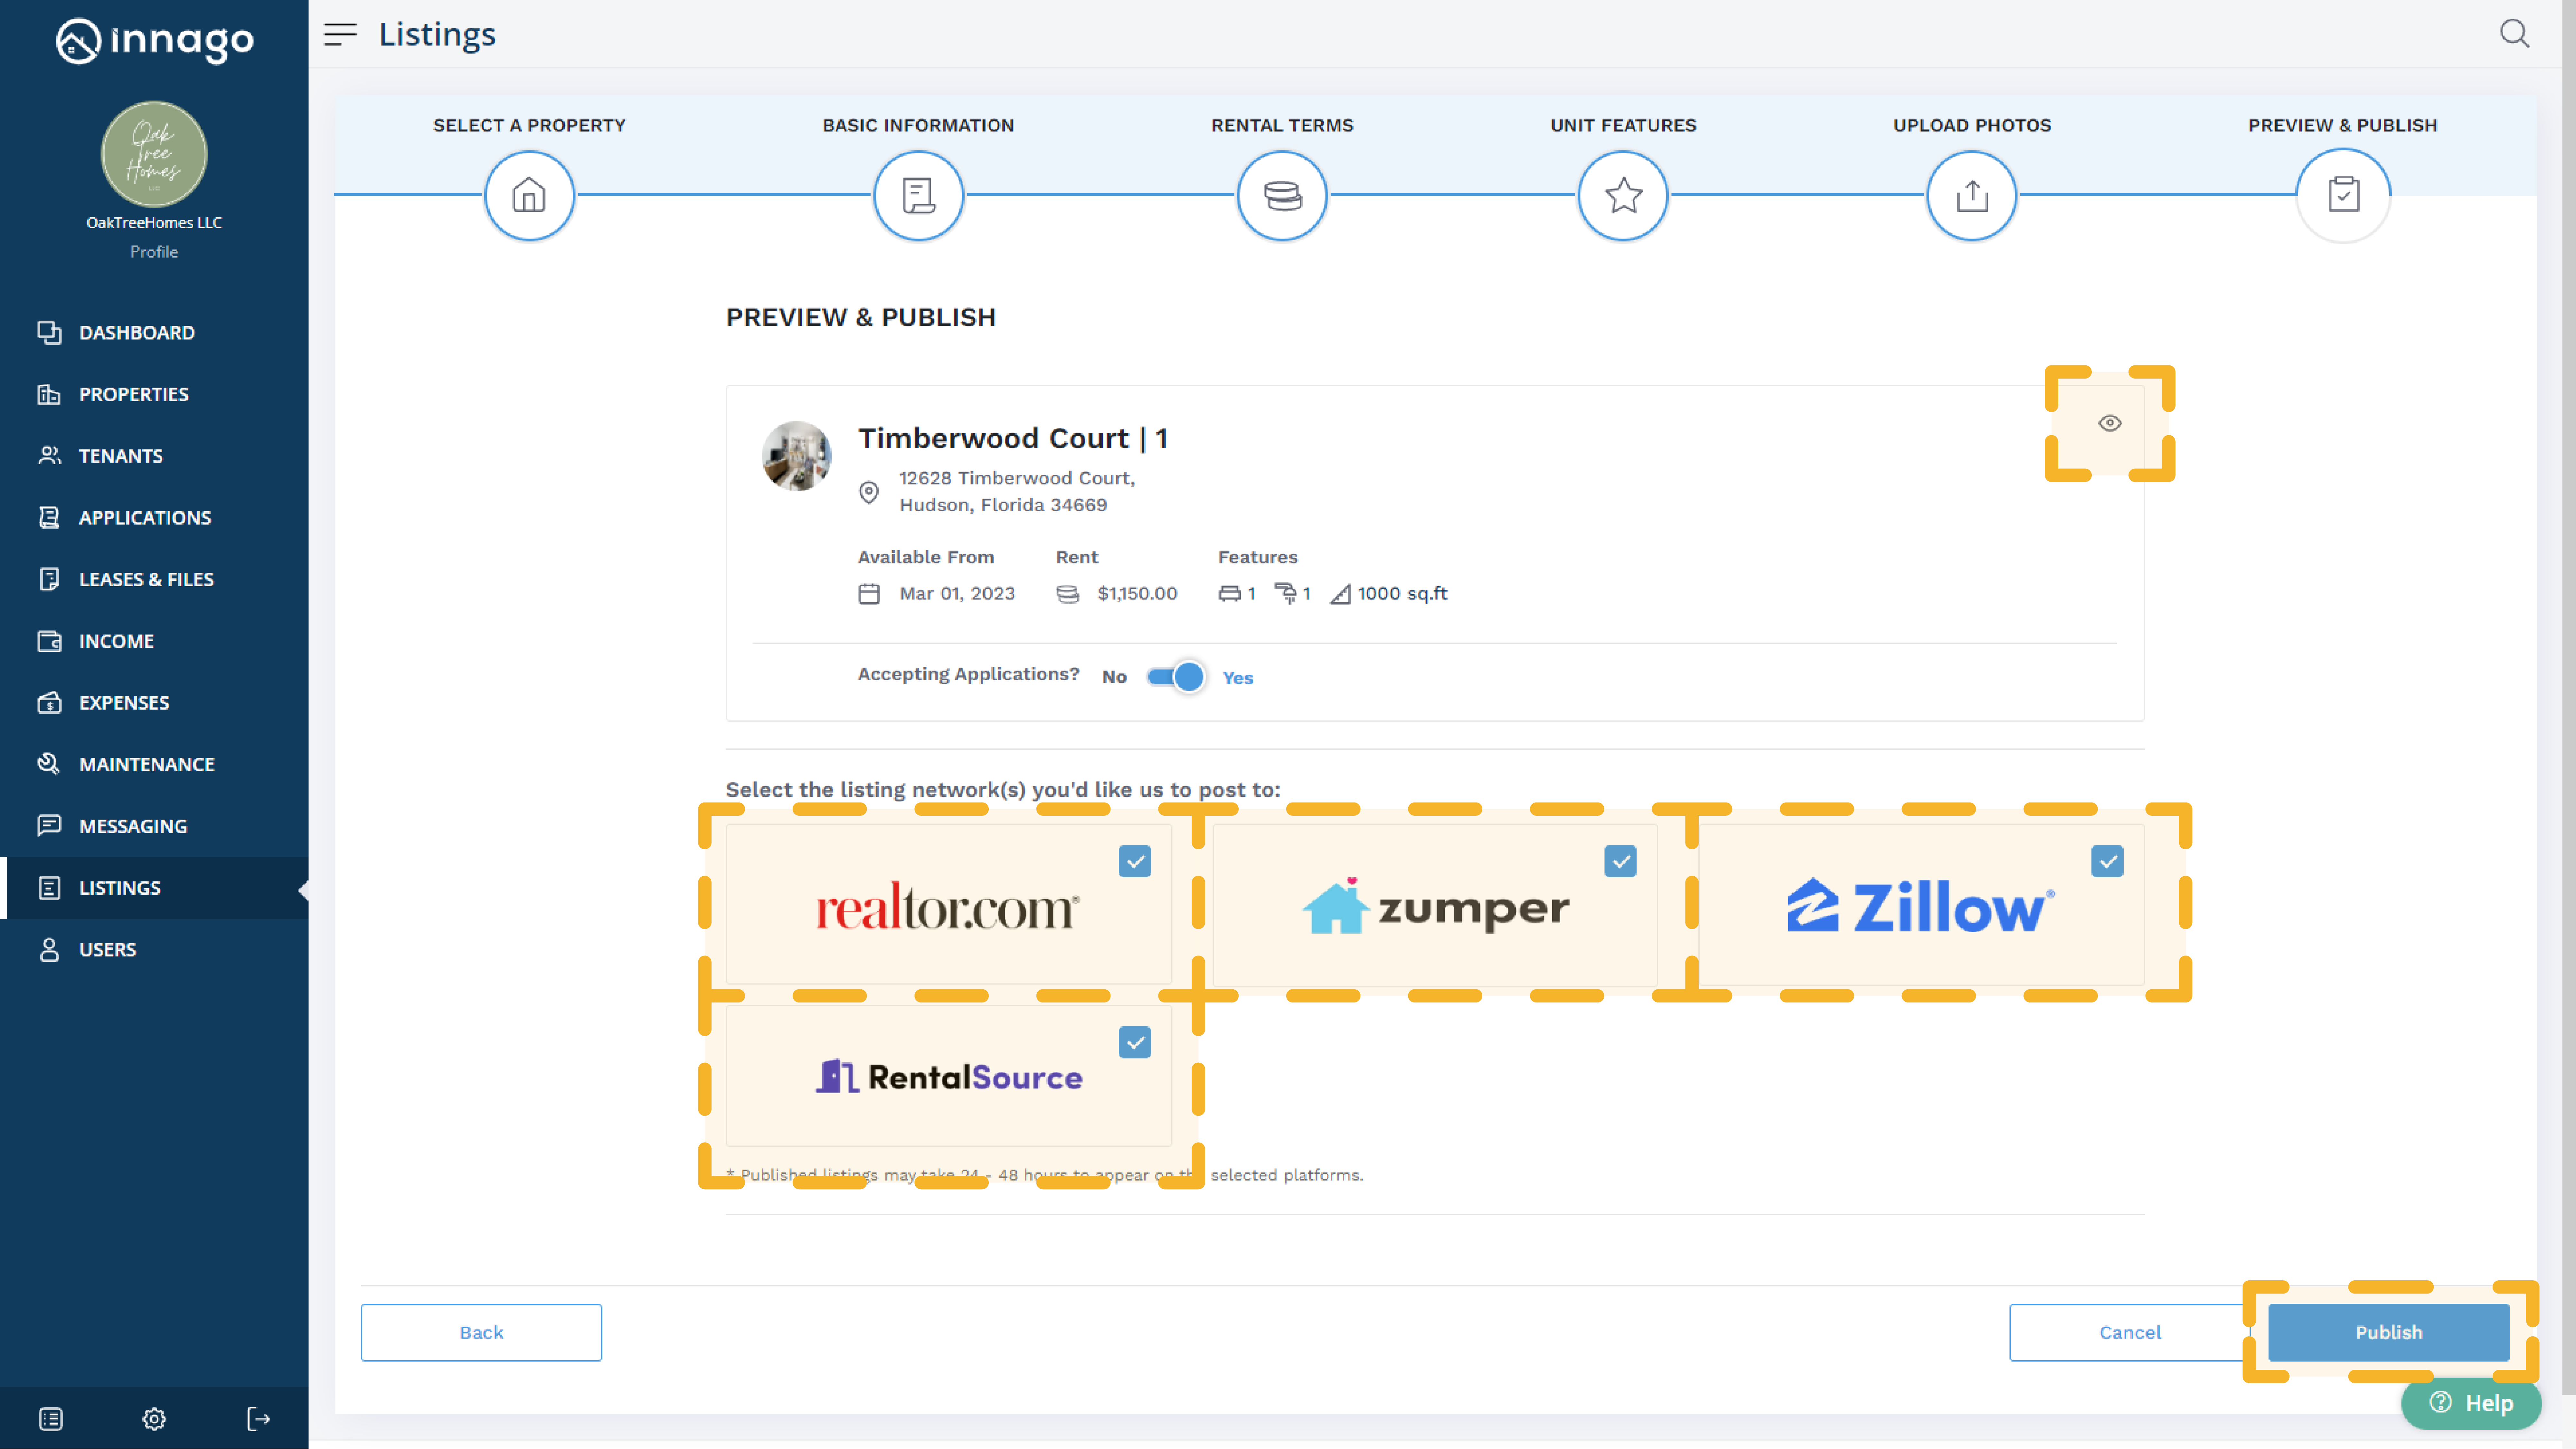
On the Review and Publish page, you can select the eye icon to preview your listing. With the toggle button, choose whether or not to accept applications. Finally, select any listing sites you would like to publish your listings on, and click “Publish”.
-
In order to activate your listing, we require you to verify via phone verification. You can choose from a phone call or a text message. Enter your phone number and click “Get Code” Type in the code to verify and click “Verify & Finish”. Congratulations! You’ve successfully published your listing.
Please note – Published listings may take 24 – 48 hours to appear on your chosen platforms. Platforms available for publishing may change over time.
If you need information on creating a listing for a commericial property, please click here.

