To sign a lease through Innago, you’ll first need to setup a lease template. You can read more about that in the following article by clicking here.
Once you’ve created your lease template, you’ll then need to go through the process of adding a new tenant to Innago.
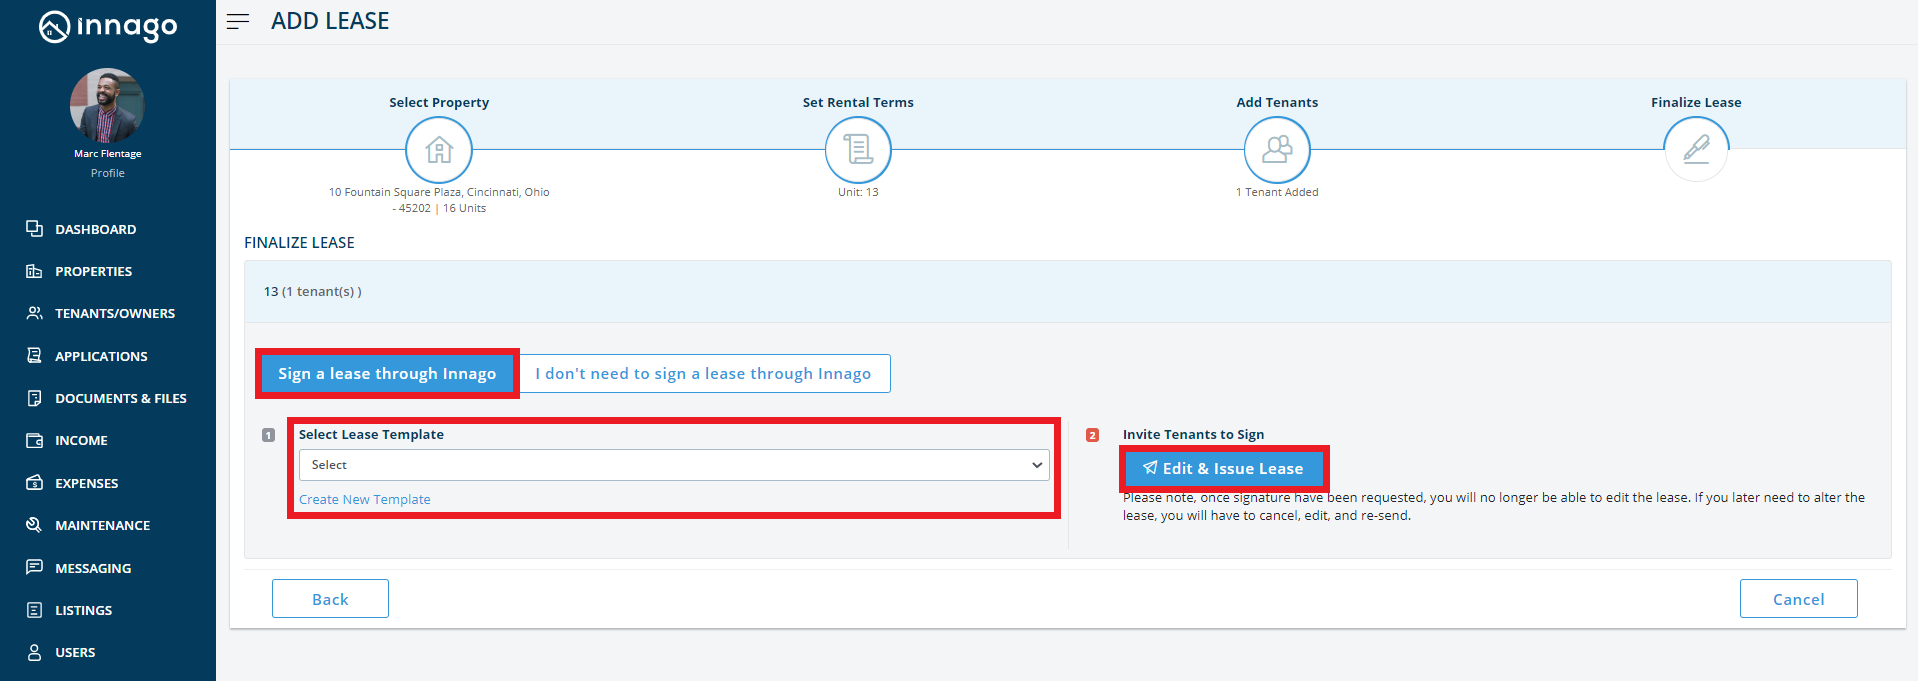
1. After selecting a property, setting the terms, and adding tenant information, you’ll be taken to a screen that will ask you whether you want to send a digital lease out for signature or select ‘I don’t need to sign a lease through Innago’, which allows you to either upload a copy of a lease that has already been signed, or skip the step entirely.
2. Make sure that ‘Sign a lease through Innago’ is selected.
3. From the dropdown menu, select the lease template you’d like to use.
4. Click ‘Edit & Issue Lease.’
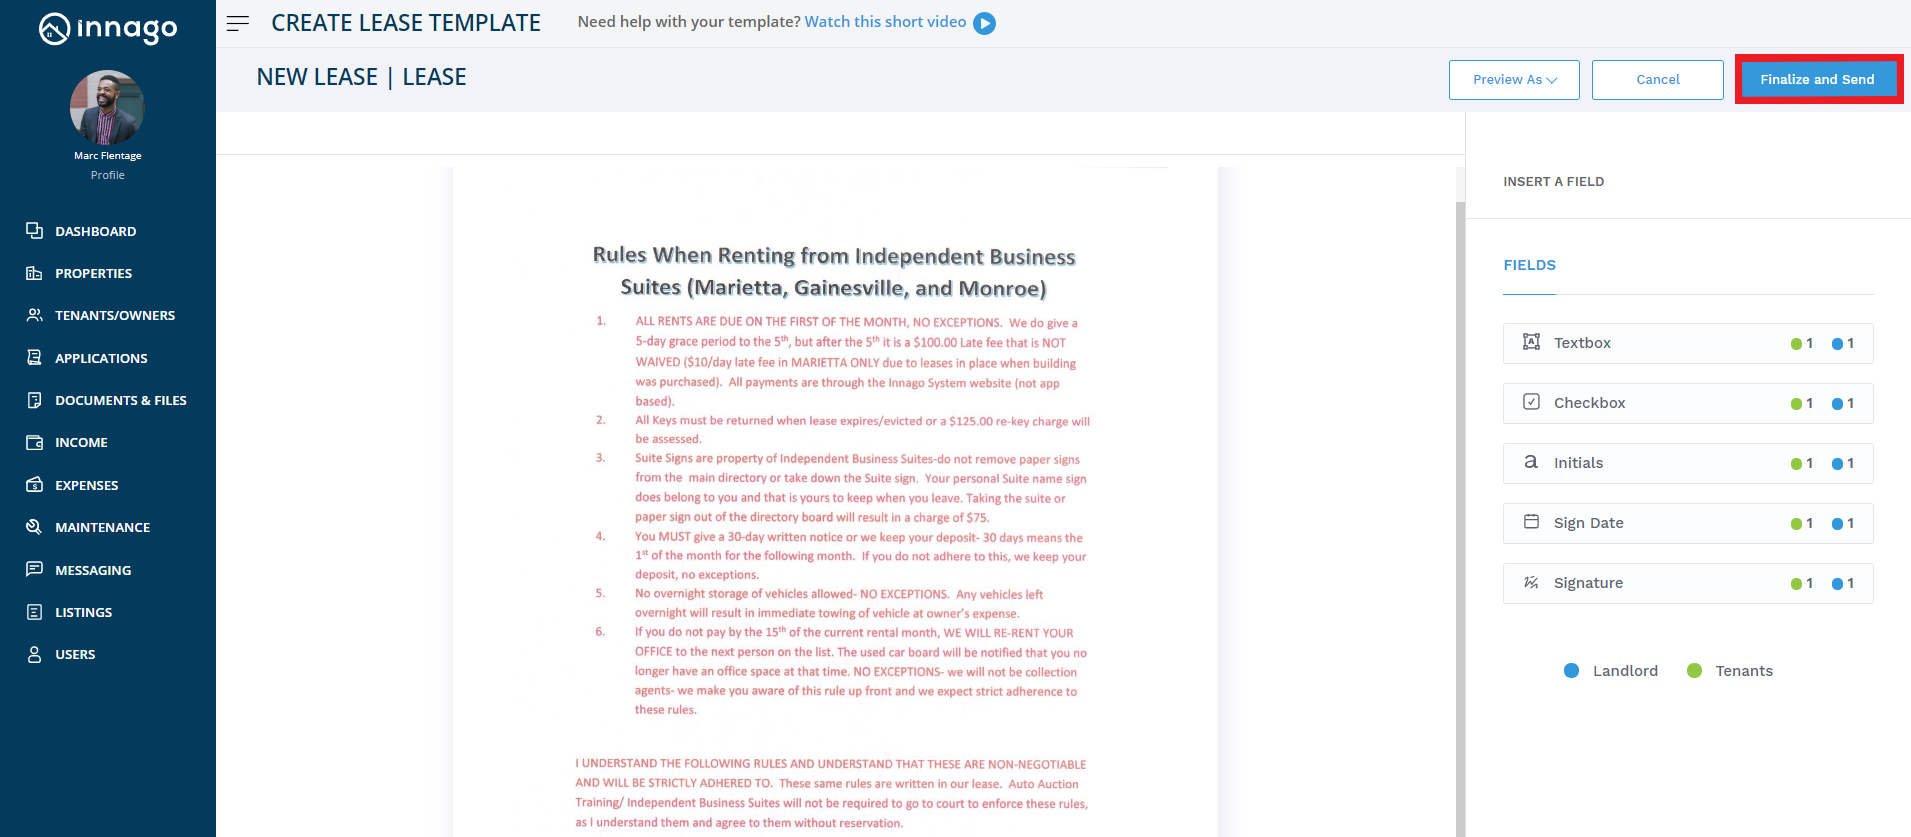
5. Leasing in Innago can be explained in two stages: the Template stage, where you upload and add fields to your lease, and the Draft stage, where certain fields — like the rent amount, lease dates, property address, and other fields — auto-populate before the lease is sent.
You are now in the draft stage, where the lease agreement will load with any automated information you’ve set — like rental amount, lease dates, address, etc.
6. You can make changes to fields, add new ones, and remove them. When satisfied, click the ‘Finalize & Send’ button in the upper right-hand corner of the editor.
7. Your lease has been sent out to tenants to be signed!
8. You can immediately sign it yourself and track its status from the Leases and Files page.
Check out our tutorial video to learn more! – https://vimeo.com/477321142


